As an Amazon Influencer, we earn from qualifying purchases you might make if you click any of the links or buttons on this page at no expense to you.
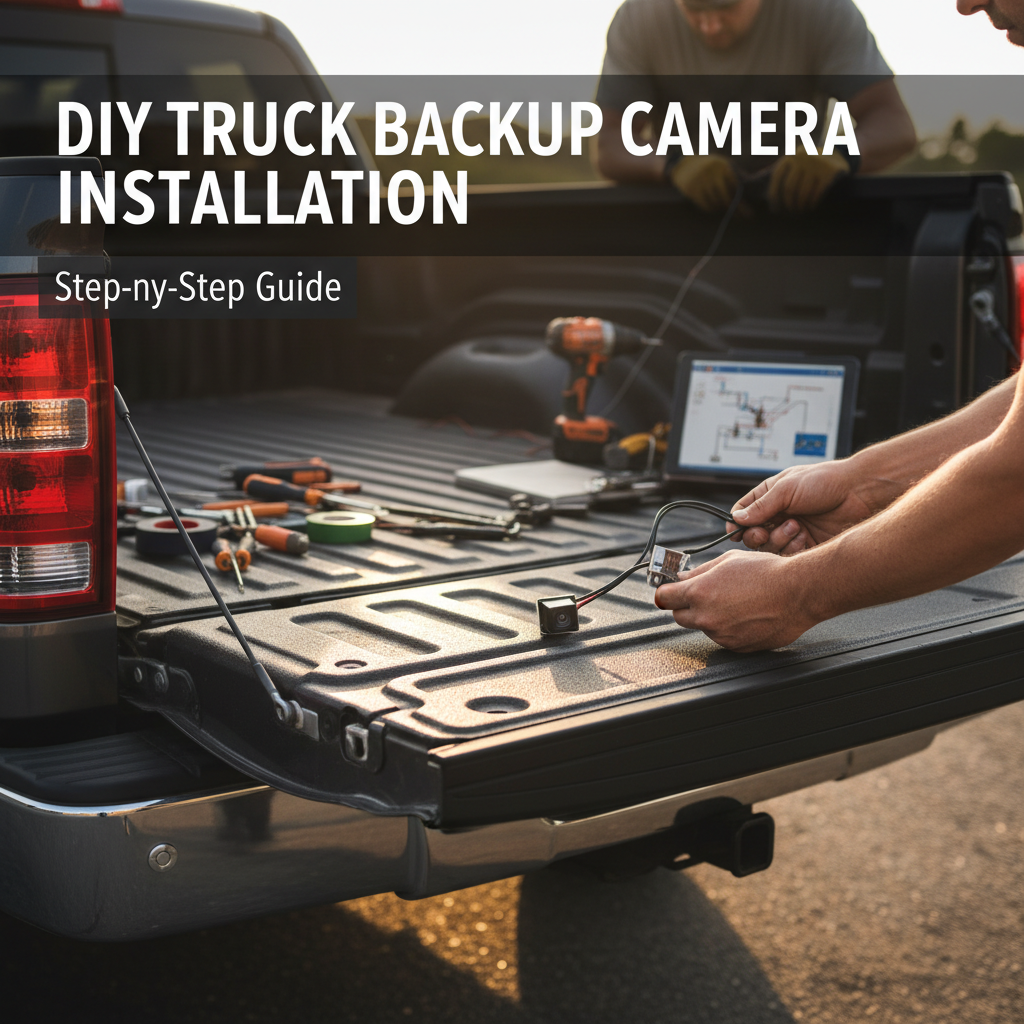
Installing a backup camera in your truck enhances safety and makes parking much easier. This comprehensive guide walks you through the entire installation process, from choosing the right camera system to completing the wiring and setup. Whether you’re a DIY enthusiast or considering professional installation, you’ll learn about the tools needed, common challenges, and expert tips to ensure your backup camera works perfectly. We’ll cover both wired and wireless options, troubleshooting steps, and maintenance requirements to help you make an informed decision.
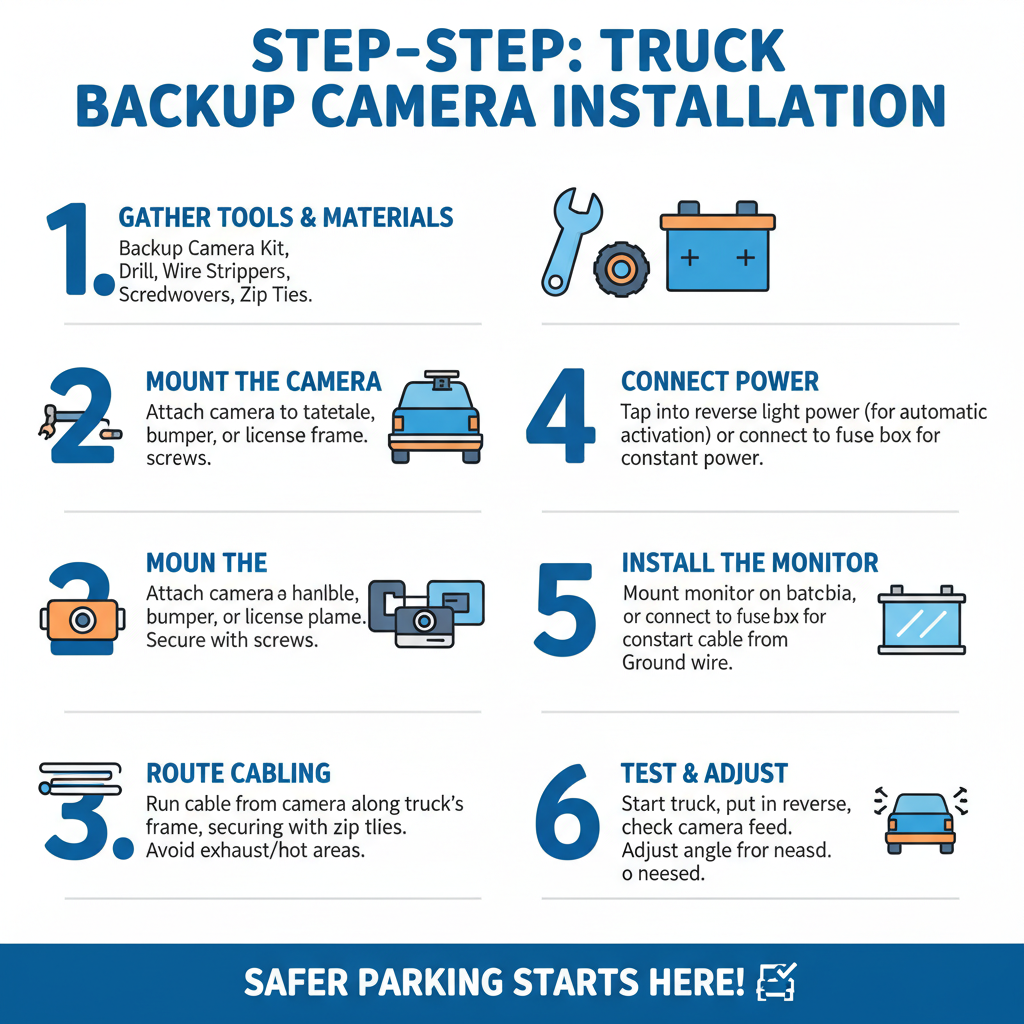
Installing a backup camera involves mounting the camera near your license plate, running video cables from the camera to your dashboard display, connecting power to your reverse lights, and configuring the system. The process typically takes 2-4 hours and requires basic tools like a drill, wire strippers, and electrical tape. Most truck owners can complete this installation with patience and careful planning.
Contents
Choosing the Right Backup Camera System
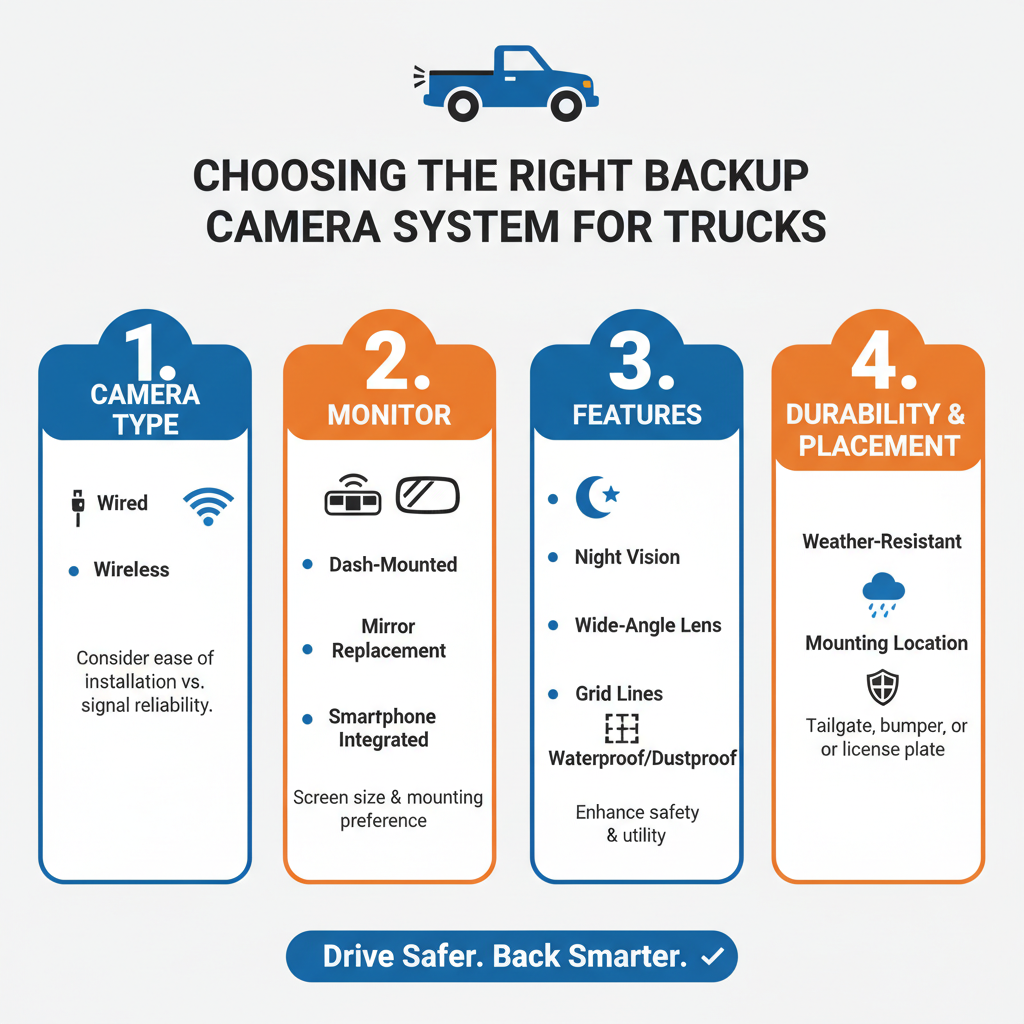
The first step involves selecting a camera system that matches your truck’s specific needs. Wired systems offer the most reliable connection but require more complex installation. Wireless systems provide easier setup but may experience interference or signal loss.
Consider your truck’s size when choosing camera resolution. Larger trucks benefit from higher resolution cameras (720p or 1080p) for better detail at greater distances. Smaller pickup trucks work well with standard 480p cameras.
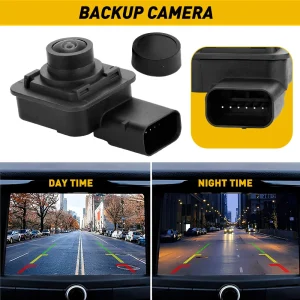
Night vision capability becomes crucial for trucks used in low-light conditions. Look for cameras with infrared LEDs or low-light sensors. Waterproof ratings of IP67 or higher ensure your camera survives harsh weather conditions.
Essential Tools and Materials
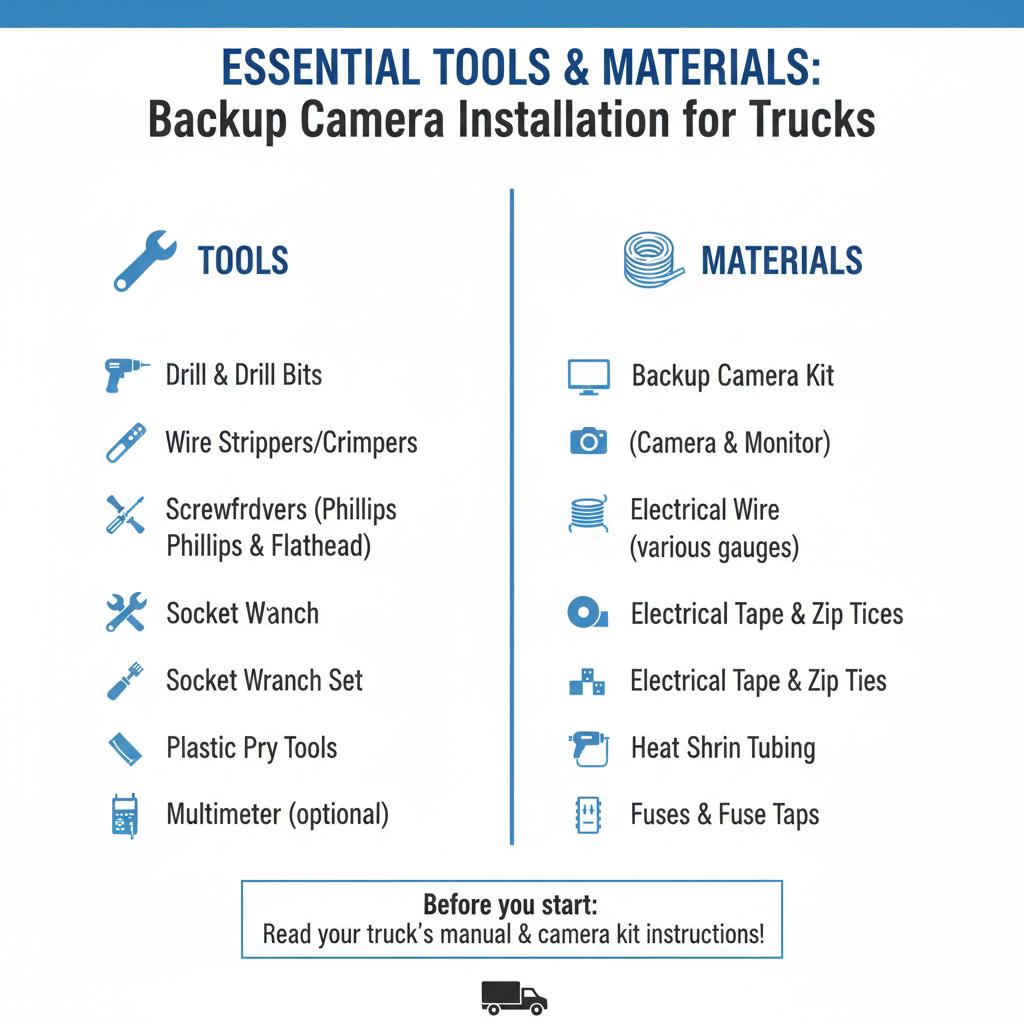
Gather these tools before starting your installation. You’ll need a power drill with various bit sizes, wire strippers, electrical tape, and a multimeter for testing connections. A fish tape or coat hanger helps route wires through tight spaces.
Purchase additional materials including electrical wire (16-18 gauge), wire nuts or crimp connectors, and zip ties for securing cables. Silicone sealant prevents water damage around mounting holes. A test light helps verify power connections.
Consider renting or borrowing specialized tools like a borescope for checking wire routing paths. Panel removal tools prevent damage to interior trim pieces during installation.
Step By Step to install
Mounting the Camera
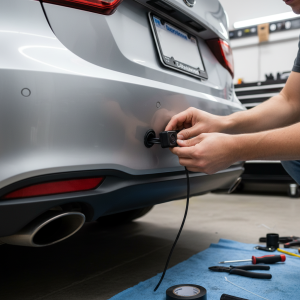
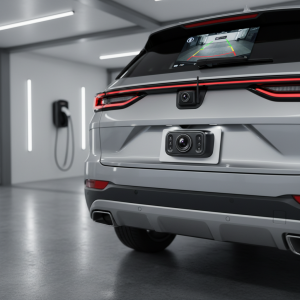
Select a mounting location that provides the best viewing angle without obstructing your license plate. Most truck installations work best with the camera mounted above or below the license plate. Avoid mounting too high, as this creates blind spots directly behind your truck.
Mark your mounting holes carefully and use a center punch to prevent drill bit wandering. Start with a small pilot hole, then enlarge to the final size. Apply silicone sealant around the mounting area before securing the camera bracket.
Test the camera angle before final tightening. The ideal position shows the ground about 6-8 feet behind your truck at the bottom of the screen. Adjust the camera angle to minimize sky visibility while maintaining adequate ground coverage.
Running Video and Power Cables
Route the video cable from your camera location to the dashboard display. In practice, the easiest path typically runs along the truck frame, through existing grommets in the firewall, and up behind the dashboard panels.
Remove the tailgate inner panel to access the area behind your license plate. Fish the cable through the tailgate structure and into the main truck body. Use existing wire harnesses when possible to avoid drilling additional holes.
Secure all cables with zip ties every 12-18 inches to prevent rattling or damage from road debris. Keep video cables separated from power cables to minimize electrical interference.
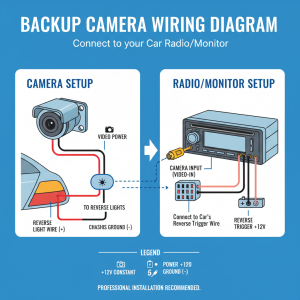
Connecting Power to Reverse Lights
Locate your truck’s reverse light wiring at the rear of the vehicle. The reverse lights provide the trigger signal that activates your backup camera when shifting into reverse. Use a multimeter to identify the positive wire that shows 12 volts only when the transmission is in reverse.
Splice into the reverse light positive wire using a T-tap connector or by cutting and joining wires with crimp connectors. Connect the camera’s power wire to this splice point. Ground the camera’s negative wire to a clean metal surface using a ring terminal and self-tapping screw.
Field experience shows that poor ground connections cause most backup camera failures. Clean the grounding point thoroughly and apply dielectric grease to prevent corrosion.
Installing the Display Monitor
Choose a display location that doesn’t obstruct your view while driving. Dashboard mounting works well for most trucks, but some owners prefer visor-mounted or rearview mirror replacement displays. Ensure the chosen location allows easy viewing when backing up.
Route the display power wire to your fuse box or directly to the battery with appropriate fusing. Many displays include a cigarette lighter adapter for temporary installations. For permanent mounting, connect to a switched power source that turns off with the ignition.
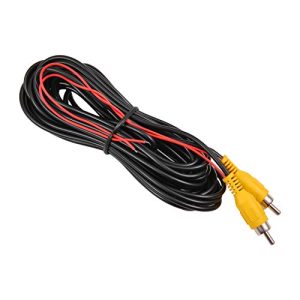
Connect the video input cable from your camera to the display unit. Most systems use RCA-style connectors that are color-coded for easy identification. Secure all connections with electrical tape to prevent moisture intrusion.
Wireless System Installation Differences
Wireless backup camera systems eliminate the need to run video cables but still require power connections at the camera. The wireless transmitter mounts near the camera and sends video signals to a receiver connected to your display.
Position the wireless receiver away from other electronic devices to minimize interference. Cell phones, GPS units, and CB radios can disrupt wireless video signals. Test the system thoroughly before final installation to ensure reliable signal transmission.
Battery-powered wireless cameras offer the easiest installation but require regular charging or battery replacement. Solar-powered options work well for trucks parked outdoors regularly.
Testing and Calibration
Before reassembling panels and trim pieces, test your entire system thoroughly. Start your truck and shift into reverse to verify the camera activates and displays a clear image. Check that the display automatically switches to camera view when backing up.
Test the system in various lighting conditions including bright sunlight, shade, and darkness. Adjust camera angle if needed to eliminate glare or improve visibility. Verify that guide lines (if equipped) align properly with your truck’s actual path.
A common issue technicians encounter is delayed activation when shifting into reverse. This typically indicates a weak power connection or insufficient voltage at the camera.
Troubleshooting Common Problems
No display when shifting into reverse usually indicates power supply issues. Check all connections with a multimeter and verify 12 volts reaches the camera. Loose ground connections frequently cause intermittent operation.
Poor image quality often results from incorrect camera positioning or dirty lens surfaces. Clean the camera lens regularly and adjust the angle to minimize glare from the sun or headlights.
Interference lines or static in wireless systems typically indicate signal conflicts with other devices. Try changing the wireless channel or relocating the receiver unit away from potential interference sources.
Professional vs DIY Installation
Professional installation typically costs $200-500 depending on your truck’s complexity and local labor rates. Technicians have specialized tools and experience routing wires through difficult areas. They also provide warranties on their work.
DIY installation saves money but requires patience and basic electrical knowledge. Budget 4-6 hours for your first installation, including time for troubleshooting and adjustments. Complex trucks with multiple cab configurations may require professional expertise.
Consider professional installation if your truck has advanced electrical systems, aftermarket alarms, or if you’re uncomfortable working with automotive wiring.
Maintenance and Care
Clean your backup camera lens monthly or more frequently in dusty conditions. Use a soft cloth and mild soap solution to avoid scratching the lens surface. Check mounting bolts periodically to ensure the camera remains securely positioned.
Inspect wiring connections annually, especially in areas exposed to road salt or harsh weather. Apply dielectric grease to electrical connections to prevent corrosion. Replace any damaged wire insulation immediately to prevent short circuits.
Monitor display brightness and contrast settings as the unit ages. LCD displays may require adjustment over time to maintain optimal visibility in various lighting conditions.
Frequently Asked Questions
How long does backup camera installation take?
Most DIY installations require 2-4 hours depending on your truck’s complexity and your experience level. Professional installation typically takes 1-2 hours.
Can I install a backup camera without drilling holes?
Yes, license plate frame cameras and magnetic mount options eliminate drilling. However, permanent mounting provides better stability and weather resistance.
Will a backup camera work with my existing radio?
Many modern truck radios include backup camera inputs. Check your radio’s specifications or consult the owner’s manual to verify compatibility.
Do wireless backup cameras work reliably?
Quality wireless systems work well but may experience occasional interference. Wired systems provide the most reliable connection for critical safety applications.
How much does a backup camera system cost?
Basic systems start around $50-100, while high-quality units with advanced features cost $200-400. Professional installation adds $200-500 to the total cost.
Can I use my smartphone as a backup camera display?
Some wireless cameras connect to smartphone apps via WiFi. However, dedicated displays typically provide better reliability and don’t drain your phone’s battery.
What happens if my backup camera stops working?
Check power connections first, then inspect the camera lens for damage or obstruction. Most failures result from loose wiring or water intrusion at connection points.
Final Thoughts
Installing a backup camera in your truck significantly improves safety and convenience when reversing or parking. While the installation requires patience and basic electrical skills, most truck owners can complete the project successfully with proper planning and the right tools. Choose a system that matches your truck’s specific needs and budget, whether that’s a basic wired camera or an advanced wireless system with multiple features. Regular maintenance keeps your backup camera functioning reliably for years, making it a worthwhile investment in both safety and peace of mind.