As an Amazon Influencer, we earn from qualifying purchases you might make if you click any of the links or buttons on this page at no expense to you.
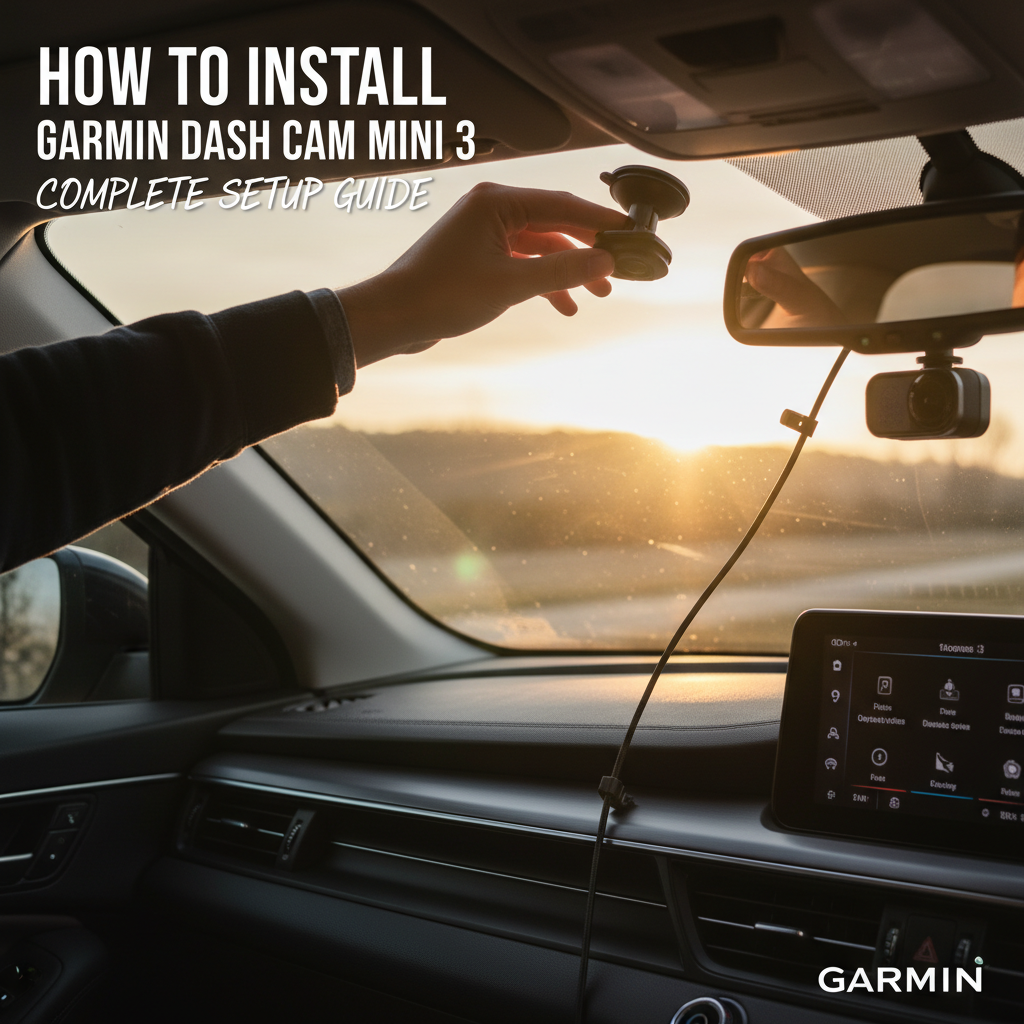
Installing a dash cam in your vehicle provides valuable protection and peace of mind while driving. The Garmin Dash Cam Mini 3 offers excellent recording quality in an ultra-compact design that won’t obstruct your view. This guide walks you through the complete installation process, from choosing the optimal mounting location to connecting the power source and configuring your settings for the best performance.
To install the Garmin Dash Cam Mini 3, mount the magnetic base behind your rearview mirror, connect the USB power cable to your vehicle’s 12V outlet, route the cable along the headliner and A-pillar, then download the Garmin Drive app to complete setup. The entire process takes 15-30 minutes and requires no special tools.
Contents
- What’s Included in the Box
- Choosing the Perfect Mounting Location
- Preparing Your Vehicle for Installation
- Step-by-Step Installation Process
- Power Connection Options
- Cable Management Techniques
- Initial Setup and Configuration
- Testing Your Installation
- Common Installation Mistakes to Avoid
- Troubleshooting Installation Issues
- Frequently Asked Questions
- Final Thoughts
What’s Included in the Box
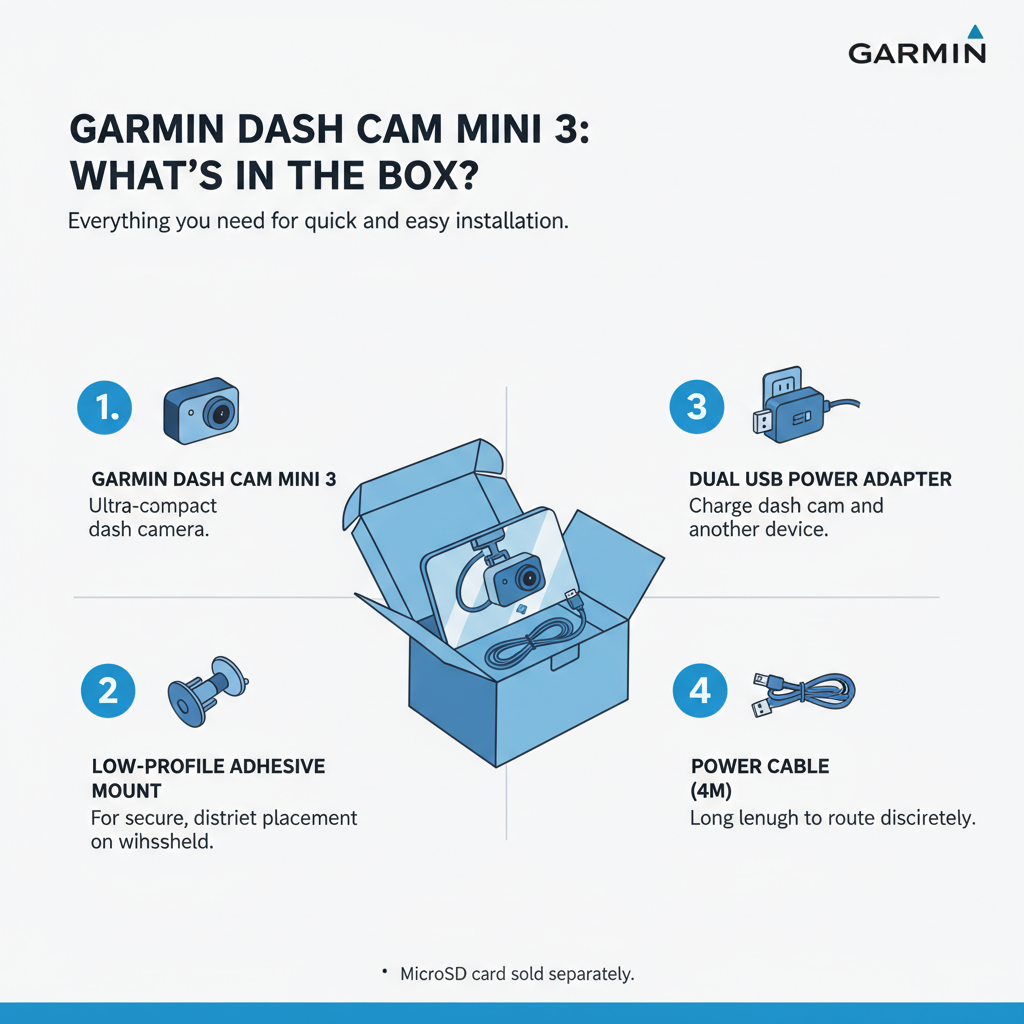
The Garmin Dash Cam Mini 3 package contains everything needed for basic installation. You’ll find the dash cam unit itself, a magnetic mounting base, a 12V power adapter with an integrated USB cable, and a quick start guide.
The magnetic mounting system eliminates the need for adhesive pads that can damage your windshield. The power cable measures approximately 12 feet, providing enough length to route cleanly through most vehicles.
Some retailers offer installation kits with additional cable management clips and longer power cables. These accessories aren’t necessary but can improve the finished appearance of your installation.
Choosing the Perfect Mounting Location
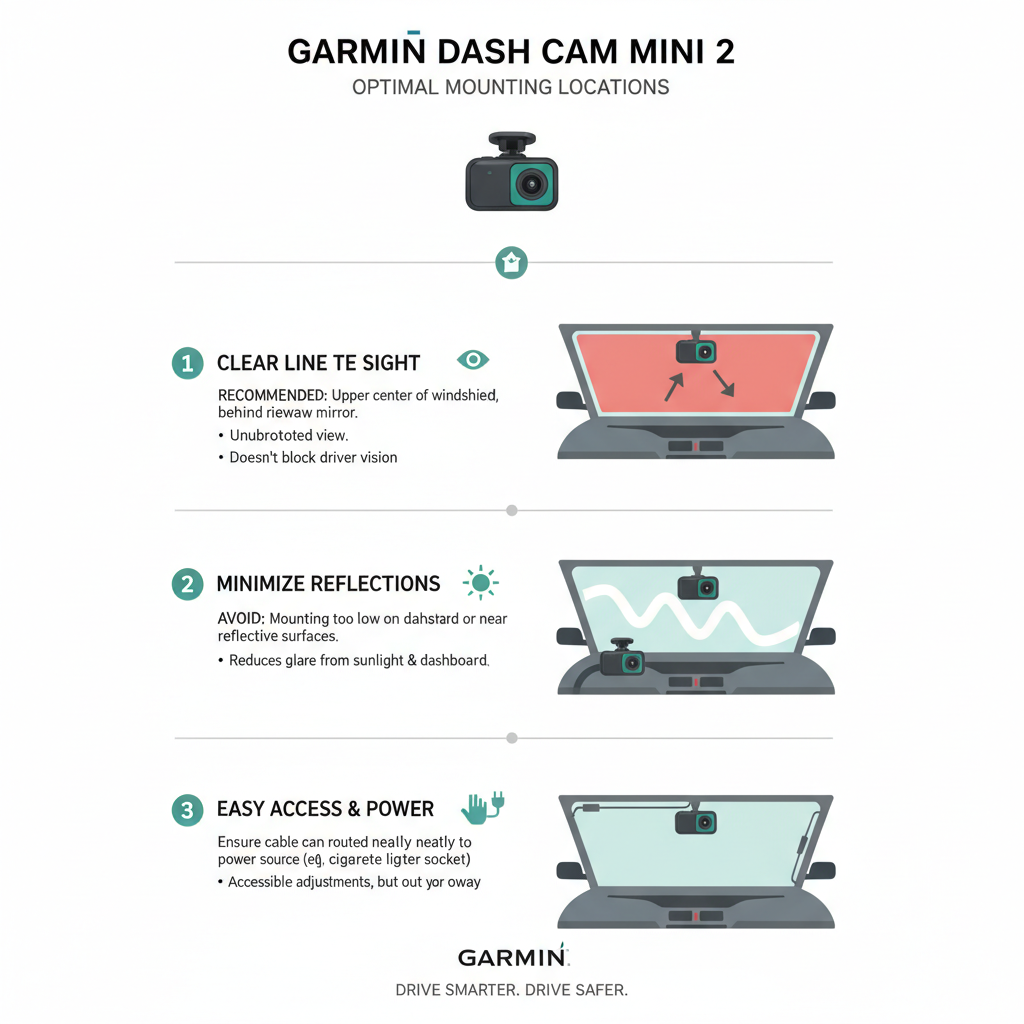
Windshield placement directly affects recording quality and legal compliance. Position the dash cam behind your rearview mirror, slightly to the right of center. This location captures the best view while remaining inconspicuous.
Check your local regulations before mounting. Most states require dash cams to be positioned in the lower corner of the windshield or behind the rearview mirror. Never mount the device where it blocks your view of the road.
The magnetic base should sit on a clean, flat section of windshield. Avoid areas with heavy tinting, embedded heating elements, or rain sensors that could interfere with the magnetic connection.
Preparing Your Vehicle for Installation
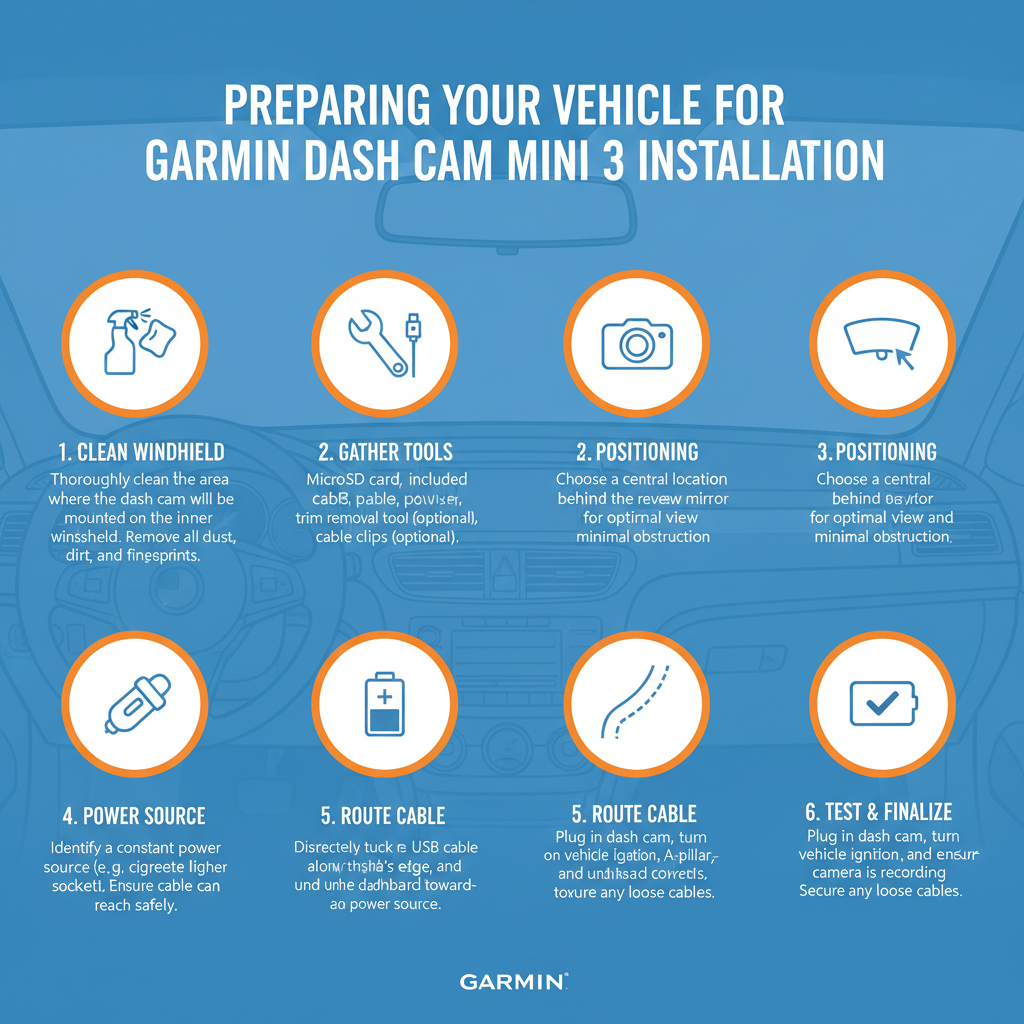
Clean the mounting area thoroughly with glass cleaner and a lint-free cloth. Any dirt or residue will prevent the magnetic base from adhering properly. Allow the surface to dry completely before proceeding.
Remove any existing suction cup marks or adhesive residue from previous dash cam installations. Use a plastic scraper if necessary, being careful not to scratch the glass.
Test fit the magnetic base in your chosen location before final installation. Ensure the dash cam unit, when attached, doesn’t interfere with your rearview mirror adjustment or block any important controls.
Step-by-Step Installation Process
Start by attaching the magnetic mounting base to your windshield. Press firmly and hold for 10 seconds to ensure proper adhesion. The base uses a strong adhesive backing that bonds permanently to glass.
Connect the dash cam to the magnetic base. The unit will snap into place with a satisfying click. Adjust the angle so the camera points straight ahead, parallel to the ground.
Route the power cable from the dash cam along the headliner toward the A-pillar. Most vehicles have enough space between the headliner and windshield to hide the cable completely. Use your fingers to tuck the cable into this gap.
Continue routing the cable down the A-pillar, following the existing wiring harness when possible. Many vehicles have removable trim pieces that make cable routing easier, but removal isn’t usually necessary.
Connect the power adapter to your vehicle’s 12V outlet. The dash cam should power on automatically when you start your engine. A blue LED indicates normal operation.
Power Connection Options
The included 12V adapter plugs into your cigarette lighter or auxiliary power outlet. This method works for all vehicles but leaves the cable visible in your interior.
For a cleaner installation, consider hardwiring the dash cam to your vehicle’s electrical system. This requires basic electrical knowledge and may void your vehicle warranty. Professional installation is recommended for hardwired setups.
Some newer vehicles offer USB ports that can power the dash cam. Check your owner’s manual to confirm these ports remain active when the engine is off, as constant power drain can affect your battery.
Cable Management Techniques
Proper cable routing creates a professional appearance and prevents interference with vehicle operation. Start by identifying the path from your mounting location to the power source.
Use existing gaps and channels in your vehicle’s interior. The space between door seals and trim panels often provides perfect cable routing paths. Avoid areas where the cable might get pinched by moving parts.
Secure loose cable sections with small zip ties or adhesive cable clips. Focus on areas where the cable might rattle or become visible during normal driving. Leave some slack near connection points to prevent stress on the connectors.
Initial Setup and Configuration
Download the Garmin Drive app on your smartphone before first use. This app provides access to advanced settings and allows you to view recorded footage directly on your phone.
Connect to the dash cam’s Wi-Fi network using the credentials shown on the device screen. The initial connection process takes 2-3 minutes as the app downloads necessary updates.
Configure basic settings including video resolution, loop recording duration, and incident detection sensitivity. The default settings work well for most users, but customization improves performance for specific driving conditions.
Set your time zone and enable GPS to ensure accurate timestamps on recorded footage. This information becomes crucial if you need to use recordings for insurance claims or legal purposes.
Testing Your Installation
Record a short test drive to verify proper operation. Check that the camera captures a clear view of the road ahead without any obstructions from the windshield or interior components.
Review the footage on your smartphone to confirm video quality and audio clarity. The Mini 3 records in 1080p resolution with good detail in both bright and low-light conditions.
Test the incident detection feature by simulating sudden stops or turns in a safe environment. The dash cam should automatically save and protect footage when it detects significant G-forces.
Verify that loop recording functions correctly by letting the device record until the memory card fills up. Older footage should be automatically overwritten to make space for new recordings.
Common Installation Mistakes to Avoid
Mounting the dash cam too low on the windshield reduces recording quality and may violate local laws. Always position the device in the upper portion of the windshield, preferably behind the rearview mirror.
Failing to secure the power cable properly creates safety hazards and unprofessional appearance. Loose cables can interfere with pedal operation or distract the driver.
Using the wrong memory card affects recording reliability. The Mini 3 requires a Class 10 microSD card with at least 8GB capacity. High-endurance cards designed for continuous recording provide better long-term performance.
Ignoring software updates reduces functionality and may cause compatibility issues. Check for firmware updates monthly through the Garmin Drive app.
Troubleshooting Installation Issues
If the magnetic base won’t stick properly, clean the windshield again with isopropyl alcohol. Some glass treatments and tints interfere with adhesive bonding. Allow extra curing time in cold weather.
Power issues usually stem from loose connections or incompatible outlets. Verify that your 12V outlet provides constant power when the engine runs. Some outlets only work with the ignition in the accessory position.
Poor video quality often results from incorrect mounting angles or dirty lenses. Ensure the camera points straight ahead and clean the lens regularly with a microfiber cloth.
Wi-Fi connectivity problems typically resolve with a device restart. Hold the power button for 10 seconds to force a reboot if the dash cam becomes unresponsive.
Frequently Asked Questions
Can I install the Dash Cam Mini 3 myself without professional help?
Yes, the installation process is designed for DIY completion. The magnetic mounting system and plug-in power connection require no special tools or technical expertise. Most users complete installation in 15-30 minutes.
Will the dash cam work in extreme temperatures?
The Mini 3 operates in temperatures from -10°F to 140°F (-23°C to 60°C). However, extreme heat can affect battery life and may cause the device to shut down temporarily for protection. Park in shade when possible during summer months.
How much memory card storage do I need?
A 32GB card provides approximately 4 hours of continuous recording at 1080p resolution. The loop recording feature automatically overwrites old footage, so larger cards simply extend the time before overwriting occurs.
Can I use the dash cam while my car is parked?
The Mini 3 includes a parking mode that activates when it detects impact or motion while parked. This feature requires constant power, which may drain your vehicle battery if used extensively without the engine running.
What happens if I need to remove the dash cam temporarily?
The magnetic mounting system allows easy removal for security or maintenance. Simply lift the dash cam off the magnetic base. The base remains attached to the windshield for quick reinstallation.
Will the installation damage my windshield?
The magnetic base uses automotive-grade adhesive that bonds permanently to glass. Removal may leave residue that requires glass cleaner and scraping to remove completely. The adhesive won’t damage the windshield itself.
How do I access recorded footage?
Use the Garmin Drive smartphone app to view and download footage wirelessly. You can also remove the memory card and access files directly on a computer. Important incidents are automatically protected from being overwritten.
Final Thoughts
Installing the Garmin Dash Cam Mini 3 provides valuable protection and documentation for your daily driving. The straightforward installation process, combined with the device’s compact design and reliable performance, makes it an excellent choice for drivers seeking peace of mind on the road. Take time to position the camera correctly and route cables neatly for the best long-term results. Regular maintenance, including lens cleaning and software updates, ensures optimal performance throughout the device’s lifespan.