A car stereo that refuses to turn on despite having power can ruin your drive. You crank the ignition, expect your favorite tunes, but get silence instead. Frustrating, right? This issue often stems from simple fixes you can tackle at home. In this guide, we’ll walk you through why your car stereo won’t power up, how to diagnose the problem, and practical solutions to get your music flowing again. Let’s dive into troubleshooting your car audio system with clear, actionable steps.
Contents
- Common Reasons Your Car Stereo Won’t Turn On
- Step-by-Step Troubleshooting Guide
- Tips to Prevent Future Car Stereo Issues
- When to Call a Professional
- Understanding Your Car Stereo System
- Why Aftermarket Stereos Are Prone to Issues
- Signs Your Car Stereo Has Power Issues
- Tools You’ll Need for Troubleshooting
- Safety Tips for Working on Your Car Stereo
- Wrapping Up
Common Reasons Your Car Stereo Won’t Turn On
Several culprits can cause a car stereo to stay silent even when power flows. Understanding these issues helps you pinpoint the problem quickly. Here’s a breakdown of the most common reasons:
Blown Fuse
A blown fuse often stops your car stereo dead in its tracks. Fuses protect the stereo from power surges, but they can blow due to electrical spikes or faulty wiring. Check the fuse box under the hood or near the dashboard. Look for a melted or broken fuse. Use a multimeter to test for continuity. If the fuse reads no signal, replace it with one of the same amperage. Never use a higher-rated fuse—it risks damaging your stereo.
Faulty Wiring Connections
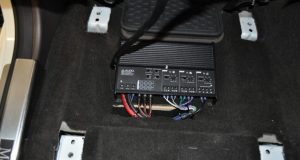
Loose or damaged wires disrupt power delivery. Aftermarket stereos, in particular, suffer from poor wiring setups. Inspect the wiring harness behind the head unit. Ensure the red (accessory), yellow (constant), and black (ground) wires connect securely. A loose pigtail connector can also cause issues. Tug gently on wires to check for looseness. If you spot frayed or corroded wires, replace them to restore proper connections.
Dead or Weak Car Battery
A weak battery might supply some power but not enough to fire up the stereo. If your car’s lights or wipers also act sluggish, the battery could be the issue. Test the battery with a voltmeter—it should read around 12.6 volts when the engine’s off. A reading below 12 volts signals a dying battery. Charge or replace it to see if the stereo springs back to life.
Anti-Theft Mode Activation
Many modern stereos lock into anti-theft mode after a power disruption, like a battery replacement. The display might show “CODE” or stay blank. Consult your stereo’s manual for the unlock code or reset procedure. If you_variation_1 isn’t working, check the manufacturer’s website or contact a dealer for the code.
Grounding Issues
A poor ground connection prevents the stereo from completing its circuit. The ground wire (usually black) connects the stereo to the car’s chassis. Rust, corrosion, or a loose connection here can kill power. Inspect the ground wire for tightness and clean any rust with sandpaper. For aftermarket stereos, ensure the ground connects to bare metal on the chassis for a solid link.
Faulty Head Unit
Sometimes, the stereo itself fails. If fuses, wiring, and the battery check out, the head unit’s internal circuits might be fried. Bench-test the unit by connecting it directly to a 12-volt power source outside the car. If it still won’t turn on, the head unit likely needs repair or replacement.
Step-by-Step Troubleshooting Guide
Ready to fix your car stereo? Follow these steps to diagnose and resolve the issue. Grab a multimeter, a test light, and basic tools like a screwdriver.
Step 1: Verify Power Supply
Start by confirming the stereo has power. Turn the ignition to the “accessory” position. Check if the stereo’s display lights up or shows any signs of life. If it’s completely dead, use a multimeter to test the voltage at the stereo’s power wires. The yellow wire (constant) should read 12 volts at all times, while the red wire (accessory) should show 12 volts only when the ignition is on. No voltage? Move to the fuses.
Step 2: Inspect Fuses
Locate the car’s fuse box—often under the hood or near the driver’s side dashboard. Check the stereo’s fuse, usually labeled “RADIO” or “AUDIO.” Remove it and inspect for a broken filament. Test with a multimeter set to ohms. Touch the probes to the fuse’s metal caps. A reading means the fuse is blown; no reading means it’s good. Also, check for an in-line fuse on the stereo’s power wire behind the head unit. Replace any blown fuses with the correct amperage.
Step 3: Check Wiring and Connections
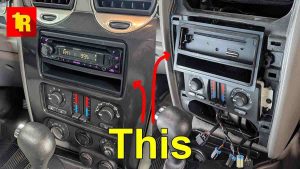
Remove the stereo from the dashboard using stereo removal tools or a flathead screwdriver. Inspect the wiring harness for loose, frayed, or reversed wires. Ensure the pigtail connector seats firmly in the head unit. Test the red, yellow, and black wires with a multimeter for proper voltage. If the wires are reversed (yellow to accessory, red to constant), swap them to match the stereo’s requirements. Tighten any loose connections and replace damaged wires.
Step 4: Test the Ground Connection
A weak ground can mimic a power issue. Locate the black ground wire connected to the car’s chassis. Check for rust or looseness. Use a multimeter in continuity mode. Place one probe on the ground wire and the other on a known good ground (bare metal on the car). A beep confirms a good ground. No beep? Clean the connection with sandpaper or re-ground to a new metal spot.
Step 5: Check Anti-Theft Mode
If the display shows “CODE” or a similar message, the stereo’s in anti-theft mode. Refer to the stereo’s manual for the unlock code. If you don’t have the manual, check the manufacturer’s website or contact a dealer. Follow the reset steps, which might involve pressing specific buttons or entering the code via the stereo’s controls.
Step 6: Test the Power Button
A stuck or broken power button can prevent the stereo from turning on. Press it several times to check responsiveness. If other buttons work but the power button doesn’t, consult the manual for alternative ways to power on the unit. If the button’s faulty, you may need to repair or replace it.
Step 7: Bench Test the Head Unit
If all else fails, remove the stereo and test it outside the car. Connect the yellow and red wires to a 12-volt battery’s positive terminal and the black wire to the negative. Press the power button. If the stereo still won’t turn on, the head unit is likely defective. Consider professional repair or replacement.
Tips to Prevent Future Car Stereo Issues
Once your stereo’s back in action, take steps to keep it humming. Regular maintenance avoids repeat problems and extends your audio system’s life.
- Monitor Voltage Regularly: Use a multimeter to check your battery and wiring voltage every few months. Catch weak batteries or loose connections early.
- Use Correct Fuses: Always replace blown fuses with the same amperage. Higher-rated fuses can damage the stereo or cause fires.
- Secure Wiring: Double-check aftermarket stereo installations. Use crimped connectors or solder for solid wiring connections.
- Clean Ground Connections: Periodically inspect and clean the ground wire to prevent corrosion buildup.
- Protect Against Power Surges: Install a surge protector for aftermarket stereos to shield against voltage spikes.
When to Call a Professional
Some issues require expert hands. If you’ve tried all steps and the stereo still won’t turn on, or if you’re uncomfortable with electrical work, seek a professional. Car audio shops or dealership service centers can diagnose complex problems like internal head unit failures or intricate wiring shorts. Expect repair costs to range from $50 to $200, depending on the issue. A new head unit, if needed, can cost $100 to $500 for quality models.
Understanding Your Car Stereo System
To troubleshoot effectively, it helps to know how your car stereo works. The head unit serves as the control center, housing buttons, dials, or a touchscreen. It connects to the car’s battery via power and ground wires. The battery supplies 12 volts, either directly or through the alternator when the engine runs. The stereo’s wiring harness links to speakers, an amplifier (if present), and the antenna for radio signals. Faults in any of these components—wires, battery, or head unit—can halt operation.
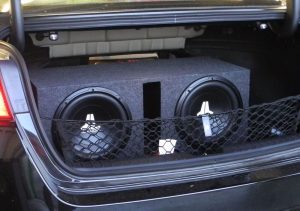
Why Aftermarket Stereos Are Prone to Issues
Aftermarket stereos, like those from Pioneer or Sony, offer better sound and features than factory units. However, they’re more likely to face power issues. Non-standard wiring colors, improper grounding, or mismatched connectors often cause trouble. Always use a wiring harness adapter specific to your car’s make and model during installation. This ensures plug-and-play compatibility and reduces wiring errors.
Signs Your Car Stereo Has Power Issues
How do you know your stereo’s facing a power problem? Watch for these red flags:
- Display stays blank or shows “CODE.”
- Stereo makes clicking or buzzing noises when you try to power it on.
- Other car electronics (lights, wipers) work, but the stereo doesn’t.
- Intermittent power—stereo works sometimes but cuts out randomly.
- Burnt smell or visible sparks near the stereo or fuse box.
If you notice these, start troubleshooting immediately to avoid further damage.
Tools You’ll Need for Troubleshooting
Gather these tools to diagnose and fix your car stereo:
- Multimeter: Measures voltage, continuity, and ohms. Essential for testing fuses, wires, and battery.
- Test Light: A simpler alternative to a multimeter for checking power.
- Screwdriver Set: For removing the stereo and accessing the fuse box.
- Stereo Removal Tools: Specialized tools to pull the head unit from the dashboard.
- Sandpaper: Cleans rusty ground connections.
- Replacement Fuses: Match the amperage of your stereo’s fuse.
- Crimping Tool and Connectors: Secures new wiring connections.
These tools make the process smoother and safer.
Safety Tips for Working on Your Car Stereo
Electrical work carries risks. Stay safe with these precautions:
- Disconnect the car battery’s negative terminal before handling wires to prevent shocks or shorts.
- Work in a well-lit area to spot small wires and fuses clearly.
- Avoid touching exposed wires with bare hands when the battery’s connected.
- Double-check all connections before powering on to prevent sparks or blown fuses.
- If you smell burning or see smoke, stop immediately and disconnect power.
Wrapping Up
A car stereo that won’t turn on despite having power is a solvable problem. By checking fuses, wiring, the battery, anti-theft mode, grounding, and the head unit, you can often fix it yourself. Regular maintenance, like monitoring voltage and securing connections, prevents future headaches. If the issue persists, a professional car audio technician can step in. Don’t let a silent stereo ruin your drive—tackle the problem with confidence and get back to enjoying your music.