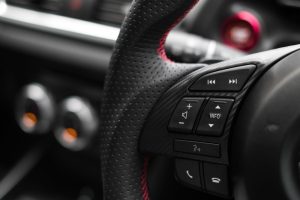
Upgrading your car’s audio system sparks excitement. A new stereo promises crisp sound, modern features, and a refreshed driving experience. But what happens when you realize a wiring harness isn’t part of the equation? Can you install a car stereo without a harness? Yes, you can, and this guide walks you through the process. Expect clear steps, practical tips, and expert advice to ensure your installation succeeds, even without a harness. By the end, you’ll confidently tackle the project and enjoy your new car audio system.
Contents
- What Is a Car Stereo Wiring Harness?
- Why Install a Car Stereo Without a Harness?
- Tools and Materials You’ll Need
- Step-by-Step Guide to Installing a Car Stereo Without a Harness
- Tips for a Successful Installation
- Common Challenges and How to Overcome Them
- Benefits of Installing Without a Harness
- When to Consider a Wiring Harness
- Safety Considerations
- Enhancing Your Car Audio Experience
- Conclusion
What Is a Car Stereo Wiring Harness?
A car stereo wiring harness simplifies installation. It acts as a connector between your vehicle’s wiring and the new stereo. Each harness matches specific car makes, models, and stereo brands, ensuring a plug-and-play setup. With a harness, you avoid cutting or splicing wires, which saves time and reduces errors. But what if you don’t have one? Installing without a harness requires manual wiring, which demands patience and precision. While it’s more labor-intensive, it’s entirely doable with the right approach.
Why Install a Car Stereo Without a Harness?
Several reasons might lead you to skip the harness. Perhaps you’re working on a tight budget, and buying a harness feels like an extra expense. Maybe you’re installing a stereo in an older vehicle where harnesses are hard to find. Or, you might enjoy the hands-on challenge of a custom installation. Whatever the reason, bypassing the harness means you’ll connect wires directly. This process takes longer but gives you full control over the setup. Let’s explore how to make it happen.
Tools and Materials You’ll Need
Before diving in, gather the right tools and materials. Preparation prevents frustration during the installation. Here’s what you need:
- Screwdrivers (Phillips and flathead): For removing the old stereo and dashboard panels.
- Wire cutters and strippers: To trim and prepare wires for connection.
- Electrical tape or heat-shrink tubing: To insulate and secure connections.
- Soldering iron and solder (optional): For stronger, more reliable wire connections.
- Crimping tool and connectors: For secure wire joins if you’re not soldering.
- Multimeter or test light: To check wire functions and ensure correct connections.
- Wiring diagram: Specific to your car and stereo, available in manuals or online.
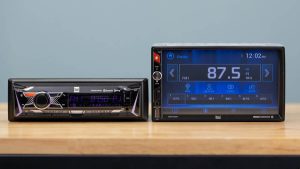
- New car stereo: Ensure it’s compatible with your vehicle.
- Butt connectors or twist caps: For joining wires securely.
Having these tools ready streamlines the process. Double-check your list before starting to avoid mid-project delays.
Step-by-Step Guide to Installing a Car Stereo Without a Harness
Follow these steps to install your car stereo without a harness. Each step builds on the last, so take your time to get it right.
Step 1: Disconnect the Car Battery
Safety comes first. Disconnect the negative terminal of your car battery to prevent electrical shocks or short circuits. Use a wrench to loosen the terminal and set it aside. This step ensures you work on the wiring without risking damage to yourself or the vehicle’s electronics.
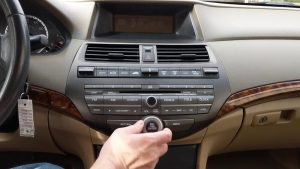
Step 2: Remove the Old Stereo
Remove the existing stereo from your car’s dashboard. Use a screwdriver to take off any trim panels or screws holding the stereo in place. Some vehicles require a special removal tool to release the stereo from its mount. Gently pull the stereo out, exposing the wiring behind it. Label the wires if they’re not already marked to avoid confusion later.
Step 3: Identify the Wiring
Now, examine the wires connected to the old stereo. Your car’s wiring and the new stereo’s wires need to match up correctly. Consult the wiring diagram for your vehicle and the stereo’s manual. Common wires include:
- Power wires: Constant (yellow), switched (red), and ground (black).
- Speaker wires: Pairs for front, rear, left, and right speakers, often color-coded.
- Antenna wire: For radio reception.
- Illumination/dimmer wires: For controlling display brightness.
Use a multimeter or test light to confirm each wire’s function. For example, test the constant power wire to ensure it holds a steady 12 volts. Accurate identification prevents mistakes during connection.
Step 4: Prepare the Wires
Trim and strip the ends of the wires from both the car and the new stereo. Remove about 1/4 inch of insulation from each wire to expose the bare conductor. If you’re soldering, tin the wire ends with a thin layer of solder for easier joining. If using crimp connectors, ensure you have the right size for a snug fit. Clean, well-prepared wires lead to reliable connections.
Step 5: Connect the Wires
Match the wires from the new stereo to the car’s wiring based on your diagram. For each connection:
- Twist the bare ends of the corresponding wires together.
- Secure the connection with a butt connector, crimp it tightly, or solder the wires for a permanent bond.
- Insulate the connection with electrical tape or heat-shrink tubing to prevent shorts.
Work methodically, connecting one wire at a time. Double-check each connection against the wiring diagram. For speaker wires, ensure positive and negative terminals align to avoid phase issues, which can weaken sound quality.
Step 6: Test the Connections
Before fully installing the stereo, reconnect the car battery and test the system. Turn on the stereo to check if it powers up. Test the radio, speakers, and any additional features like Bluetooth or USB ports. Listen for clear audio from each speaker. If something doesn’t work, revisit the wiring and check for loose or incorrect connections. A multimeter helps diagnose issues by testing voltage at key points.
Step 7: Mount the New Stereo
Once everything works, secure the stereo in the dashboard. Slide it into the mounting slot and fasten it with screws or clips, depending on your vehicle. Reattach any trim panels you removed earlier. Ensure the stereo sits flush and doesn’t wobble. A tidy installation looks professional and prevents future issues.
Step 8: Final Testing and Cleanup
Perform a final test with the stereo fully installed. Play music, switch between sources, and adjust settings to confirm everything functions. Check that buttons, knobs, or touchscreens respond properly. If all checks out, clean up your workspace, organize any leftover wires, and enjoy your new audio system.
Tips for a Successful Installation
A few extra tips boost your chances of success:
- Use a wiring diagram: Even experienced installers rely on diagrams to avoid mistakes.
- Label wires: Mark each wire with tape and a pen to track connections.
- Work in a well-lit area: Good lighting helps you see small wires and connectors.
- Take breaks: If you feel frustrated, step away to avoid rushing and making errors.
- Consider soldering: Soldered connections last longer than crimped ones, especially in high-vibration environments like cars.
These small habits make a big difference in the quality of your installation.
Common Challenges and How to Overcome Them
Installing without a harness isn’t always smooth. Here are common issues and solutions:
- Wiring mismatches: If wires don’t align with the diagram, recheck the manual or search online for model-specific forums. User communities often share fixes.
- No sound from speakers: Check speaker wire polarity. Swapped positive and negative wires cause phase cancellation.
- Stereo doesn’t power on: Verify the constant and switched power connections. Use a multimeter to confirm voltage.
- Interference or static: Ground wires may be loose. Ensure the ground connection is tight and free of corrosion.
Patience and troubleshooting resolve most problems. Don’t hesitate to consult online resources or ask a professional if you’re stuck.
Benefits of Installing Without a Harness
Skipping the harness offers unique advantages. You save money by not purchasing an adapter, which can cost $20-$50. You also gain a deeper understanding of your car’s electrical system, which helps with future upgrades. Custom wiring allows flexibility, especially for older or rare vehicles where harnesses aren’t available. Plus, the hands-on experience feels rewarding when you hear your new stereo fire up.
When to Consider a Wiring Harness
While installing without a harness works, a harness simplifies the process. If you’re short on time or new to car audio, a harness reduces the risk of errors. It’s also ideal for leased vehicles where you want a reversible installation. If you decide to use a harness later, you can still apply the knowledge gained from this guide.
Safety Considerations
Working with car electronics requires caution. Always disconnect the battery before handling wires. Avoid working in wet conditions to prevent shocks. Double-check connections to prevent short circuits, which can damage the stereo or car. If you’re unsure about any step, consult a professional to avoid costly mistakes.
Enhancing Your Car Audio Experience
A new stereo transforms your driving experience. To maximize it, consider these upgrades:
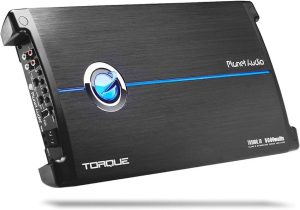
- Add an amplifier: Boosts sound quality and power for richer audio.
- Upgrade speakers: High-quality speakers pair well with a new stereo for balanced sound.
- Soundproofing: Add damping mats to reduce road noise and improve bass.
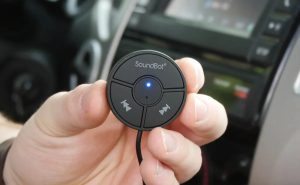
- Bluetooth adapters: Ensure seamless phone connectivity for hands-free calls and streaming.
These additions take your audio system to the next level, making every drive enjoyable.
Conclusion
Installing a car stereo without a harness is a rewarding project. With the right tools, a clear wiring diagram, and careful execution, you’ll achieve a professional-quality setup. This guide equips you with the steps and tips to succeed, whether you’re a beginner or a seasoned DIYer. Take your time, double-check connections, and soon you’ll cruise with your favorite tunes sounding better than ever. Ready to start? Grab your tools and transform your car’s audio today.