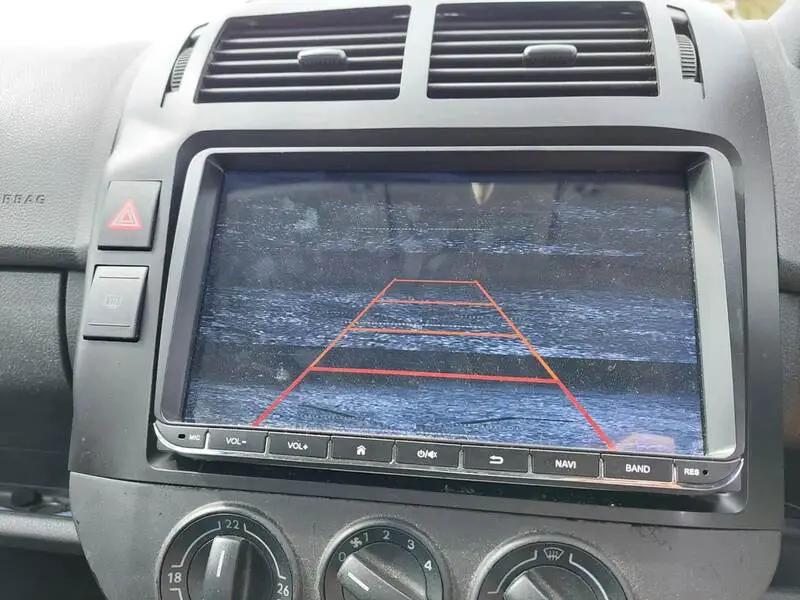
When you shift your car into reverse, you expect your Android head unit to seamlessly display the reverse camera feed. But what happens when it doesn’t? A blank screen or no response can be frustrating, especially when you rely on that camera for safe parking. This issue is common among Android head unit users, but the good news is that most problems have straightforward solutions. In this guide, we’ll walk you through the reasons your Android head unit isn’t switching to the reverse camera and provide step-by-step fixes to get it working again. By the end, you’ll have a clear path to troubleshoot and resolve the issue, ensuring your backup camera functions perfectly.
Contents
Understanding the Android Head Unit and Reverse Camera System
Android head units serve as the central hub for your car’s infotainment system, controlling everything from navigation to music and, crucially, the reverse camera. These units connect to the vehicle’s rearview camera, which activates when you shift into reverse. The head unit detects the reverse gear signal and switches the display to show the camera feed. If this process fails, the issue could stem from hardware, software, or wiring problems.
Common culprits include faulty connections, incorrect settings, or software glitches. Let’s dive into the potential causes and explore how to fix them, so you can restore your reverse camera’s functionality.
Common Reasons Your Android Head Unit Won’t Switch to the Reverse Camera
Before jumping into solutions, it’s helpful to understand why this issue occurs. Here are the most frequent reasons your Android head unit fails to display the reverse camera feed:
- Loose or Faulty Wiring Connections – The reverse camera relies on proper wiring to communicate with the head unit. Loose, damaged, or improperly connected wires can disrupt the signal.
- Incorrect Reverse Trigger Setup – The head unit needs a reverse trigger signal (usually from the reverse light circuit) to detect when you shift into reverse. If this trigger is misconfigured, the camera won’t activate.
- Software or Firmware Issues – Outdated firmware or software glitches can prevent the head unit from recognizing the reverse signal or displaying the camera feed.
- Camera Malfunction – The reverse camera itself could be defective or damaged, failing to send a video signal to the head unit.
- Incorrect Head Unit Settings – Misconfigured settings, such as the wrong camera input or disabled reverse camera feature, can cause the issue.
- Power Supply Problems – Insufficient power to the camera or head unit can lead to inconsistent performance.
Now that you know the potential causes, let’s move on to troubleshooting steps to pinpoint and fix the problem.
Step-by-Step Troubleshooting Guide
Follow these steps to diagnose and resolve the issue with your Android head unit not switching to the reverse camera. Start with the simplest checks and progress to more advanced solutions as needed.
Step 1: Check the Reverse Camera Connection
First, inspect the physical connections between the reverse camera and the Android head unit. A loose or disconnected cable is often the root cause. Here’s what to do:
- Locate the reverse camera, typically mounted on the rear of your vehicle.
- Trace the camera’s wiring to the head unit, checking for loose plugs, frayed wires, or damaged connectors.
- Ensure the RCA video cable (usually yellow) is securely connected to the head unit’s camera input port.
- Verify the reverse trigger wire (often red or labeled “reverse”) is connected to the head unit and the vehicle’s reverse light circuit.
If you find a loose connection, reconnect it firmly and test the system by shifting into reverse. If the camera still doesn’t display, proceed to the next step.
Step 2: Verify the Reverse Trigger Signal
The reverse trigger signal tells the head unit when to switch to the camera feed. If this signal isn’t reaching the head unit, the camera won’t activate. To check the trigger:
- Confirm the reverse trigger wire is connected to the vehicle’s reverse light circuit. This wire taps into the power line that activates the reverse lights when you shift into reverse.
- Use a multimeter to test the reverse light circuit. Set the multimeter to DC voltage and check if the circuit outputs 12V when the car is in reverse. If there’s no voltage, the issue may lie in the vehicle’s wiring or fuse.
- Ensure the head unit’s reverse trigger input matches the vehicle’s wiring. Some head units require specific settings to recognize the trigger signal.
If the trigger signal is missing or weak, consult a professional auto electrician to repair the circuit. Otherwise, move on to checking the head unit’s settings.
Step 3: Review Head Unit Settings
Incorrect settings can prevent the reverse camera from displaying. Android head units often have customizable options for camera inputs and reverse detection. Here’s how to check:
- Access the head unit’s settings menu, typically found under “System Settings” or “Camera Settings.”
- Look for an option labeled “Reverse Camera” or “Rear Camera Input.” Ensure it’s enabled.
- Verify the correct camera input is selected (e.g., “AVIN,” “CAM1,” or “RCA”). Some head units support multiple camera inputs, and selecting the wrong one can cause the issue.
- Check if the reverse detection mode is set to “Automatic” or “Trigger-Based.” This ensures the head unit switches to the camera feed when it receives the reverse signal.
Save any changes and test the system again. If the camera still doesn’t work, it’s time to investigate software issues.
Step 4: Update Firmware and Software
Outdated firmware or software glitches can disrupt the head unit’s ability to process the reverse camera signal. To update the system:
- Visit the manufacturer’s website or contact their support team to download the latest firmware for your head unit model.
- Follow the provided instructions to install the update, usually via a USB drive or SD card.
- After updating, restart the head unit and test the reverse camera.
If the issue persists, consider resetting the head unit to factory settings. Be sure to back up any custom settings or apps before doing so, as a reset will erase all data.
Step 5: Test the Reverse Camera
If the head unit and wiring check out, the problem might lie with the reverse camera itself. To test the camera:
- Disconnect the camera’s video cable from the head unit and connect it to a portable monitor or another display device with an RCA input.
- Power the camera (usually via a 12V source) and check if it displays an image.
- If the camera doesn’t work, inspect it for physical damage, such as water ingress or cracked lenses. Replace the camera if necessary.
If the camera functions but still doesn’t display on the head unit, the issue may involve compatibility or a deeper hardware problem.
Step 6: Check Power Supply
Both the reverse camera and head unit require stable power to function. A weak or inconsistent power supply can cause the camera to fail. To verify:
- Use a multimeter to check the voltage at the camera’s power input. It should read approximately 12V when the car is running.
- Inspect the head unit’s power connections, ensuring all fuses are intact and the unit receives consistent voltage.
- Look for signs of electrical interference, such as aftermarket accessories drawing power from the same circuit as the camera.
If you suspect power issues, consult a professional to diagnose and fix the vehicle’s electrical system.
Step 7: Seek Professional Help
If none of the above steps resolve the issue, it’s time to call in a professional. An auto electrician or car audio specialist can:
- Diagnose complex wiring or compatibility issues.
- Test the head unit’s internal components for faults.
- Recommend a replacement camera or head unit if necessary.
When choosing a professional, opt for someone with experience in Android head units and automotive camera systems to ensure accurate repairs.
Tips to Prevent Future Issues
Once your reverse camera is working, take these steps to keep it functioning smoothly:
- Regularly inspect wiring connections for wear or looseness.
- Keep the head unit’s firmware and software up to date.
- Clean the camera lens periodically to maintain clear image quality.
- Avoid installing aftermarket accessories that may interfere with the camera’s power supply.
Why Fixing This Issue Matters
A functional reverse camera is more than a convenience—it’s a critical safety feature. It helps you avoid obstacles, park accurately, and protect pedestrians or objects behind your vehicle. By addressing the problem promptly, you ensure safer driving and peace of mind.
Conclusion
Dealing with an Android head unit that won’t switch to the reverse camera can be aggravating, but most issues are fixable with the right approach. Start by checking connections, verifying the reverse trigger, and reviewing settings. If those don’t work, update the firmware, test the camera, and ensure a stable power supply. For stubborn problems, don’t hesitate to seek professional help. With this guide, you’re equipped to troubleshoot and resolve the issue, restoring your reverse camera to full functionality.
If you found this guide helpful, share it with others facing similar issues. Have a tip or question? Drop a comment below—we’d love to hear from you!


