Intermittent backup camera failures can be incredibly frustrating, especially when you’re trying to park safely or navigate tight spaces. One moment your camera displays a crystal-clear view, and the next moment you’re staring at a blank screen or distorted image. This sporadic behavior is actually one of the most common backup camera problems that drivers face today.
Understanding why your backup camera works inconsistently requires examining several interconnected systems in your vehicle. From loose electrical connections to software glitches, multiple factors can cause this maddening on-and-off functionality. The good news is that many of these issues can be diagnosed and resolved without expensive professional repairs.
Contents
Primary Culprits Behind Intermittent Camera Function
Unstable Electrical Connections
Loose or corroded electrical connections top the list of intermittent backup camera problems. Your camera system relies on multiple connection points throughout your vehicle, and any weak link can cause sporadic failures.
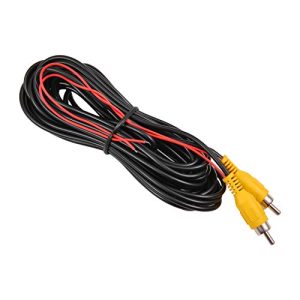
The connection between your camera and the main wiring harness experiences constant vibration from driving. Over time, these connections can work loose, creating intermittent contact that causes your camera to cut in and out randomly.
Corrosion at connection points creates resistance that can block electrical signals unpredictably. Moisture infiltration, especially in older vehicles, gradually builds up corrosion that interferes with proper electrical flow.
Temperature-Related Component Failures
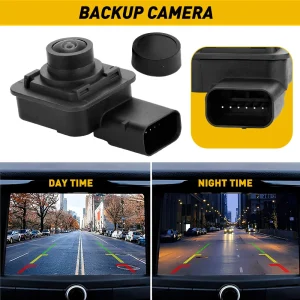
Electronic components in your backup camera system can become temperature-sensitive as they age. Cold weather often causes intermittent failures because electrical resistance changes in various components.
Your camera’s internal circuits may develop “cold solder joints” that only make proper contact when warmed up. This explains why some cameras work fine after driving for a while but fail immediately after starting a cold car.
Heat can also cause problems, particularly in cameras mounted near exhaust systems or in direct sunlight. Excessive heat causes electronic components to expand and contract, potentially breaking internal connections.
Power Supply Inconsistencies
Voltage fluctuations in your vehicle’s electrical system can cause backup cameras to function erratically. Your camera needs consistent power to operate reliably, and any interruption in that power supply creates intermittent operation.
Aging vehicle batteries often struggle to maintain steady voltage, especially during engine startup or when multiple electrical systems operate simultaneously. This voltage instability directly affects camera performance.
Alternator problems can also create power supply issues that manifest as intermittent camera failures. When your alternator doesn’t maintain proper charging voltage, sensitive electronic components like backup cameras suffer first.
Step-by-Step Diagnostic Approach
Initial Visual Assessment
Start your troubleshooting by conducting a thorough visual inspection of your entire backup camera system. This simple step often reveals obvious problems that cause intermittent operation.
1. Examine the Camera Lens and Housing – Clean the camera lens with a soft, damp cloth – Look for cracks in the camera housing that might allow moisture infiltration – Check if the camera appears securely mounted or shows signs of looseness – Inspect for any visible damage from impacts or weather exposure
2. Test the Display Screen Function – Turn on your vehicle and shift into reverse multiple times – Note whether the screen turns on but shows no image, or fails to activate entirely – Check if other display functions (radio, navigation) work properly – Look for error messages or unusual display behavior
3. Verify Reverse Light Operation – Have someone observe your reverse lights while you shift into reverse – Non-functioning reverse lights often indicate the same electrical problem affecting your camera – This test confirms whether your transmission properly sends the reverse signal
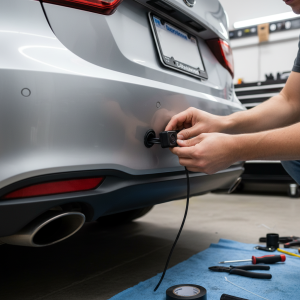
Electrical Connection Investigation
4. Locate and Inspect Camera Connections – Find where your camera’s wiring connects to your vehicle’s main harness – Look for loose plugs, corroded terminals, or damaged wire insulation – Gently wiggle connections while someone watches the display for changes – Clean any corrosion with electrical contact cleaner
5. Check Fuse Box Components – Locate your backup camera fuse using your owner’s manual – Remove and visually inspect the fuse for breaks or burn marks – Test fuse continuity with a multimeter if available – Check nearby fuses that might affect camera operation
6. Examine Ground Connections – Locate your camera’s ground connection point – Clean any corrosion from ground terminals – Ensure ground connections are tight and secure – Poor grounds often cause intermittent electrical problems
Advanced Diagnostic Procedures
7. Voltage Testing at Camera – Use a multimeter to check voltage at the camera connector – You should see 12 volts when the transmission is in reverse – Intermittent voltage readings confirm electrical supply problems – This step requires basic electrical testing knowledge
8. Signal Path Verification – Trace wiring from camera to display unit – Look for damaged wires, especially near moving parts – Check for proper wire routing away from heat sources – Inspect areas where wires pass through body panels
9. Display Unit Assessment – Test camera with an alternate display if possible – Check display unit connections and mounting – Verify display unit receives proper power and ground – Some display units have internal fuses that can fail intermittently
DIY Repairs vs Professional Service Requirements
Tasks You Can Handle Yourself
✅ Basic Maintenance and Inspection – Cleaning camera lens and housing – Visual inspection of obvious damage – Checking and replacing fuses – Testing reverse lights – Cleaning accessible electrical connections
✅ Simple Electrical Checks – Using a multimeter to check fuse continuity – Cleaning corrosion from battery terminals – Tightening loose ground connections – Basic voltage testing with proper safety precautions
✅ Software-Related Solutions – Resetting display unit to factory settings – Updating firmware if manufacturer provides instructions – Adjusting camera settings through vehicle menus
Professional Service Situations
🧰 Complex Electrical Diagnosis Professional technicians should handle advanced electrical troubleshooting that requires specialized equipment. Automotive electrical systems can be complex, and improper diagnosis might cause additional problems.
Modern vehicles often integrate backup cameras with multiple vehicle systems, requiring professional-grade diagnostic tools to properly assess functionality. These tools can communicate with vehicle computers to identify specific fault codes.
🧰 Component Replacement Replacing backup cameras, display units, or wiring harnesses typically requires professional installation. These components often integrate with vehicle safety systems and require proper calibration after installation.
Professional installation ensures proper weatherproofing and routing of replacement wiring. Improper installation can lead to water damage or interference with other vehicle systems.
🧰 Warranty Considerations If your vehicle is still under warranty, professional diagnosis protects your coverage. Attempting complex repairs yourself might void warranty protection for related components.
Critical Safety Precautions
Electrical Safety Measures
Always disconnect your vehicle’s battery before working with electrical connections. Even backup camera systems carry enough current to cause injury or damage sensitive electronic components.
Turn off your ignition and remove keys before beginning any electrical work. Many vehicle systems remain powered even when the engine is off, creating potential safety hazards.
Use insulated tools when working around electrical connections. Metal tools can create short circuits that damage expensive electronic components or cause personal injury.
Vehicle Movement Safety
Never work on backup camera systems while your vehicle is running or in gear. Accidental movement can cause serious injury, especially when working around the rear of your vehicle.
Engage your parking brake and use wheel chocks when working underneath or behind your vehicle. This prevents accidental rolling that could cause injury or property damage.
Be aware of automatic liftgate or tailgate systems that might activate unexpectedly. These systems can cause injury if they operate while you’re working on camera components.
Tool and Environmental Safety
Work in well-lit conditions to properly see small electrical components and connections. Poor lighting increases the risk of mistakes that could damage your vehicle’s electrical system.
Avoid working in wet conditions, as moisture increases the risk of electrical shock and can damage sensitive electronic components during repair procedures.
Keep electrical contact cleaner and other chemicals away from painted surfaces and interior materials. These products can cause permanent damage to your vehicle’s finish.
By following this comprehensive troubleshooting approach, you can identify and resolve most intermittent backup camera problems. Start with simple visual inspections and basic electrical checks before moving to more complex diagnostic procedures. Remember that persistent problems often require professional diagnosis to prevent additional damage to your vehicle’s electrical systems.