Installing a new car stereo can transform your driving experience, but facing that bundle of colored wires can be intimidating. Many car owners hesitate to tackle this project because they’re unsure which wires connect to what. The good news? Car stereo wiring follows standard color codes that make the process much simpler once you understand the basics.
This guide breaks down everything you need to know about car stereo wiring colors, helping you confidently install your new audio system without professional help. Let’s dive into the world of car audio wiring and turn that confusing cluster of wires into a perfectly functioning stereo system.
Contents
- Understanding Car Stereo Wiring Basics
- Standard Car Stereo Wire Color Codes
- Detailed Breakdown of Each Wire’s Function
- Special Wiring Considerations
- Step-by-Step Installation Process
- Troubleshooting Common Wiring Issues
- Safety Tips for Car Stereo Wiring
- When to Seek Professional Help
- Conclusion
- FAQs About Car Stereo Wiring
Understanding Car Stereo Wiring Basics
Before connecting any wires, you should understand what you’re working with. Car stereo systems typically have two main wire harnesses:
- Power/Speaker Harness: Connects to your car’s electrical system and speakers
- Antenna Wire: Brings in radio signals
The power/speaker harness contains most of the wires you’ll need to connect. These wires fall into three main categories:
- Power Wires: Supply electricity to your stereo
- Ground Wires: Complete the electrical circuit
- Speaker Wires: Carry audio signals to your speakers
Let’s examine each wire type in detail so you can identify them correctly during installation.
Standard Car Stereo Wire Color Codes
Car manufacturers follow a fairly standard color-coding system for stereo wiring. While some variations exist between makes and models, these color codes remain consistent across most vehicles:
Power Wire Colors
| Wire Color | Function | Description |
|---|---|---|
| Yellow | Constant 12V+ | Always powered (memory) |
| Red | Switched 12V+ | On when ignition is on |
| Orange | Illumination | Connects to dash lights |
| Orange/White | Dimmer | Controls display brightness |
| Blue | Antenna/Amp Remote | Triggers power antenna or amplifier |
| Blue/White | Amp Remote Turn-On | Powers external amplifier |
Ground Wire Color
| Wire Color | Function | Description |
|---|---|---|
| Black | Ground | Connects to vehicle chassis |
Speaker Wire Colors
| Wire Colors | Speaker Position |
|---|---|
| White (+) / White/Black (-) | Left Front |
| Gray (+) / Gray/Black (-) | Right Front |
| Green (+) / Green/Black (-) | Left Rear |
| Purple (+) / Purple/Black (-) | Right Rear |
The solid colors represent positive terminals, while striped colors (with black) represent negative terminals.
Detailed Breakdown of Each Wire’s Function
Power Wires
Yellow Wire (Constant 12V+) The yellow wire connects to your car’s battery, providing constant power even when the ignition is off. This connection allows your stereo to save settings, radio presets, and clock time. Without this connection, you’d need to reprogram your stereo settings every time you turn off your car.
Red Wire (Switched 12V+) The red wire connects to a power source that’s only active when your car’s ignition is in the “on” or “accessory” position. This wire tells your stereo when to turn on and off with your vehicle, preventing battery drain when the car isn’t running.
Orange Wire (Illumination) The orange wire connects to your vehicle’s instrument panel lighting circuit. This connection ensures your stereo lights up when you turn on your headlights, making it easier to see the display at night.
Orange/White Wire (Dimmer) Similar to the illumination wire, the orange wire with a white stripe connects to your car’s dimmer circuit. This allows your stereo display brightness to adjust with your dashboard lights.
Blue Wire (Antenna/Amp Remote) The blue wire serves as a trigger for your power antenna or external amplifier. When you turn on your stereo, this wire sends a signal to extend your power antenna or activate your amplifier.
Blue/White Wire (Amplifier Remote Turn-On) The blue wire with white stripe specifically controls external amplifiers. It sends a 12V signal to turn on your amplifier when the stereo is powered up, then cuts power when the stereo turns off.
Ground Wire
Black Wire (Ground) The black wire completes the electrical circuit by connecting to your vehicle’s metal chassis. A secure ground connection is essential for proper stereo function—many audio problems stem from poor grounding. Always ensure this connection is tight and attached to clean, unpainted metal.
Speaker Wires
Car stereo systems use four pairs of wires to connect to your vehicle’s speakers:
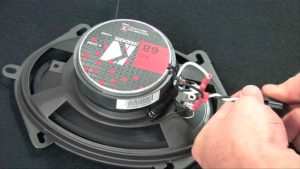
White and White/Black (Left Front) The white wire (positive) and white with black stripe wire (negative) connect to your left front speaker. The solid white wire attaches to the positive terminal, while the striped wire connects to the negative terminal.
Gray and Gray/Black (Right Front) The gray wire (positive) and gray with black stripe wire (negative) connect to your right front speaker. The solid gray wire attaches to the positive terminal, while the striped wire connects to the negative terminal.
Green and Green/Black (Left Rear) The green wire (positive) and green with black stripe wire (negative) connect to your left rear speaker. The solid green wire attaches to the positive terminal, while the striped wire connects to the negative terminal.
Purple and Purple/Black (Right Rear) The purple wire (positive) and purple with black stripe wire (negative) connect to your right rear speaker. The solid purple wire attaches to the positive terminal, while the striped wire connects to the negative terminal.
Special Wiring Considerations
Aftermarket vs. Factory Stereos
When replacing a factory stereo with an aftermarket unit, you’ll likely need a wiring harness adapter. These adapters connect your new stereo’s wires to your vehicle’s existing wiring harness without cutting or splicing any factory wires.
Wiring harness adapters typically cost between $10-30 and are specific to your vehicle’s make, model, and year. Using an adapter preserves your vehicle’s original wiring, making it easy to restore the factory stereo later if needed.
European and Asian Vehicles
While most American vehicles follow the standard color codes listed above, European and Asian manufacturers sometimes use different color schemes. If you’re working on a non-American vehicle, consult your owner’s manual or look up vehicle-specific wiring diagrams online before making connections.
Vehicles with Special Audio Systems
Vehicles with premium factory audio systems (like Bose, JBL, or Harman Kardon) often have additional wiring for amplifiers, subwoofers, or digital signal processors. These systems might require special integration modules to work properly with aftermarket stereos. If your vehicle has a premium audio package, research whether you need additional adapters before starting your installation.
Step-by-Step Installation Process
Now that you understand car stereo wiring colors, let’s walk through the installation process:
Tools You’ll Need
- Wire crimpers/strippers
- Electrical tape
- Wiring harness adapter (vehicle-specific)
- Stereo removal tools (often plastic pry tools)
- Basic hand tools (screwdrivers, pliers)
Installation Steps
- Disconnect the battery: Always disconnect your car’s negative battery terminal before working on electrical components. This prevents shorts and possible damage to your vehicle’s electrical system.
- Remove the factory stereo: Use stereo removal tools or follow your vehicle’s specific removal procedure to extract the existing stereo unit.
- Prepare the wiring harness adapter: Connect the wires from your new stereo to the matching wires on your vehicle-specific harness adapter. Match colors according to the guide above or the instructions provided with your adapter.
- Make secure connections: Use wire crimpers to secure connections, or solder the wires for the most reliable connection. Cover all connections with electrical tape or heat shrink tubing to prevent shorts.
- Connect the antenna: Plug the antenna cable into the back of your new stereo.
- Test before final installation: Reconnect the battery and test your stereo before fully mounting it. Make sure all speakers work and that the stereo powers on and off with the ignition.
- Complete the installation: Once tested successfully, slide the stereo into place and secure it according to your vehicle’s mounting requirements.
Troubleshooting Common Wiring Issues
Even with careful attention to wire colors, problems can arise. Here are common issues and their likely causes:
No Power to Stereo
- Check that the yellow (constant) and red (switched) power wires are properly connected
- Verify that fuses in both the stereo and your vehicle’s fuse box are intact
- Ensure the ground (black) wire has a secure connection to bare metal
Stereo Stays On When Car is Off
- The red (switched) wire might be connected to a constant power source
- Connect the red wire to an ignition-switched power source
Speakers Not Working
- Double-check speaker wire connections for correct polarity (positive to positive, negative to negative)
- Look for breaks or damage in speaker wires
- Verify speaker settings in the stereo menu
Audio Quality Issues
- Ensure speaker wires aren’t touching (causing shorts)
- Check for secure ground connection
- Verify that speaker impedance matches stereo requirements
Safety Tips for Car Stereo Wiring
- Always disconnect the battery before working on car electrical systems
- Never work on electrical components in wet conditions
- Use proper wire gauge for all connections (typically 16-18 gauge for car audio)
- Secure all wires away from moving parts and heat sources
- Insulate all connections to prevent shorts
- Follow your vehicle’s specific wiring diagrams when available
When to Seek Professional Help
While many car owners can handle basic stereo installations, certain situations call for professional assistance:
- Vehicles with advanced safety systems integrated with the factory stereo
- Cars with steering wheel controls that require special adapters
- Premium sound systems with factory amplifiers and digital processors
- Custom installations requiring new speaker locations or extensive dashboard modifications
- If you feel uncomfortable working with automotive electrical systems
Professional installation typically costs between $50-200 depending on the complexity of your vehicle and desired setup.
Conclusion
Understanding car stereo wire colors takes the mystery out of installing a new audio system. By following the standard color codes outlined in this guide, you can confidently connect your new stereo and enjoy improved sound quality without paying for professional installation.
Remember that while wire colors are generally standardized, variations exist between vehicle manufacturers. When in doubt, consult your vehicle’s wiring diagram or stereo installation manual for specific guidance.
With proper preparation and attention to detail, you can successfully wire your new car stereo and upgrade your driving experience with better sound quality and modern features. The satisfaction of completing this project yourself makes every note sound even sweeter.
FAQs About Car Stereo Wiring
Q: What happens if I connect the wrong wires together? A: Connecting incorrect wires can blow fuses, damage your stereo, or create electrical shorts. Always double-check connections before powering on your system.
Q: Do I need to disconnect the battery when installing a new stereo? A: Yes, disconnecting the negative battery terminal is strongly recommended to prevent electrical shorts and potential damage to your stereo or vehicle electrical system.
Q: Can I install a stereo without a wiring harness adapter? A: While possible by splicing directly into your vehicle’s wiring, using a vehicle-specific wiring harness adapter is highly recommended to preserve factory wiring and ensure proper connections.
Q: How do I know which wire is positive and negative for speakers? A: For standard color codes, solid colors (white, gray, green, purple) are positive, while the same colors with black stripes are negative.
Q: Why does my stereo reset every time I turn off my car? A: This typically indicates the yellow (constant power) wire isn’t properly connected to a source that stays powered when the vehicle is off.


