So, you’ve got your hands on a Pioneer AVH-120BT and you’re ready to install it? Awesome! This guide will walk you through the wiring process step-by-step, making sure you get your head unit installed smoothly and correctly. We’ll cover everything from unboxing to testing, so grab your tools and let’s get started!
Contents
- Getting Started: Unboxing Your AVH-120BT
- Locating the Pioneer AVH-120BT Wiring Harness
- Understanding the AVH-120BT’s Wiring Diagram
- Connecting the Power and Ground Wires
- Hooking Up the Speaker Wires: Left & Right
- Installing the Illumination and Dimmer Wires
- Connecting the Remote Turn-On Wire
- Adding the Antenna and Accessory Wires
- Troubleshooting Common Wiring Issues
- Finishing Up: Testing Your AVH-120BT
Getting Started: Unboxing Your AVH-120BT
First things first: carefully unpack your Pioneer AVH-120BT. Make sure you’ve got everything included in the box: the head unit itself, the wiring harness, the mounting bracket, any necessary screws, and the instruction manual (which is always a good idea to give a quick glance). Take your time and inspect everything to ensure no damage occurred during shipping. This initial check will save you headaches later on.
Next, familiarize yourself with the components. Identify the head unit, the various connectors on the wiring harness, and the mounting bracket. Lay everything out neatly so you can easily access each part as you proceed with the installation. Having everything organized makes the process much easier and less stressful.
Locating the Pioneer AVH-120BT Wiring Harness
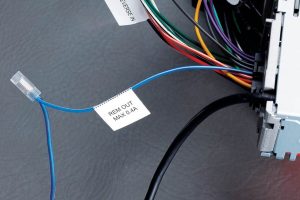
The wiring harness is the heart of the installation. It’s the bundle of wires that connects your AVH-120BT to your car’s electrical system. You’ll typically find it bundled with the other accessories in the box. It’s usually a large, multi-connector harness. Don’t worry if it looks intimidating; we’ll break down each wire individually.
Once you’ve located the harness, take a moment to visually inspect it. Make sure none of the wires are damaged or broken. If you notice any issues, contact Pioneer support immediately. A damaged harness could lead to installation problems or even electrical malfunctions.
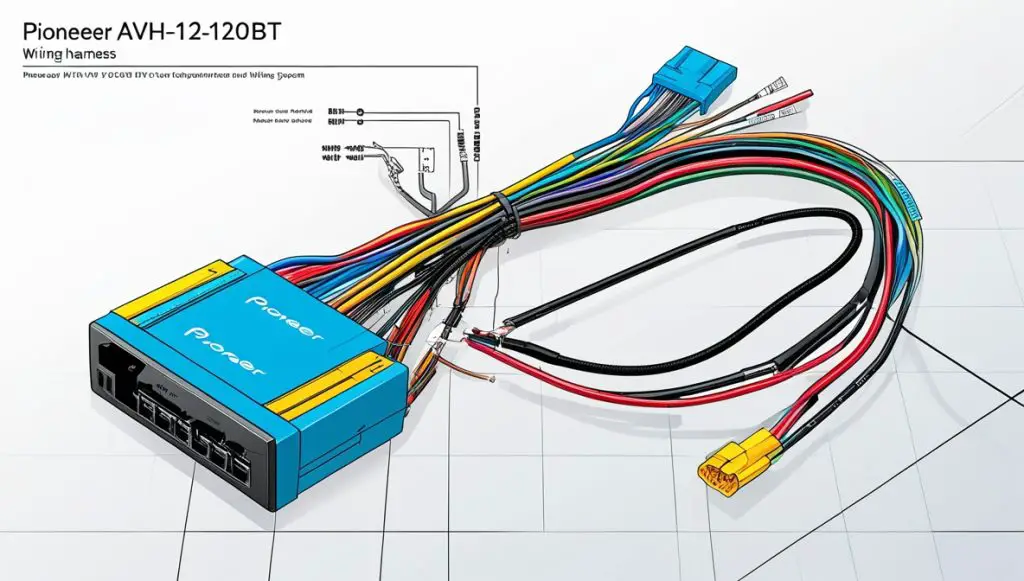
Understanding the AVH-120BT’s Wiring Diagram
Before you start connecting anything, carefully study the wiring diagram provided in your AVH-120BT’s instruction manual. This diagram shows you which wire does what. It’s crucial to understand this diagram to avoid short circuits or incorrect connections. Take your time, and don’t hesitate to refer back to it as you work.
The diagram will typically use color codes to identify each wire’s function. Commonly, you’ll see wires for power, ground, speakers, illumination, and more. Match these color codes to the wires on your harness to ensure accurate connections. Remember, accuracy is key!
Connecting the Power and Ground Wires
Now for the crucial connections: power and ground. The power wire (+12V) provides power to the unit, while the ground wire (-) completes the circuit. Incorrectly connecting these can damage your head unit or your vehicle’s electrical system. Double-check the wiring diagram to confirm the correct wire colors before making any connections.
Securely connect the positive power wire to a constant 12V power source in your vehicle. Similarly, connect the ground wire to a clean, bare metal surface on your car’s chassis, ensuring a solid connection to prevent interference. Use appropriate connectors and ensure a tight fit to avoid any loose connections.
Hooking Up the Speaker Wires: Left & Right
Next, connect your speaker wires. These wires transmit the audio signal from your AVH-120BT to your car’s speakers. The wiring diagram will clearly indicate which wire goes to which speaker (left front, right front, left rear, right rear). Pay close attention to the polarity (+ and -) of each wire.
Connecting the speaker wires incorrectly can result in poor sound quality or even damage to your speakers. Make sure to match the positive (+) and negative (-) terminals on both the head unit and the speakers. Use appropriate connectors and secure them tightly.
Installing the Illumination and Dimmer Wires
The illumination wire connects the AVH-120BT’s display to your car’s dashboard lights. This ensures that the display brightness matches the overall dashboard lighting. The dimmer wire allows you to adjust the brightness of the head unit’s display. Refer to your wiring diagram for the correct wire colors.
Connect the illumination wire to a source that provides power when your headlights are on. The dimmer wire connects to your car’s dimmer circuit, allowing you to control the brightness of the head unit’s display. Ensure secure connections to avoid flickering or inconsistent illumination.
Connecting the Remote Turn-On Wire
The remote turn-on wire allows your AVH-120BT to turn on and off with your car’s ignition. This is a crucial connection for many aftermarket accessories, allowing them to power on and off with the car’s ignition system. Consult your wiring diagram for the correct wire color and location.
Connect this wire to a 12V source that’s only active when the ignition is turned on. This prevents the head unit from draining your car’s battery when the car is off. A properly connected remote turn-on wire is essential for proper operation and prevents battery drain.
Adding the Antenna and Accessory Wires
Finally, connect your antenna wire and any other accessory wires. The antenna wire transmits radio signals to your head unit. Make sure the connection is secure and properly grounded to ensure optimal radio reception. Any other accessory wires should be connected according to their respective instructions and the wiring diagram.
Double-check all connections before proceeding. Ensure that all wires are securely connected and that there are no loose wires or exposed terminals. This step is crucial for the proper functioning of the AVH-120BT and the safety of your vehicle’s electrical system.
Troubleshooting Common Wiring Issues
If you encounter problems, such as no power, no sound, or a flickering display, systematically check your connections. Start by verifying the power and ground connections. Then, check the speaker wire connections, making sure you haven’t reversed the polarity. If you’re still having issues, consult the AVH-120BT’s manual or seek professional help.
Remember, patience is key. Troubleshooting electrical issues can be time-consuming, but methodical checking will help you pinpoint the problem quickly. Don’t hesitate to consult online forums or Pioneer’s support resources for assistance.
Finishing Up: Testing Your AVH-120BT
Once you’ve completed all the connections, carefully reassemble everything. Now it’s time to test your newly installed AVH-120BT! Turn on your car’s ignition and power on the head unit. Check that the display is illuminated correctly and that the audio is working properly. Test all functions, including radio, CD (if applicable), and Bluetooth.
If everything works as expected, congratulations! You’ve successfully installed your Pioneer AVH-120BT. If you encounter any issues, revisit the troubleshooting section or seek professional help. Enjoy your new head unit!
Installing your Pioneer AVH-120BT might seem daunting at first, but by following these steps and taking your time, you can successfully complete the installation. Remember to always refer to the wiring diagram and double-check your connections. Happy listening!