Tuning a monoblock car amp delivers the heart-pounding bass you crave from your car audio system. A properly tuned amplifier ensures your subwoofer hits hard, sounds clean, and lasts longer. Poor tuning, however, risks distorted sound, overheating, or even damaged equipment. This guide walks you through the process of tuning a monoblock amp with clear, actionable steps. Whether you’re a car audio newbie or a seasoned enthusiast, you’ll learn how to optimize your system for powerful, distortion-free bass. Let’s dive into the essentials of tuning your monoblock amp to achieve the best sound quality.
Contents
- What Is a Monoblock Amp?
- Why Tuning Your Monoblock Amp Matters
- Tools You’ll Need to Tune Your Monoblock Amp
- Step-by-Step Guide to Tuning a Monoblock Car Amp
- Common Mistakes to Avoid When Tuning a Monoblock Amp
- Tips for Optimizing Your Monoblock Amp Performance
- Troubleshooting Common Monoblock Amp Issues
- How to Maintain Your Monoblock Amp for Longevity
- When to Seek Professional Help
- Conclusion
What Is a Monoblock Amp?
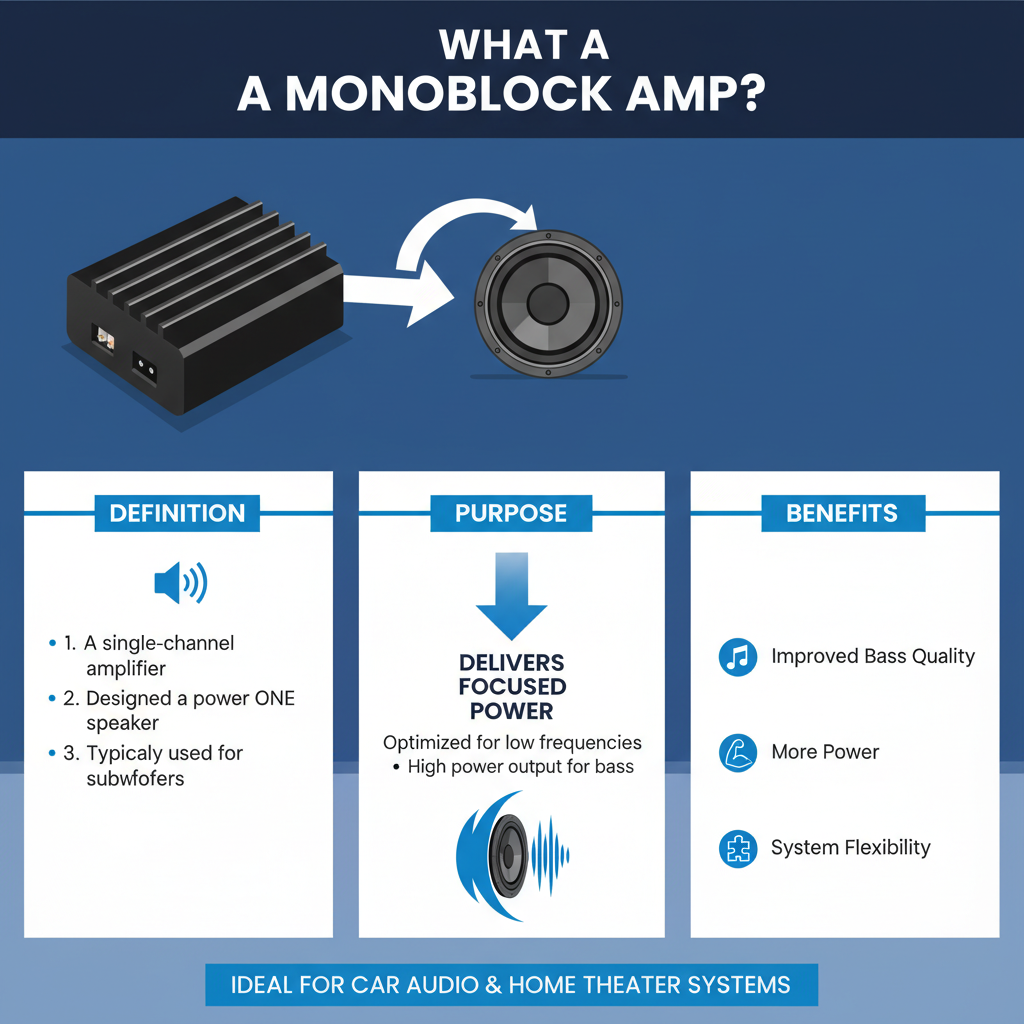
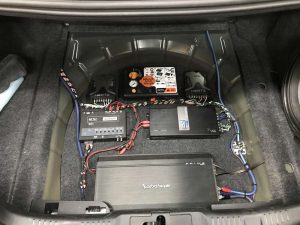
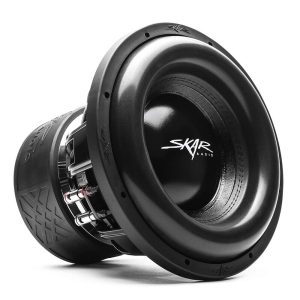
A monoblock amplifier powers a single channel, typically driving a subwoofer in car audio systems. Unlike multi-channel amps that handle multiple speakers, monoblock amps focus all their power on delivering deep, low-frequency bass. They’re ideal for car audio setups prioritizing subwoofer performance. Tuning a monoblock amp involves adjusting settings like gain, low-pass filter (LPF), bass boost, and subsonic filter to match your subwoofer and vehicle acoustics. Proper tuning maximizes sound clarity, prevents clipping, and protects your equipment.
Why Tuning Your Monoblock Amp Matters
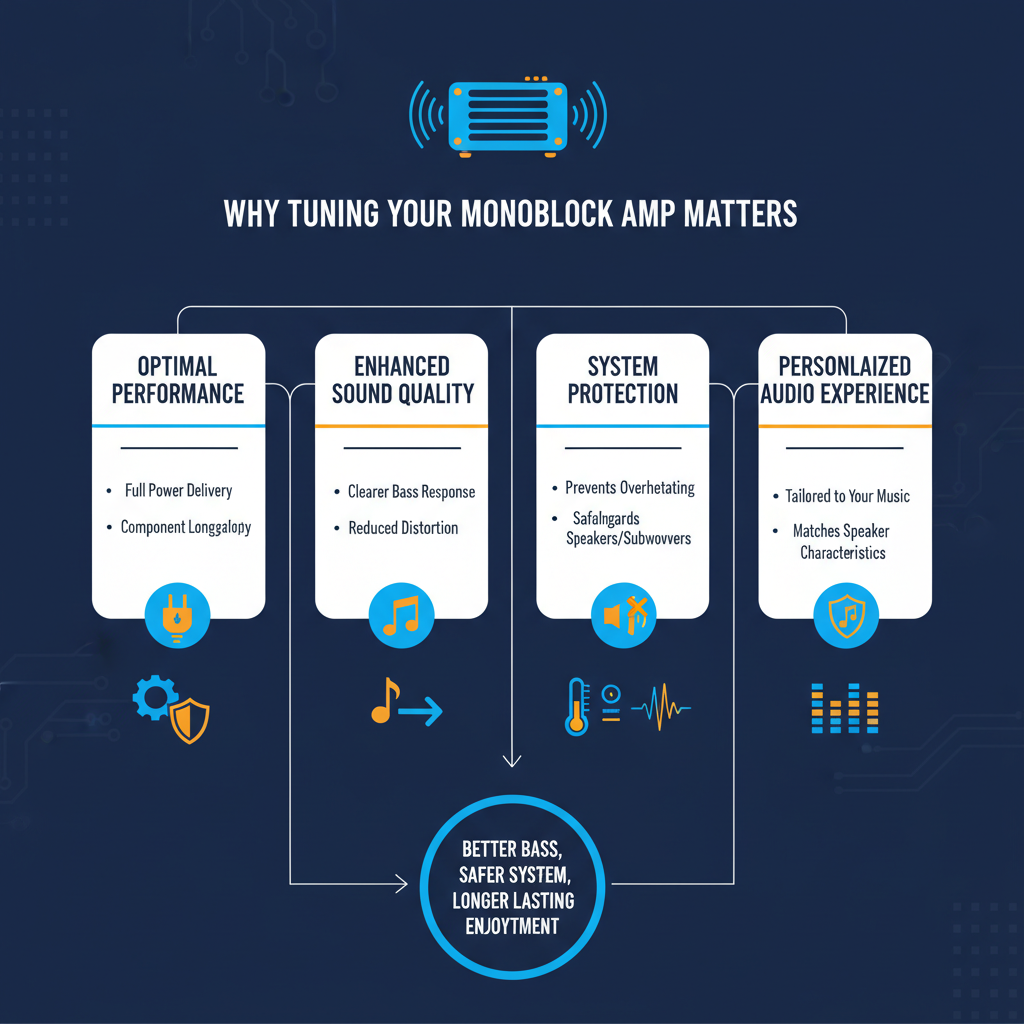
Tuning a monoblock amp optimizes audio performance and safeguards your subwoofer. Correct settings ensure the amp delivers the right amount of power without overdriving the subwoofer, which can cause distortion or mechanical failure. A well-tuned amp also enhances bass response, making low frequencies punchy and clear. By fine-tuning the gain, filters, and other controls, you create a balanced soundstage that complements your car’s acoustics. Neglecting this process often leads to muddy bass, overheating, or costly repairs.
Tools You’ll Need to Tune Your Monoblock Amp
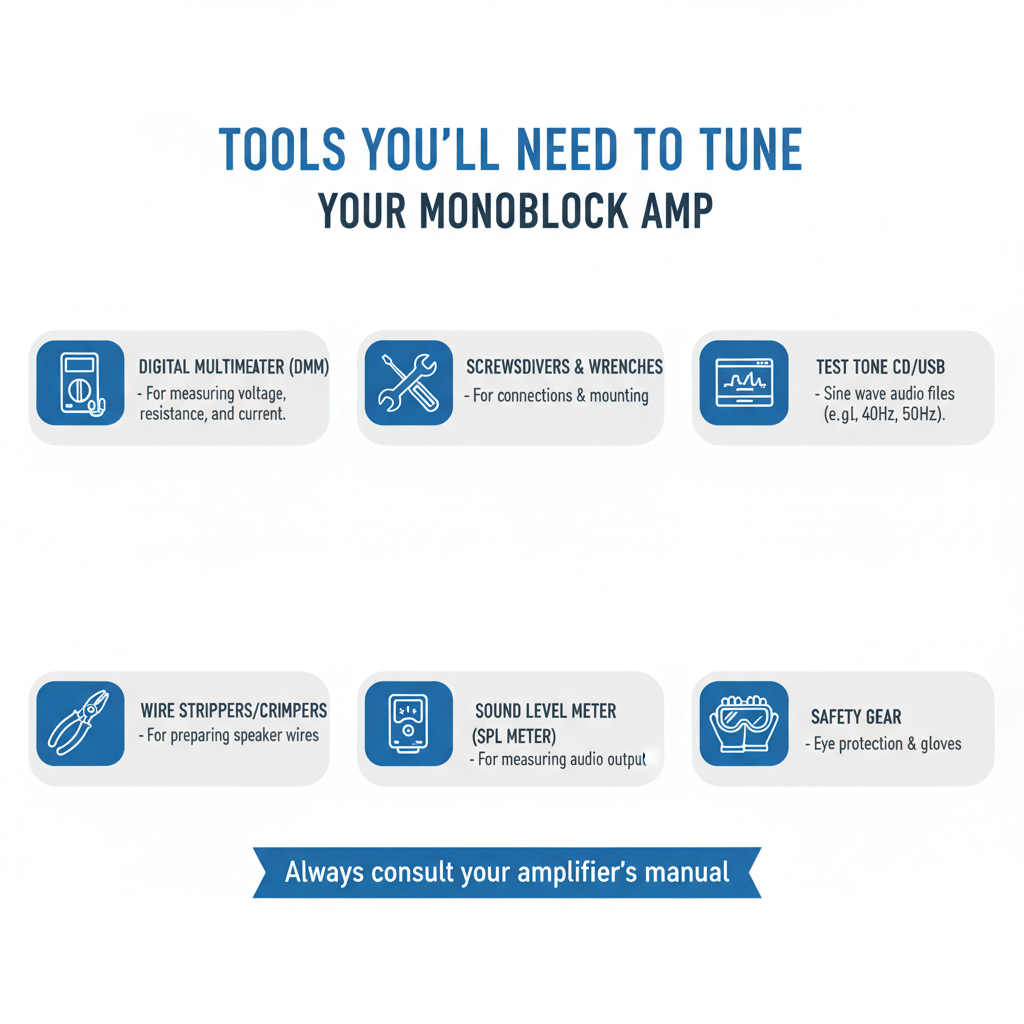
Before starting, gather these tools to make the tuning process smooth and accurate:
- Multimeter: Measures voltage to set gain precisely.
- Test tones: Use 50 Hz or 60 Hz sine wave tones (available online or on CDs).
- Screwdriver: Adjusts the amp’s control knobs.
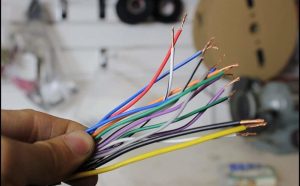
- Speaker wire and connectors: Ensures secure connections.
- Calculator: Calculates target voltage for gain setting.
- Smartphone or laptop: Plays test tones through your audio system.
- Owner’s manuals: References amp and subwoofer specifications.
Having these tools ready streamlines the process and ensures accurate adjustments.
Step-by-Step Guide to Tuning a Monoblock Car Amp
Follow these steps to tune your monoblock amp for optimal bass performance. Each step focuses on a specific setting, ensuring your subwoofer delivers clean, powerful sound.
Step 1: Prepare Your Audio System
Start by setting up your system correctly. Turn off the car stereo and disconnect the amp’s power. Check all connections between the amp, subwoofer, and head unit. Loose wires cause noise or signal loss, so ensure everything is secure. Next, set your head unit’s equalizer to flat (all bands at zero) and disable any bass boost or sound enhancements. This creates a neutral starting point for tuning. Finally, consult your amp and subwoofer manuals to understand their power ratings and recommended settings.
Step 2: Set the Gain to Minimum
Locate the gain control on your monoblock amp, often labeled as “gain” or “level.” Turn it to the minimum setting (fully counterclockwise). The gain controls the input signal strength sent to the subwoofer. Setting it too high causes clipping, which distorts sound and risks damaging your subwoofer. Starting at the minimum allows you to gradually increase the gain while monitoring the output for clarity.
Step 3: Adjust the Low-Pass Filter (LPF)
The low-pass filter restricts the frequencies sent to the subwoofer, allowing only low frequencies to pass through. This ensures your subwoofer handles bass while higher frequencies go to other speakers. Set the LPF to around 80 Hz as a starting point. If your subwoofer sounds muddy or reproduces vocals, lower the LPF to 60-70 Hz. Test the setting by playing music with strong bass. Adjust until the subwoofer focuses on deep lows without interfering with midrange frequencies.
Step 4: Configure the Subsonic Filter
The subsonic filter blocks ultra-low frequencies below the subwoofer’s capabilities, protecting it from damage. Check your subwoofer’s frequency response range in the manual (e.g., 20 Hz to 200 Hz). Set the subsonic filter slightly below the lowest frequency, typically around 15-20 Hz. This prevents the subwoofer from attempting to play inaudible frequencies that cause distortion or overheating. If your amp lacks a subsonic filter, skip this step, but consider upgrading to an amp with this feature for better protection.
Step 5: Set the Bass Boost (Optional)
Many monoblock amps include a bass boost control to enhance low frequencies. Use this sparingly, as excessive boost distorts sound and strains the subwoofer. Set the bass boost to 0 dB initially. Play a bass-heavy track and slowly increase the boost until the bass feels punchy but not overpowering. Avoid maxing out the bass boost, as it often leads to clipping and reduced sound quality. If your system sounds clean without bass boost, leave it off for the best results.
Step 6: Set the Gain Using a Multimeter
Now, set the gain accurately to match your amp’s power output to the subwoofer. Follow these steps:
- Calculate the target voltage: Use the formula
Voltage = √(Power x Resistance). For example, if your amp delivers 500 watts RMS at 4 ohms, calculate√(500 x 4) = √2000 ≈ 44.7 volts. Check your amp and subwoofer manuals for RMS power and impedance values. - Play a test tone: Connect your multimeter to the amp’s speaker output terminals. Play a 50 Hz or 60 Hz test tone through the head unit at 75% volume.
- Adjust the gain: Slowly increase the gain until the multimeter reads the target voltage (e.g., 44.7 volts). Stop if you hear distortion before reaching the target.
- Verify the setting: Play music and listen for clean bass. If you hear clipping or distortion, lower the gain slightly.
This method ensures the amp delivers optimal power without overdriving the subwoofer.
Step 7: Test and Fine-Tune the Settings
With the gain, LPF, subsonic filter, and bass boost set, test the system with various music genres. Play tracks with deep bass, such as hip-hop or electronic music, and listen for clarity and balance. Adjust the LPF if the bass feels too boomy or thin. Tweak the gain if the subwoofer lacks punch or distorts at high volumes. Fine-tuning requires patience, so make small adjustments and test repeatedly until the bass sounds powerful and clean.
Step 8: Check for Overheating and Clipping
After tuning, monitor the amp and subwoofer during extended use. Feel the amp’s heatsink after 20-30 minutes of playback. If it’s excessively hot, lower the gain or improve ventilation in your car. Listen for clipping, which sounds like crackling or popping in the bass. If clipping occurs, reduce the gain or bass boost. Regular checks prevent damage and maintain sound quality over time.
Common Mistakes to Avoid When Tuning a Monoblock Amp
Tuning a monoblock amp seems straightforward, but beginners often make these mistakes:
- Maxing out the gain: High gain causes clipping and damages the subwoofer. Always use a multimeter for precise adjustments.
- Ignoring the subsonic filter: Skipping this setting risks sending harmful frequencies to the subwoofer.
- Overusing bass boost: Excessive boost distorts bass and strains the system. Use it sparingly or not at all.
- Tuning at max volume: Setting the gain at full volume overwhelms the subwoofer. Use 75% volume for test tones.
- Neglecting acoustics: Your car’s interior affects bass response. Test settings in your vehicle, not a garage.
Avoid these pitfalls to achieve clean, powerful bass and protect your equipment.
Tips for Optimizing Your Monoblock Amp Performance
To get the most out of your monoblock amp, consider these tips:
- Upgrade your wiring: Use high-quality, oxygen-free copper wires to reduce signal loss and improve power delivery.
- Add a capacitor: A capacitor stabilizes voltage, preventing power drops during heavy bass hits.
- Soundproof your car: Apply sound-deadening materials to doors and panels to reduce vibrations and enhance bass clarity.
- Match amp and subwoofer: Ensure your amp’s power output aligns with the subwoofer’s RMS rating for optimal performance.
- Regularly check connections: Loose wires degrade sound quality. Inspect connections every few months.
These steps elevate your car audio experience and prolong the life of your system.
Troubleshooting Common Monoblock Amp Issues
Even with proper tuning, issues may arise. Here’s how to address common problems:
- No bass output: Check power connections, fuses, and the remote wire. Ensure the subwoofer is wired correctly.
- Distorted bass: Lower the gain or bass boost. Verify the LPF isn’t set too high.
- Amp overheating: Improve ventilation or reduce gain. Ensure the amp’s impedance matches the subwoofer.
- Clipping sounds: Recalibrate the gain using a multimeter. Check for damaged speaker wires.
- Weak bass: Confirm the subwoofer’s RMS rating matches the amp’s output. Adjust the LPF or add a capacitor.
If problems persist, consult a professional car audio technician.
How to Maintain Your Monoblock Amp for Longevity
Regular maintenance keeps your monoblock amp performing at its best. Clean the amp’s exterior with a dry cloth to remove dust, which can cause overheating. Check wiring connections every six months to prevent corrosion or loosening. Store the amp in a cool, dry place when not in use, especially in humid climates. Avoid running the amp at maximum volume for extended periods, as this stresses components. Finally, re-tune the amp annually or after upgrading your subwoofer or head unit to maintain optimal sound quality.
When to Seek Professional Help
While most enthusiasts can tune a monoblock amp, some situations call for professional expertise. If you’re unsure about wiring or impedance matching, a car audio technician ensures safe installation. Persistent issues like overheating, clipping, or no output may indicate internal amp damage, requiring expert diagnostics. Professionals also optimize complex systems with multiple amps or custom enclosures. Search for reputable car audio shops in your area or consult online forums for recommendations.
Conclusion
Tuning a monoblock car amp transforms your car audio system, delivering deep, clean bass that enhances every drive. By following this step-by-step guide, you’ll set the gain, low-pass filter, subsonic filter, and bass boost for optimal performance. Use a multimeter for precision, test with various tracks, and avoid common mistakes like overboosting the bass. With patience and the right tools, you’ll achieve a powerful, distortion-free soundstage that rivals professional setups. Regular maintenance and periodic re-tuning keep your system sounding great for years. Start tuning today and experience bass that shakes your car and soul.