Pioneer radios are among the most reliable audio systems on the market, known for their high-quality sound and wide range of features. Whether you’re using a basic model or one with advanced Bluetooth and touchscreen capabilities, these radios can occasionally experience issues that may require a reset. A reset can resolve common problems such as unresponsive controls, connection issues, or distorted sound. Fortunately, resetting your Pioneer radio is a simple process that doesn’t require professional assistance. In this guide, we’ll walk you through how to reset your Pioneer radio, covering both soft resets and factory resets.
Why You Might Need to Reset Your Pioneer Radio
There are various reasons why you might need to reset your Pioneer radio. Over time, the system may start to experience issues due to changes in settings, faulty connections, or minor software glitches. Some of the most common reasons to reset your Pioneer radio include:
- System Glitches: Just like any other electronic device, Pioneer radios can experience system hiccups. A reset can often resolve these minor issues.
- Connection Problems: If you’re having trouble with Bluetooth connections, USB devices, or auxiliary inputs, a reset might fix these issues.
- Incorrect Settings: If you’ve changed some settings and are unhappy with the result or are having difficulty navigating back, resetting will restore the system to its default state.
- Performance Issues: A reset can help if the radio is slow to respond or if the display freezes.
While resetting your radio can be a quick fix, it’s important to know the different types of resets available and when to use each one.
Types of Pioneer Radios
Pioneer manufactures a variety of car radios, ranging from basic models to highly advanced systems with touchscreens and built-in navigation. Depending on the type of radio you have, the process of resetting it might vary slightly.
Here are the main categories of Pioneer radios:
- Standard Car Stereos: Basic models without Bluetooth or touchscreen functionality.
- Bluetooth-Enabled Radios: These models allow for wireless audio streaming and hands-free calling.
- Touchscreen Radios: These advanced models include large displays, GPS navigation, and integrated multimedia controls.
- Double DIN Radios: Larger units that offer more features and a bigger screen.
Before starting the reset process, it’s helpful to know which type of Pioneer radio you’re dealing with, as this will influence the steps you need to follow.
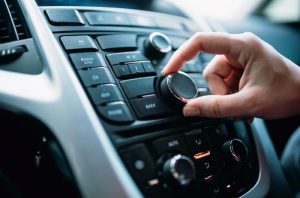
How to Perform a Soft Reset
A soft reset is the quickest way to fix minor glitches and restore basic functionality. This type of reset will not erase your stored settings, such as radio station presets or Bluetooth pairings.
Here’s how to perform a soft reset on most Pioneer radios:
- Turn Off the Radio: If your radio is still responsive, turn it off by pressing the power button. If the screen or controls are frozen, you can skip this step.
- Remove the Faceplate (If Applicable): For certain models with detachable faceplates, remove the faceplate by pressing the release button. Gently pull it away from the unit.
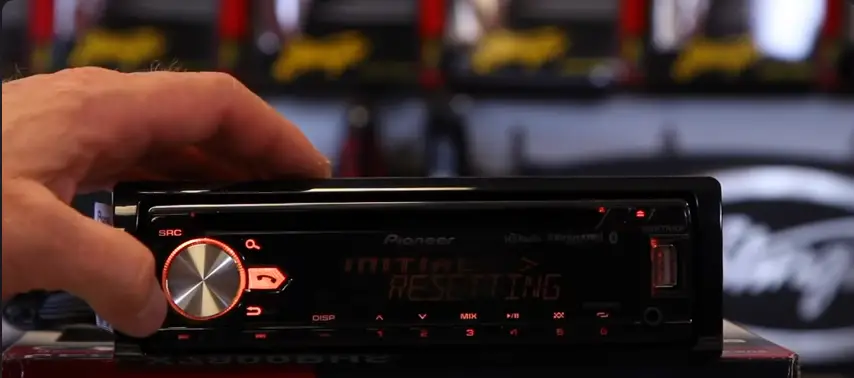
- Locate the Reset Button: Most Pioneer radios have a small reset button that can be pressed using a pointed object such as a paperclip. The reset button is usually located behind the faceplate or on the front panel of the unit.
- Press and Hold the Reset Button: Using a paperclip or similar tool, press and hold the reset button for about 5-10 seconds. Release the button after the radio turns off and on again.
- Reattach the Faceplate (If Applicable): If you removed the faceplate, reattach it by gently snapping it back into place.
After completing these steps, your Pioneer radio should be reset and ready to use. If the issue persists, you may need to perform a factory reset.
How to Perform a Hard Reset (Factory Reset)
A hard reset, also known as a factory reset, will restore your Pioneer radio to its original settings. This means all personalized settings—such as radio station presets, Bluetooth pairings, and sound preferences—will be erased. You should only perform a hard reset if a soft reset does not fix the problem or if you want to completely start over with the system’s settings.
Steps to perform a factory reset on a Pioneer radio:
- Turn Off the Radio: Press the power button to turn off the radio.
- Access the Settings Menu (For Touchscreen Models): If you have a touchscreen model, you can often find the reset option in the radio’s settings menu. Navigate to System Settings > Restore Factory Settings.
- Locate the Reset Button: If your model does not have a touchscreen, the factory reset can usually be performed using the physical reset button (as described in the soft reset instructions).
- Press and Hold the Reset Button: Using a pointed tool, press and hold the reset button for about 10-15 seconds. The screen should go blank and then show the Pioneer logo as the system reboots.
- Reconfigure Your Settings: Once the reset is complete, you will need to reconfigure your settings. This includes setting your favorite radio stations, reconnecting Bluetooth devices, and adjusting the audio settings to your preference.
A factory reset should resolve more serious issues that a soft reset couldn’t fix. However, if problems persist, you may need to check the wiring or consult a professional.
Troubleshooting Common Issues After Resetting
While a reset can resolve many problems, there are a few instances where issues might persist even after resetting the radio. Here are some common problems and solutions:
- Radio Not Turning On: Ensure that all connections are properly secured, including power cables and speaker wires. Check the car’s fuse box for any blown fuses related to the radio.
- Bluetooth Not Connecting: If Bluetooth connectivity issues persist after a reset, try deleting the radio from your phone’s list of paired devices and reconnecting it.
- USB or Auxiliary Input Not Working: Check for any dirt or debris in the USB or aux port. Also, verify that the connected device is compatible with the radio.
- No Sound: If there is no sound after resetting the radio, double-check the speaker wiring and audio settings. Ensure the volume is not muted and the speakers are properly connected.
If none of these solutions work, there could be a deeper hardware issue that requires professional attention.
How to Keep Your Pioneer Radio in Optimal Condition
Performing regular maintenance on your Pioneer radio can help prevent the need for frequent resets. Here are a few tips to ensure your radio stays in top condition:
- Update the Firmware: Pioneer occasionally releases firmware updates that can fix bugs and improve system performance. Check the Pioneer website or your radio’s settings for available updates.
- Clean the Faceplate and Buttons: Over time, dust and debris can accumulate on the faceplate and buttons, causing unresponsiveness. Regularly cleaning the radio’s exterior can help maintain smooth functionality.
- Properly Connect Devices: Ensure that Bluetooth, USB, and auxiliary devices are compatible with your radio to avoid connection issues.
- Avoid Draining the Car Battery: Turning on the radio without starting the engine for extended periods can drain the car battery. Make sure to limit the use of the radio when the engine is off.
Conclusion
Resetting your Pioneer radio is a straightforward process that can resolve a variety of issues, from minor glitches to more serious performance problems. Whether you’re performing a soft reset to fix a frozen display or a factory reset to start fresh, following the steps outlined in this guide will help you get your radio back to optimal functioning. Remember to regularly update your radio’s firmware and maintain the system to avoid future issues. With these tips, you’ll be able to enjoy your Pioneer radio to the fullest without needing professional assistance.