If you’re a car stereo enthusiast, you understand the importance of achieving the perfect sound balance in your vehicle. One way to enhance your audio experience is by installing bass blockers. These small but powerful devices help prevent unwanted low-frequency signals from reaching your speakers, ensuring your music sounds crisp and clear. In this guide, we’ll walk you through the process of how to install bass blockers, step by step, so you can enjoy optimal sound quality in your car.
Understanding Bass Blockers
Before diving into the installation process, it’s essential to grasp the basics of bass blockers. These passive electronic components are designed to block or attenuate low-frequency signals, such as bass, from reaching your speakers. They come in various forms, including capacitors and inductors, and are often used in car audio systems to prevent distortion and damage to smaller speakers when handling powerful bass frequencies.
How to Install Bass Blockers?
Gather Your Tools and Materials:
To get started, make sure you have the following tools and materials ready:
- Bass blockers (appropriate for your speaker size and power handling)
- Wire strippers
- Crimp connectors
- Wire cutters
- Screwdriver
- Electrical tape
- Wiring diagram for your car audio system (if available)
Identifying Speaker Wires:
Locate the speaker wires you plan to install the bass blockers on. Most car audio systems have separate wires for the front and rear speakers. You’ll need to identify the positive (+) and negative (-) wires for each speaker you want to connect the bass blockers to. Refer to your car’s wiring diagram or consult your car’s manual to ensure you’re working with the correct wires.
Disconnect the Car Battery:
Safety should always be a top priority when working on your car’s electrical system. Before you start the installation process, disconnect the car battery’s negative terminal to prevent any accidental electrical shocks or short circuits.
Preparing the Wires:
Using your wire strippers, carefully strip a small section of insulation from the positive and negative wires of the speakers you’re connecting the bass blockers to. Be sure not to strip too much insulation, as this can lead to electrical problems down the line.
Installing the Bass Blockers:
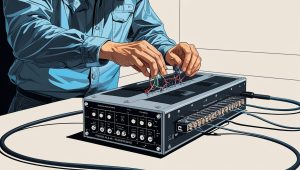
Take your bass blockers and connect them to the stripped ends of the speaker wires. Typically, bass blockers have two wires: one for input and one for output. Connect the input wire to the positive speaker wire and the output wire to the positive terminal on the speaker. Repeat this process for each speaker you’re installing bass blockers on.
Secure the Connections:
To ensure a reliable and durable connection, use crimp connectors to secure the wires together. Crimp connectors provide a strong bond and help prevent loose connections that can lead to audio issues.
Insulate the Connections:
Wrap electrical tape around the crimp connectors to insulate them and protect against any potential shorts or damage. This step is crucial to maintain the integrity of your car’s electrical system.
Reconnect the Car Battery:
With the bass blockers securely installed and all connections insulated, it’s time to reconnect the car battery. Reattach the negative terminal carefully.
Testing Your System:
Before finalizing the installation, turn on your car stereo and play some music with prominent bass frequencies. Listen carefully to ensure that the bass blockers are doing their job. You should notice a cleaner and distortion-free sound from your speakers.
Conclusion
Congratulations! You’ve successfully learned how to install bass blockers in your car stereo system. By following this step-by-step guide, you can enjoy a clearer and more balanced audio experience in your vehicle. Don’t hesitate to consult a professional if you encounter any difficulties during the installation process. Happy listening!


