Installing a backup camera system in your vehicle can significantly improve safety and make parking maneuvers much easier. Learning how to connect backup camera to head unit properly ensures you’ll have a reliable reverse camera setup that enhances your driving experience. This comprehensive guide will walk you through the entire process, from selecting compatible equipment to completing the wiring installation.
Contents
Backup Camera Systems and Head Unit Compatibility
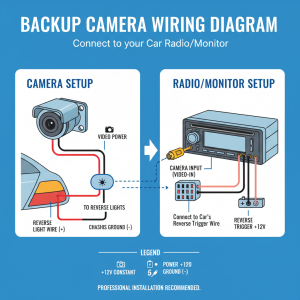
Before diving into the installation process, it’s essential to understand how backup cameras work with aftermarket head units and factory stereo systems. A backup camera system consists of several key components: the rear-view camera itself, the display monitor (your head unit), connecting cables, and power supply connections.
Modern car stereo systems and multimedia receivers often come with built-in backup camera inputs, making the connection process more straightforward. However, older head units may require additional adapters or modules to support reverse camera functionality. The key is ensuring your head unit has either a dedicated camera input or RCA video inputs that can accommodate the backup camera signal.
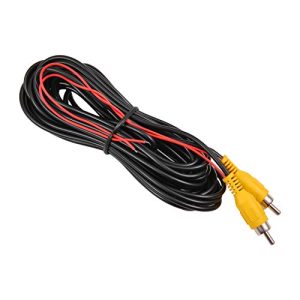
When selecting a backup camera for your vehicle, consider factors like viewing angle, night vision capabilities, and weather resistance. Most automotive cameras use standard RCA connections or proprietary plugs depending on the manufacturer. Understanding these compatibility requirements will help ensure a successful installation.
Essential Tools and Materials for Camera Installation
Gathering the right tools and materials before starting your backup camera installation will make the process much smoother. You’ll need basic automotive tools including screwdrivers, wire strippers, electrical tape, and possibly a drill for mounting the camera.
The primary materials include your backup camera, appropriate wiring harness, RCA cables for video transmission, and power cables. Many aftermarket head units come with camera-ready wiring, but you may need to purchase additional extension cables depending on your vehicle’s size.
Don’t forget safety equipment like gloves and safety glasses, especially when working around the vehicle’s electrical system. Having a multimeter on hand can help verify proper voltage and connections throughout the installation process.
Step-by-Step Guide: How to Connect Backup Camera to Head Unit
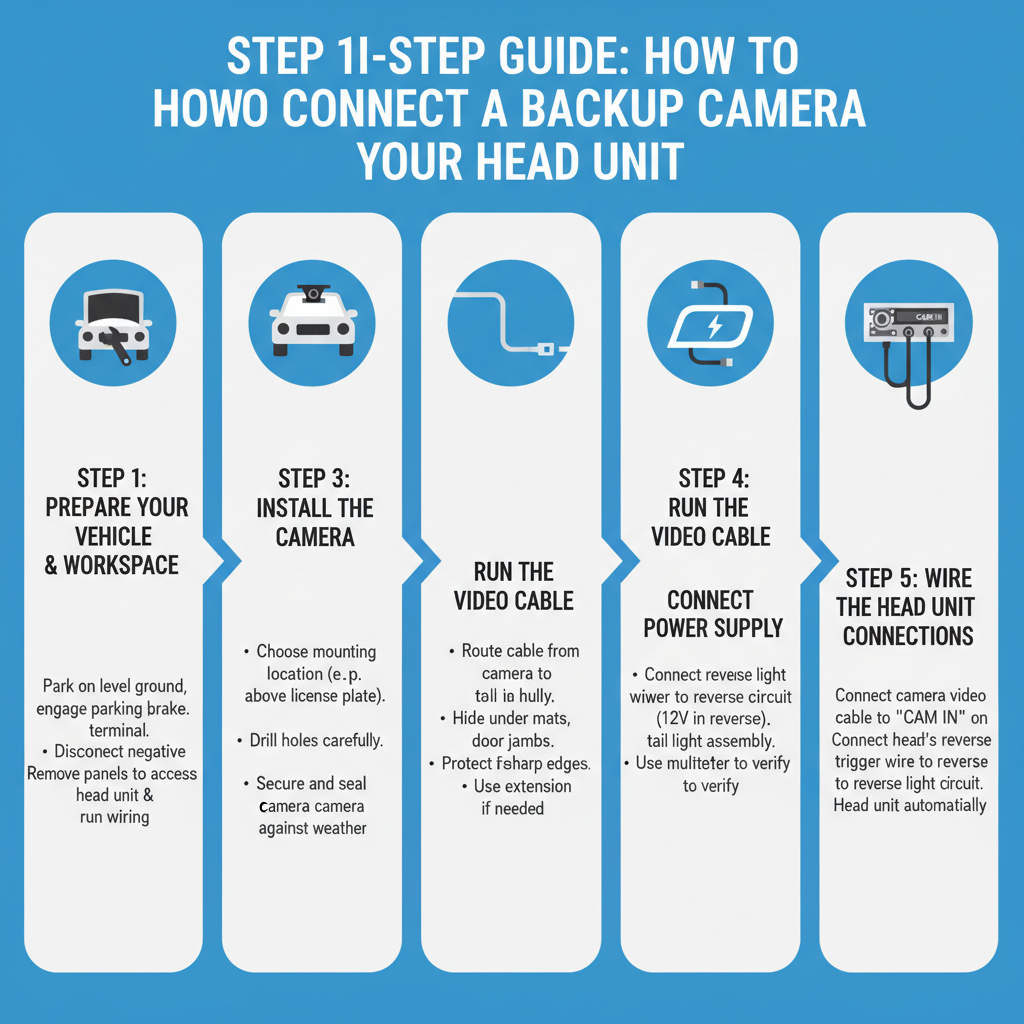
Step 1: Prepare Your Vehicle and Workspace
Start by parking your vehicle on level ground and engaging the parking brake. Disconnect the negative battery terminal to ensure safety while working with the electrical system. This prevents accidental short circuits and protects both you and your vehicle’s electronics.
Remove any panels or trim pieces necessary to access the head unit and run wiring from the front to the rear of the vehicle. Most installations require removing the dashboard trim around the stereo and possibly some interior panels to route cables properly.
Step 2: Install the Backup Camera
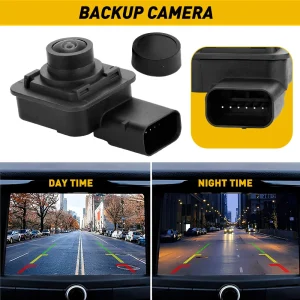
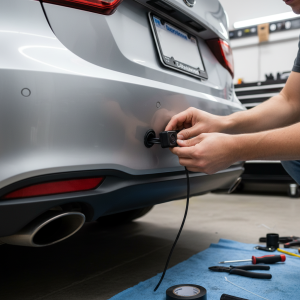
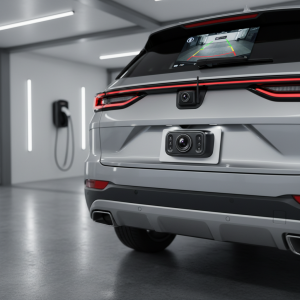
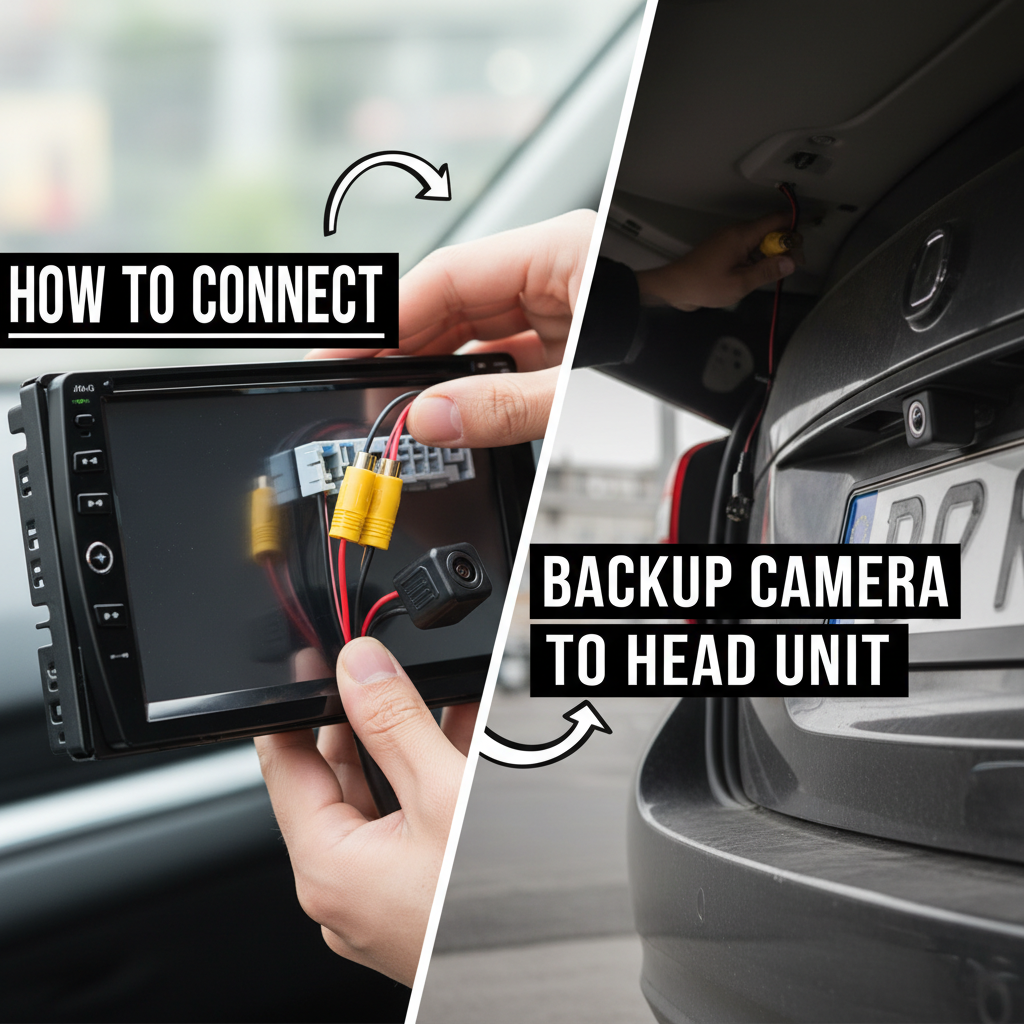
Choose an appropriate mounting location for your reverse camera, typically above the license plate or integrated into the rear bumper. The camera should provide a clear view of the area behind your vehicle without obstructions.
Drill the necessary mounting holes if required, being careful to avoid damaging any existing wiring or components behind the mounting surface. Secure the camera using the provided hardware, ensuring it’s properly sealed against weather and moisture.
Step 3: Run the Video Cable
Route the video cable from the camera location to the head unit. This often involves running cables through the vehicle’s interior, either under floor mats, through door jambs, or behind interior panels. Take care to protect the cables from sharp edges and moving parts.
For longer vehicles, you may need extension cables to reach from the rear camera to the front head unit. Ensure all connections are secure and properly insulated to prevent signal loss or interference.
Step 4: Connect Power Supply
Most backup cameras require a 12-volt power supply that activates when the vehicle is in reverse. Connect the camera’s power wire to the reverse light circuit, which provides power only when the transmission is in reverse gear.
Locate the reverse light wires at the rear of the vehicle, typically found in the tail light assembly wiring harness. Use a multimeter to verify which wire carries 12 volts when the vehicle is in reverse, then make the appropriate connection.
Step 5: Wire the Head Unit Connections
Connect the video cable from the backup camera to the appropriate input on your head unit. Most aftermarket stereos have a dedicated camera input, often labeled as “CAM IN” or similar. If your head unit doesn’t have a dedicated camera input, you may be able to use auxiliary video inputs.
Connect the reverse trigger wire from the head unit to the same reverse light circuit used for camera power. This signal tells the head unit when to automatically switch to the camera display when backing up.
Troubleshooting Common Installation Issues
Even with careful installation, you might encounter some common issues when connecting your backup camera to the head unit. Understanding these potential problems and their solutions can save time and frustration.
No Video Display: If your head unit isn’t showing the camera feed, first check all video connections. Ensure the RCA plugs are firmly seated and that you’re using the correct input on the head unit. Verify that the camera is receiving power by checking voltage at the camera’s power connection.
Poor Image Quality: Fuzzy or distorted images often result from loose connections, damaged cables, or interference from other electrical components. Check all connections and consider using higher-quality shielded cables if interference is suspected.
Camera Not Activating Automatically: If the camera display doesn’t appear when shifting into reverse, check the reverse trigger wire connection. This wire should show 12 volts when the vehicle is in reverse and zero volts in all other gear positions.
Intermittent Operation: Sporadic camera operation usually indicates loose connections or damaged wiring. Carefully inspect all connections and re-secure any loose wires. Pay particular attention to connections that may be subject to vibration or movement.
Advanced Features and Customization Options
Modern backup camera systems offer various advanced features that can enhance functionality and user experience. Many aftermarket head units allow customization of camera settings, including brightness, contrast, and display guidelines that help judge distances when parking.
Some systems support multiple camera inputs, allowing you to add side cameras or front-facing cameras for a complete surround-view system. These multi-camera setups require additional wiring and compatible head units but provide comprehensive visibility around your vehicle.
Consider cameras with night vision capabilities if you frequently drive in low-light conditions. These cameras use infrared LEDs or enhanced sensors to provide clear images even in complete darkness, significantly improving safety during nighttime reversing maneuvers.
Wireless backup camera systems are becoming increasingly popular, eliminating the need to run video cables through the vehicle. However, these systems still require power connections at the camera location and may be subject to interference or signal loss in certain conditions.
Maintenance and Long-Term Care
Proper maintenance ensures your backup camera system continues operating reliably for years to come. Regularly clean the camera lens to maintain clear image quality, especially in harsh weather conditions or dusty environments.
Periodically check all electrical connections for corrosion or looseness, particularly those exposed to weather at the rear of the vehicle. Apply dielectric grease to connections to prevent corrosion and ensure reliable electrical contact.
If you notice any degradation in image quality or system performance, address issues promptly to prevent more serious problems. Most backup camera systems are quite reliable when properly installed and maintained, providing years of improved safety and convenience.
Conclusion
Learning how to connect backup camera to head unit successfully requires careful planning, proper tools, and attention to detail during installation. By following this comprehensive guide, you can install a professional-quality backup camera system that enhances your vehicle’s safety and functionality.
Remember that proper preparation and understanding of your specific vehicle and equipment are crucial for success. Take time to research compatibility between your chosen camera and head unit, and don’t hesitate to consult professional installers if you encounter complex wiring situations.
A properly installed backup camera system provides invaluable assistance during parking and reversing maneuvers, potentially preventing accidents and property damage. The investment in time and equipment pays dividends in improved safety and peace of mind every time you drive your vehicle.