Your backup camera is a crucial safety feature that helps prevent accidents and makes parking easier. However, dirt, grime, and weather conditions can quickly obscure your rear view camera lens, compromising your visibility and safety. Learning how to clean backup camera properly ensures optimal performance and extends the life of this valuable automotive technology.
A dirty or foggy backup camera can be more than just an inconvenience—it can create dangerous blind spots when reversing. Whether you’re dealing with mud splatter, road salt, condensation, or everyday dust accumulation, regular maintenance of your reverse camera is essential for safe driving.
Contents
Understanding Your Backup Camera System
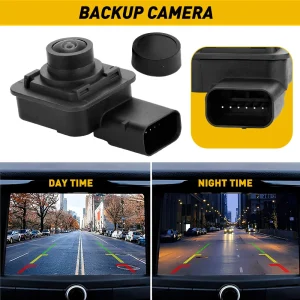
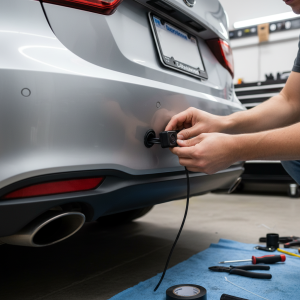
Before diving into cleaning techniques, it’s important to understand the components of your rear view camera system. Most backup cameras consist of a weatherproof lens housing, electrical connections, and mounting hardware. The camera lens itself is typically protected by a clear cover that can accumulate debris over time.
Modern reverse cameras are designed to withstand various weather conditions, but they’re not immune to dirt buildup. The location of most backup cameras—near the rear bumper or license plate—makes them particularly susceptible to road debris, mud, and other contaminants.
Essential Supplies for Camera Cleaning
Gathering the right cleaning materials is crucial for safely maintaining your backup camera without causing damage. You’ll need gentle, non-abrasive supplies that won’t scratch the lens or damage the camera housing.
Basic Cleaning Kit: – Microfiber cloths (at least 2-3 clean cloths) – Distilled water – Mild dish soap or automotive glass cleaner – Cotton swabs or soft-bristled toothbrush – Compressed air (optional) – Lens cleaning solution (camera-specific)
Advanced Cleaning Supplies: – Isopropyl alcohol (70% concentration) – Anti-fog treatment – Protective camera covers – Detailing brushes with soft bristles
Avoid using harsh chemicals, abrasive cleaners, or rough materials that could scratch or damage the camera lens. Paper towels and regular cloth can leave scratches on the delicate lens surface.
Step-by-Step Backup Camera Cleaning Process
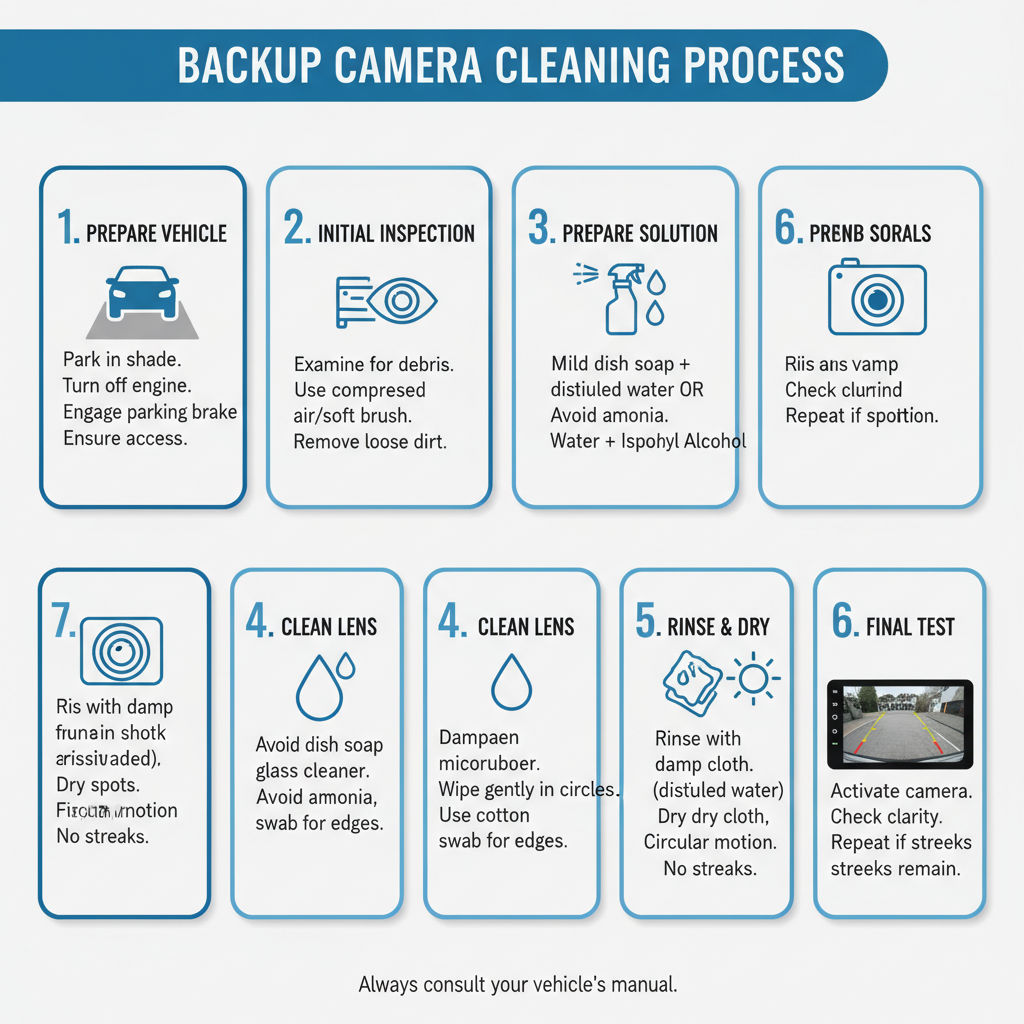
Step 1: Prepare Your Vehicle
Start by parking your vehicle in a shaded area and turning off the engine. Allow the camera to cool down if you’ve been driving, as cleaning a hot surface can cause streaking or damage.
Engage the parking brake and ensure the area around your rear bumper is easily accessible. If your backup camera is integrated into your license plate area, make sure you can reach it comfortably.
Step 2: Initial Inspection and Debris Removal
Examine your reverse camera closely to identify the type and extent of contamination. Look for mud, dust, water spots, or any physical damage to the lens housing.
Use compressed air or a soft brush to remove loose debris, leaves, or dirt particles. This prevents scratching the lens when you begin wet cleaning. Be gentle around the camera housing and avoid applying pressure to the lens itself.
Step 3: Prepare Your Cleaning Solution
Mix a small amount of mild dish soap with distilled water, or use a commercial automotive glass cleaner. Avoid ammonia-based cleaners, which can damage camera coatings and plastic components.
For stubborn grime or water spots, you can create a solution using equal parts distilled water and isopropyl alcohol. This mixture effectively cuts through road film and dried contaminants.
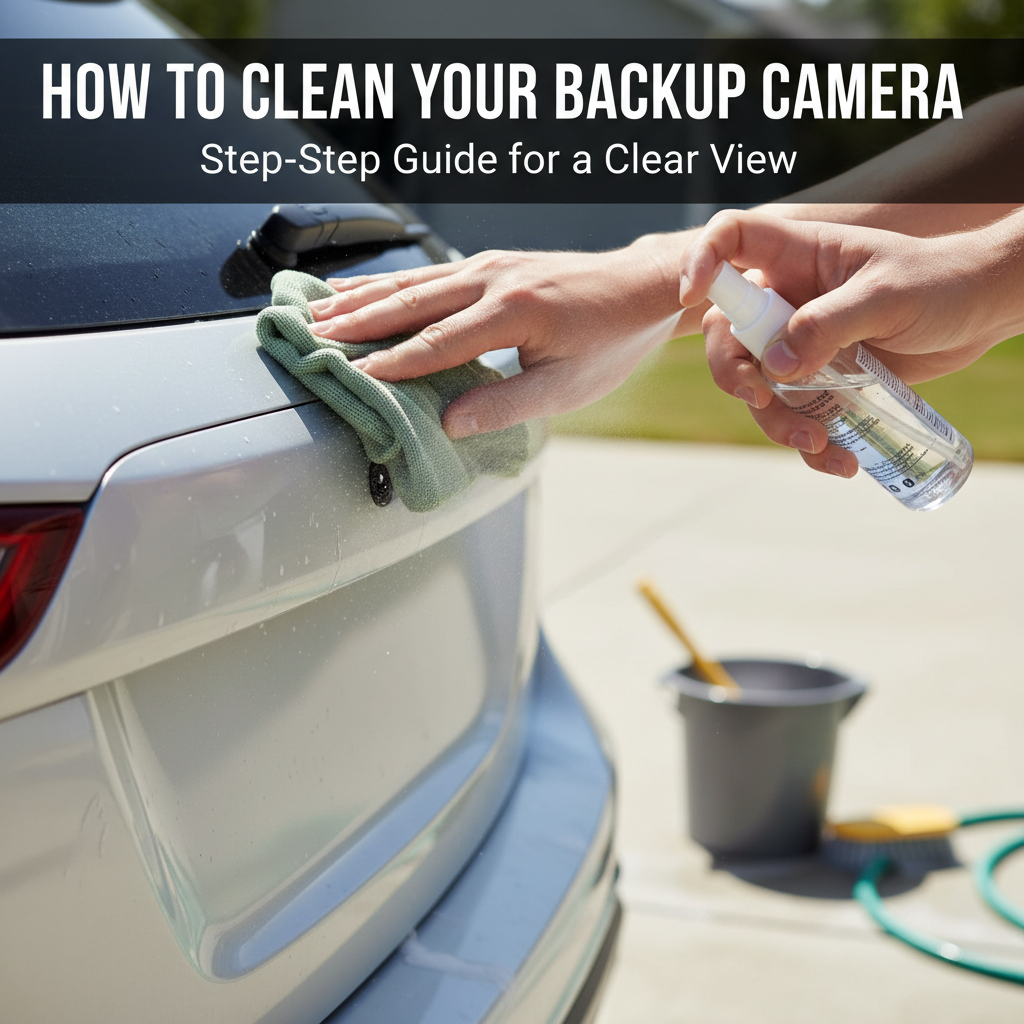
Step 4: Clean the Camera Lens
Dampen a clean microfiber cloth with your cleaning solution—it should be moist but not dripping wet. Gently wipe the camera lens in circular motions, starting from the center and working outward.
For corners and edges where dirt tends to accumulate, use a cotton swab dampened with cleaning solution. Be particularly careful around the lens edges and mounting points where debris often collects.
Step 5: Rinse and Dry
Using a separate clean, damp microfiber cloth with distilled water, remove any soap residue from the camera lens. Soap residue can create streaks or attract more dirt over time.
Dry the lens thoroughly with a clean, dry microfiber cloth using the same circular motion technique. Ensure no water spots or streaks remain on the lens surface.
Step 6: Final Inspection and Testing
Once the lens is completely dry, activate your backup camera system to test the clarity. The image should be clear and free from distortion or obstruction.
If streaks or spots remain visible on your camera display, repeat the cleaning process focusing on those specific areas.
Dealing with Specific Contamination Issues
Removing Stubborn Road Salt and Grime
Winter driving conditions often leave backup cameras coated with road salt and stubborn grime. For these challenging situations, use a slightly stronger cleaning approach.
Create a solution of warm distilled water and a small amount of white vinegar. This mixture effectively dissolves salt deposits without damaging camera components. Apply the solution and let it sit for a few minutes before gently wiping clean.
Addressing Condensation and Fogging
Internal fogging can occur when temperature differences cause condensation inside the camera housing. While you cannot clean internal condensation yourself, you can prevent it by ensuring proper drainage around the camera mount.
For external fogging, clean the lens thoroughly and apply an anti-fog treatment designed for automotive use. These products create a protective barrier that reduces future condensation buildup.
Handling Scratched or Damaged Lenses
Minor scratches on backup camera lenses can often be minimized using specialized lens polishing compounds. However, deep scratches or cracks typically require professional repair or camera replacement.
If you notice significant damage during cleaning, consult your vehicle manufacturer or a qualified automotive technician for repair options.
Preventive Maintenance and Protection Strategies
Regular cleaning is just one aspect of backup camera maintenance. Implementing preventive measures can reduce cleaning frequency and extend your camera’s lifespan.
Weekly Maintenance: – Quick visual inspection during regular car washing – Gentle wipe-down with a clean microfiber cloth – Check for loose mounting hardware or damage
Monthly Deep Cleaning: – Thorough cleaning using the complete process outlined above – Application of protective treatments – Inspection of camera housing and electrical connections
Seasonal Considerations: – Extra attention during winter months due to road salt – Increased cleaning frequency during muddy spring conditions – Protection from intense summer heat and UV exposure
Professional Maintenance and When to Seek Help
While most backup camera cleaning can be done at home, certain situations require professional attention. If your camera display shows persistent distortion, dark spots, or complete image loss after cleaning, the issue may be internal.
Professional automotive technicians have specialized tools and replacement parts for backup camera systems. They can diagnose electrical issues, replace damaged lenses, and perform software updates that might resolve display problems.
Consider professional service if you notice water damage inside the camera housing, loose mounting hardware, or if your camera system is still under warranty.
Conclusion
Learning how to clean backup camera properly is an essential skill for any vehicle owner. Regular maintenance of your rear view camera ensures optimal safety and functionality while extending the life of this important automotive technology.
By following the step-by-step cleaning process and implementing preventive maintenance strategies, you can keep your backup camera lens crystal clear in all driving conditions. Remember to use gentle cleaning materials, avoid harsh chemicals, and seek professional help when necessary.
A clean, well-maintained backup camera provides the clear visibility you need for safe reversing and parking. Make camera cleaning part of your regular vehicle maintenance routine, and enjoy the peace of mind that comes with optimal rear visibility.