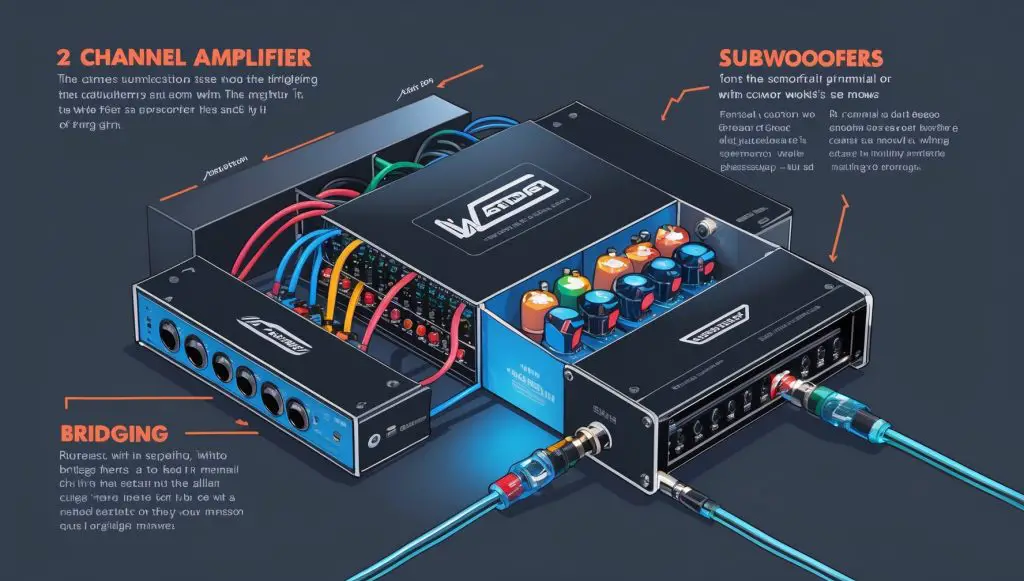
Want to shake your house to its foundations with earth-shattering bass? Bridging a 2-channel amplifier to power two subwoofers is a fantastic way to achieve monstrous low-end power. This beginner’s guide will walk you through the process step-by-step, ensuring you get the most out of your audio setup without blowing anything up. Let’s dive in!
Contents
Understanding Bridged Mode Basics
Bridging an amplifier essentially combines the power of two channels into one, doubling the voltage and significantly increasing the power output. Think of it like this: each channel normally outputs, say, 200 watts. When bridged, they combine to produce a much more powerful single channel, often around 800 watts or more (depending on the amplifier’s specifications). This increased power is ideal for driving demanding subwoofers. It’s important to note that bridging isn’t always a simple doubling; you need to consult your amplifier’s manual for the specific bridged power output.
However, bridging also alters the amplifier’s impedance requirements. Your amplifier will likely have a minimum impedance rating when bridged, which is usually higher than its standard stereo mode rating. Failing to match the impedance can damage your amplifier, so always carefully check your amplifier’s specifications and your subwoofers’ impedance before proceeding. Ignoring this crucial step can lead to a costly mistake.
Why Bridge Your 2-Channel Amp?
Bridging your amplifier offers a significant advantage: increased power output. This translates directly to louder, cleaner, and more impactful bass. If you’re looking for that deep, chest-thumping sound that only powerful subwoofers can deliver, bridging is the way to go. This is especially true if you have a pair of high-power subwoofers that demand a lot of juice to perform optimally.
Furthermore, bridging can improve the overall clarity and control of your bass response. With more power available, the subwoofers won’t struggle as much, resulting in a tighter, more defined low-end without distortion. This is particularly beneficial for genres of music with demanding basslines, such as hip-hop, electronic music, or metal. You’ll experience a noticeable upgrade in the quality of your bass.
Choosing the Right Subwoofers
Selecting the right subwoofers is paramount. First, consider the impedance. Most amplifiers have a minimum bridged impedance, often 4 ohms or higher. Therefore, you’ll need subwoofers that, when wired in parallel (as we’ll discuss later), meet or exceed this impedance requirement. Using subwoofers with too low an impedance can severely damage your amplifier.
Next, consider the power handling capacity of your subwoofers. They should be able to handle the bridged power output of your amplifier without overheating or distortion. Always choose subwoofers with a power handling capacity that comfortably exceeds the amplifier’s bridged output. Overpowering subwoofers is generally not a problem, but underpowering them can lead to distortion and damage.
Wiring Your Subs in Parallel
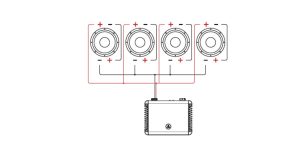
Wiring your subwoofers in parallel reduces the overall impedance while maintaining the same voltage. This is crucial because bridging an amplifier typically requires a higher impedance load than running it in stereo mode. To wire in parallel, connect the positive (+) terminals of both subwoofers together with a single wire, and similarly connect the negative (-) terminals together.
Then, run a single positive wire from the combined positive terminals to your amplifier and a single negative wire from the combined negative terminals to your amplifier. Make sure all your connections are secure and use appropriately sized speaker wire. Loose connections can lead to signal loss or even short circuits. Always double-check your wiring before connecting to the amplifier.
Connecting to the Amplifier
Now, it’s time to connect your wired subwoofers to the amplifier. Most 2-channel amplifiers have clearly marked positive (+) and negative (-) terminals for each channel. Since we’re bridging, we’ll be using both channels. Consult your amplifier’s manual for the specific bridging instructions; the process varies slightly depending on the brand and model.
Typically, you’ll connect the positive wire from your parallel-wired subwoofers to the positive terminal of one channel on the amplifier and the negative wire to the negative terminal of the other channel. The remaining terminals of the second channel will be left unconnected. Again, meticulously follow your amplifier’s instructions to avoid any mistakes. Incorrect wiring can lead to serious damage.
Setting the Amplifier’s Gain
Setting the amplifier’s gain correctly is crucial for preventing distortion and protecting your equipment. Start with the gain control completely turned down (counter-clockwise). Then, play a test track with significant bass content at a moderate volume. Slowly increase the gain control while monitoring the output.
Listen carefully for any distortion or clipping. Clipping is a harsh, grating sound indicating that the amplifier is being overdriven. Stop increasing the gain as soon as you hear any clipping. The ideal gain setting is the highest level you can achieve without any audible distortion. This ensures you’re getting the maximum clean power from the amplifier.
Adjusting the Low-Pass Filter
The low-pass filter (LPF) on your amplifier controls the frequencies sent to your subwoofers. This is essential because subwoofers are designed to reproduce only low frequencies. Setting the LPF too high will allow mid-range and high-frequency sounds to reach your subwoofers, potentially causing distortion or a muddy sound.
A good starting point for the LPF is around 80 Hz, but this can vary depending on your subwoofers and personal preference. Experiment with different settings to find the best balance between deep bass and clarity. Too low a setting might result in a less defined bass response, while too high a setting may lead to distortion or unwanted sounds. Listen critically and adjust the lpf until you achieve the desired sound.
Phase Alignment: Crucial Step!
Phase alignment is often overlooked, but it significantly impacts the overall sound quality. Incorrect phase alignment can result in a weak, thin, or even cancelled-out bass response. Most subwoofers have a phase switch (usually 0° or 180°). Experiment with both settings, playing the same test track.
Listen closely to the difference. The correct phase setting will produce a fuller, more powerful bass. If the bass seems weaker or less defined, switch the phase. The setting that produces the most impactful and defined bass is the correct one. This seemingly minor adjustment can make a huge difference in the final sound.
Testing Your Bridged Setup
After completing all the connections and adjustments, it’s time to test your setup. Play a variety of music with different bass content. Pay close attention to the quality of the bass. Is it clean, powerful, and well-defined? Or is it muddy, distorted, or weak?
If you hear any distortion, clipping, or a weak bass response, double-check all your connections, gain settings, and phase alignment. Make sure the impedance of your subwoofers matches the amplifier’s bridged impedance requirements. If the problem persists, refer to the troubleshooting section below. Thorough testing is crucial to ensure your system is performing optimally.
Troubleshooting Common Issues
If your bridged subwoofer setup isn’t working as expected, there are several potential issues to investigate. First, check all your wiring connections for any loose or incorrect connections. A single loose wire can cause significant problems. Double-check the polarity of your connections to ensure they are correctly wired in parallel.
Next, verify that your subwoofers’ impedance matches your amplifier’s bridged impedance rating. Using subwoofers with too low an impedance can damage your amplifier. Finally, if you’re still having trouble, consult your amplifier’s manual or seek assistance from an audio professional. Systematic troubleshooting will help you pinpoint the source of the problem.
Bridging your 2-channel amp to power two subwoofers is a rewarding endeavor that can significantly enhance your audio experience. By carefully following these steps and paying attention to detail, you can unleash earth-shattering bass in your home. Remember, patience and careful attention to detail are key to a successful setup. Enjoy the incredible sound!