So you’ve got a 4-channel amplifier and want to unleash its full power for a booming mono sound system? Bridging your amp is the way to go! This beginner’s guide will walk you through the process step-by-step, ensuring you do it safely and effectively. Don’t worry if you’re not an electrical engineer – we’ll keep it simple and straightforward. Let’s dive in!
Contents
- Understanding Your 4-Channel Amp
- Identifying Your Amp’s Outputs
- Choosing the Right Bridging Method
- Wiring for Mono Bridging: The Basics
- Bridging for Maximum Power Output
- Safety First: Essential Precautions
- Connecting Your Speakers Properly
- Testing Your Bridged Amp Setup
- Troubleshooting Common Bridging Issues
- Enjoying Your Powerful Mono Sound
Understanding Your 4-Channel Amp
A 4-channel amplifier, as its name suggests, has four channels, each capable of powering a single speaker. However, by bridging two channels together, you combine their power to create a single, more powerful channel. This is ideal for powering a subwoofer or other high-power speaker that demands significant wattage. Think of it like combining the strength of two people to lift a heavier object. Understanding your amp’s specifications is crucial. Check the manual for the maximum power output per channel and the bridging specifications. This information is vital for safe and effective bridging.
This understanding extends to the impedance matching capabilities of your amplifier. Bridging changes the impedance requirements, so make sure your subwoofer or speaker is compatible with the bridged impedance your amplifier can handle. Incorrect impedance matching can lead to damage to your amp or speakers. Always consult your amplifier’s manual for specific impedance ratings when bridged. Ignoring this can lead to serious problems.
Identifying Your Amp’s Outputs
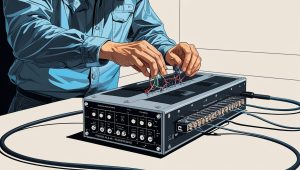
Before you even think about connecting wires, carefully identify your amplifier’s output terminals. Each channel will usually have a positive (+) and a negative (-) terminal. These are clearly labeled on most amplifiers; however, some might use color-coding instead. Common color codes include red (+) and black (-). Take your time and double-check; accuracy is paramount here. Misidentifying these terminals can lead to serious damage.
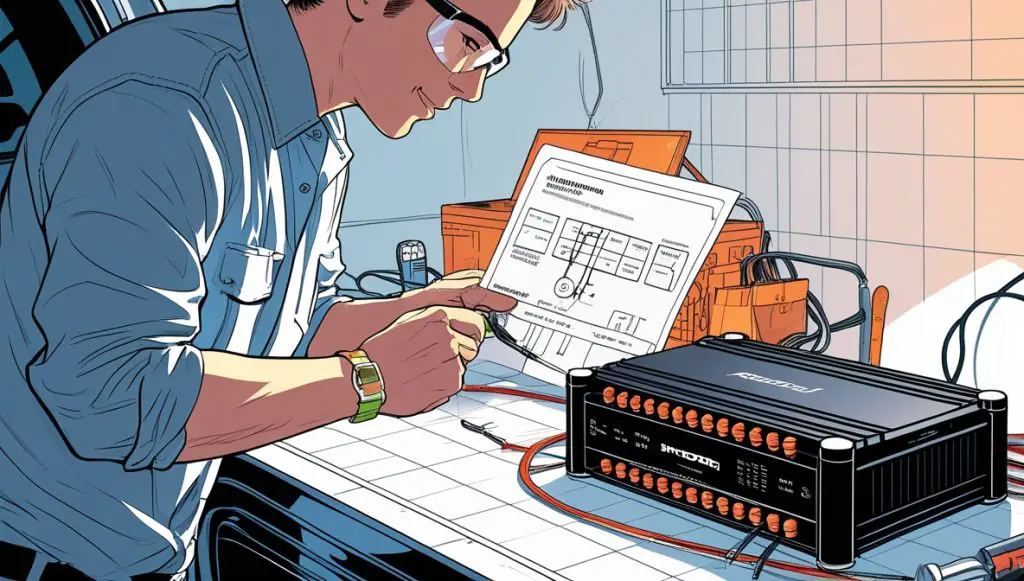
Locate the specific terminals designated for bridging. Not all 4-channel amps allow bridging all channels. Some might only allow bridging specific pairs of channels. Consult your amplifier’s manual to confirm which channels can be bridged and how to correctly identify the bridging terminals. The manual will provide diagrams and clear instructions to guide you through this process. Pay close attention to any specific instructions or warnings.
Choosing the Right Bridging Method
There are primarily two bridging methods: mono bridging and stereo bridging. Mono bridging combines all four channels into one incredibly powerful mono channel, perfect for a single subwoofer. Stereo bridging, on the other hand, combines pairs of channels to create two powerful stereo channels. This guide focuses on mono bridging, the most common method for maximizing power output for a single speaker.
The choice depends entirely on your setup and needs. If you’re aiming for maximum bass from a single subwoofer, mono bridging is your best bet. If you need two powerful channels for, say, front speakers, then stereo bridging would be more appropriate. Always refer to your amplifier’s manual to ensure your chosen method is supported by your specific model. Improper bridging can damage your equipment.
Wiring for Mono Bridging: The Basics
Mono bridging involves connecting the positive (+) terminal of one channel to the negative (-) terminal of another. This creates a single, more powerful channel. Typically, you’ll bridge two pairs of channels, effectively creating one massive channel. Start by connecting the positive (+) terminal of one channel to the negative (-) terminal of its bridged partner. Repeat this process for the other pair of channels.
Once you’ve connected the internal bridging pairs, you’ll need to connect your subwoofer. Connect the positive (+) terminal of your subwoofer to the remaining positive (+) terminal of one of the bridged channel pairs. Connect the negative (-) terminal of your subwoofer to the remaining negative (-) terminal of the other bridged channel pair. Remember to always double-check your connections before turning on the power. A simple mistake can have costly consequences.
Bridging for Maximum Power Output
Bridging significantly increases the power output, but it’s not a simple doubling of power. The actual power increase depends on the amplifier’s design and specifications. Consult your amplifier’s manual for the bridged power output rating. This rating will tell you the maximum power you can safely expect from your bridged setup. Exceeding this rating can severely damage your amplifier.
To achieve maximum power output, ensure your subwoofer’s impedance matches the bridged impedance rating of your amplifier. Mismatched impedance can lead to overheating, distortion, and potential damage to both your amplifier and subwoofer. Always prioritize safety and adhere to the manufacturer’s specifications. Remember, a safe setup is a powerful setup.
Safety First: Essential Precautions
Before you even touch a wire, disconnect the amplifier from the power source. This is the most critical safety precaution. Working with electronics involves the risk of electric shock. Always ensure the amplifier is completely disconnected from the power source before making any connections. This prevents accidental shorts and potential injury.
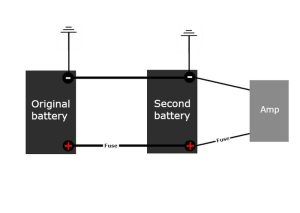
Furthermore, use the correct gauge wiring for your amplifier and subwoofer. Too thin a gauge wire can overheat and potentially cause a fire. Consult your amplifier’s manual for the recommended wire gauge. Proper wiring ensures safe and efficient power transfer. Investing in high-quality wiring is a wise decision.
Connecting Your Speakers Properly
Connecting your subwoofer correctly is crucial. Ensure you have the correct gauge wiring and that the positive (+) and negative (-) terminals are connected correctly to the amplifier’s bridged outputs. Incorrect polarity can damage your subwoofer. Double-check all connections before powering up your system. A quick visual inspection can save you from costly repairs.
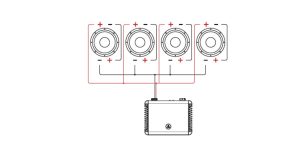
Remember, you’re only connecting one subwoofer to the bridged amplifier output. Attempting to connect multiple speakers to a single bridged channel will overload the amplifier and likely result in damage. Stick to the single subwoofer configuration for optimal performance and safety. Always refer to your subwoofer’s specifications for impedance and power handling capabilities.
Testing Your Bridged Amp Setup
Once you’ve made all connections, carefully reconnect the amplifier to the power source. Turn on the amplifier and your audio source. Start with a low volume level to avoid any potential damage. Gradually increase the volume, listening for any distortion or unusual sounds. Distortion indicates a problem with the setup or impedance mismatch.
If you hear any unusual noises, immediately turn off the system and double-check all your connections. Pay close attention to the impedance matching between your amplifier and subwoofer. If you’re still experiencing problems, refer to the troubleshooting section below. A methodical approach to testing ensures a safe and successful bridging operation.
Troubleshooting Common Bridging Issues
One common issue is distortion at higher volumes. This usually points to an impedance mismatch. Double-check the impedance rating of your subwoofer and compare it to your amplifier’s bridged impedance specification. If they don’t match, you’ll need a subwoofer with the correct impedance. Never force a mismatch – it will damage your equipment.
Another common problem is the amplifier overheating. This could be due to excessive power demands, a faulty connection, or an impedance mismatch. Check all connections, ensure proper ventilation around the amplifier, and verify the impedance matching. If the problem persists, consult a professional for assistance. Prevention is always better than cure.
Enjoying Your Powerful Mono Sound
With your 4-channel amp successfully bridged, you can now enjoy the powerful, booming sound of your subwoofer. Remember to always listen at safe volume levels to protect your hearing and your equipment. Enjoy the rich, deep bass that your bridged amplifier provides. Your hard work has paid off!
Remember, this guide provides a general overview. Always consult your amplifier and subwoofer manuals for specific instructions and safety precautions. Happy listening!
Bridging your 4-channel amplifier can significantly enhance your audio experience, especially for subwoofer applications. By following these steps and prioritizing safety, you can confidently create a powerful mono sound system. Remember to always double-check your connections and refer to your equipment’s manuals. Now go forth and enjoy your booming bass!