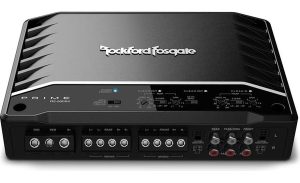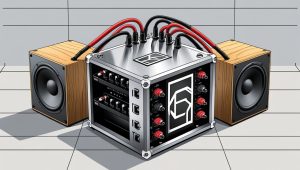
So, you’ve got a killer car audio system planned, but your amplifier just won’t quite fit in the space you’ve allocated? Don’t despair! This guide will walk you through using an oscillating tool to precisely modify your amplifier’s mounting location. We’ll cover everything from safety precautions to final testing, making this a beginner-friendly guide to achieving a perfect, custom fit for your car amp. Remember, safety first! Always prioritize your well-being and work in a well-ventilated area. Let’s get started!
Contents
- Getting Started: Amp & Oscillating Tool Safety
- Choosing the Right Oscillating Tool Bit
- Preparing Your Car Amplifier for Work
- Making the Initial Cuts Carefully
- Shaping the Amp’s Mounting Location
- Fine-Tuning the Fit with Precision
- Addressing Any Irregularities or Gaps
- Securing the Amp in its New Home
- Wiring and Connection Considerations
- Testing Your Newly Installed Amp
Getting Started: Amp & Oscillating Tool Safety
First and foremost, safety is paramount. Before you even touch your amplifier or oscillating tool, ensure you’re working in a well-lit, clean, and spacious area. This minimizes the risk of accidents. Always disconnect the car battery’s negative terminal before starting any work on your car’s electrical system. This prevents accidental shorts and protects you from electric shock. Failing to do so could lead to serious injury or damage to your vehicle.
Furthermore, familiarize yourself with your oscillating tool’s operation. Read the manufacturer’s instructions carefully. Always wear appropriate safety gear, including safety glasses to protect your eyes from flying debris, hearing protection to dampen the tool’s noise, and work gloves to protect your hands. Remember, even a small mistake can lead to damage or injury, so take your time and be methodical in your approach.
Choosing the Right Oscillating Tool Bit
Selecting the appropriate oscillating tool bit is crucial for achieving clean, precise cuts. For modifying your amplifier’s mounting location, you’ll likely need a fine-tooth wood or metal blade, depending on the material of your amplifier’s casing. A fine-tooth blade provides more control and minimizes the risk of tearing or chipping the material. Avoid using coarse blades, as these can cause excessive vibration and potentially damage your amplifier.
Moreover, consider the thickness of the material you’ll be cutting. A thinner blade might be suitable for thin metal casings, while a thicker, more robust blade might be necessary for thicker plastic or metal. Always choose a blade that’s compatible with your oscillating tool. Inspect the blade for any damage before use and replace it immediately if you notice any cracks or wear. A dull blade will make cutting more difficult and increase the risk of accidents.
Preparing Your Car Amplifier for Work
Before you start cutting, thoroughly clean your amplifier. Remove any dust or debris that might interfere with your work. This ensures a clean working surface and prevents accidental scratching of the amplifier’s casing. Next, carefully mark the areas on the amplifier that need to be modified. Use a pencil or marker to outline the precise areas you’ll be cutting. This helps you maintain accuracy and prevents unintended cuts.
Subsequently, consider using masking tape to protect areas you don’t want to cut. This will help prevent accidental damage to the amplifier’s surface and will make the cutting process more controlled. Take your time with this step; accurate marking is essential for a clean, professional-looking result. Remember, you can always make smaller cuts, but you can’t put material back once it’s been removed.
Making the Initial Cuts Carefully
With your markings in place, begin making your initial cuts. Start slowly and use gentle pressure. Avoid forcing the oscillating tool; let the blade do the work. Make small, controlled cuts, gradually removing material until you achieve the desired shape. Regularly check your progress and compare it to your markings.
Furthermore, remember that you can always make more cuts, but you can’t easily undo them. It’s better to err on the side of caution and make smaller cuts than to risk removing too much material. Take breaks if you start to feel tired or rushed. Fatigue can lead to mistakes, so prioritize safety and accuracy over speed.
Shaping the Amp’s Mounting Location
Once you’ve made your initial cuts, you can start shaping the amplifier’s mounting location. Use the oscillating tool to carefully remove any excess material. Work slowly and methodically, checking your progress frequently. Remember, you’re aiming for a snug fit, not a loose one.
In addition, consider using various sanding tools to smooth out any rough edges or imperfections after making the cuts. This will ensure a clean, professional finish. Use progressively finer grits of sandpaper to achieve a smooth surface. Take your time and be patient; this step will significantly improve the overall look and feel of your installation.
Fine-Tuning the Fit with Precision
After shaping the amplifier’s mounting location, it’s time for fine-tuning. This involves making small, precise adjustments to ensure a perfect fit. Use the oscillating tool with extra care during this stage, making only minimal cuts as needed. Regularly test the fit of the amplifier to ensure it’s fitting correctly.
Consequently, if you notice any areas where the amplifier is still too tight, make small cuts to relieve the pressure. If it’s too loose, you may need to add some material to fill the gaps, perhaps using automotive-grade filler and sandpaper. This meticulous approach will guarantee a perfect, custom fit for your amplifier.
Addressing Any Irregularities or Gaps
During the shaping process, you might encounter irregularities or gaps. These can be addressed using various techniques. For smaller gaps, you might use automotive-grade filler to fill the voids. Allow the filler to dry completely before sanding it smooth. For larger gaps, you might need to make additional cuts to create a more uniform surface.
Similarly, you can use epoxy putty to fill any gaps that are too large for filler. Ensure the putty is fully cured before continuing with the installation. Be patient and take your time addressing these issues; a well-finished installation will look much more professional.
Securing the Amp in its New Home
Once you’ve achieved the perfect fit, it’s time to secure the amplifier in its new home. Use appropriate mounting hardware, such as screws or bolts, to firmly attach the amplifier to its mounting location. Ensure the screws or bolts are properly tightened to prevent the amplifier from moving or vibrating during operation.
Moreover, consider using vibration dampening material, such as rubber washers or grommets, to minimize vibrations and noise. This will improve the overall performance and longevity of your car audio system. Make sure the amplifier is securely fastened and won’t move around, especially during rough driving conditions.
Wiring and Connection Considerations
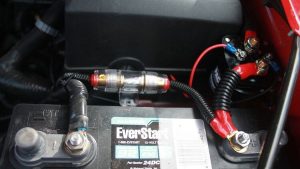
Before connecting your amplifier, double-check all your wiring. Ensure all connections are secure and properly insulated. Use appropriate gauge wire for your amplifier’s power requirements. Incorrect wiring can lead to damage to your amplifier or even a fire. Always consult your amplifier’s manual for specific wiring instructions.
Additionally, ensure your ground connection is clean and secure. A poor ground connection can lead to noise and other problems. Use a sturdy ground wire and connect it to a clean, bare metal surface on your vehicle’s chassis. Take your time and double-check everything before turning on your system.
Testing Your Newly Installed Amp
Finally, it’s time to test your newly installed amplifier. Reconnect the car battery’s negative terminal. Turn on your car’s audio system and test the amplifier’s functionality. Listen for any unusual noises or distortions. Check all the connections again to ensure everything is secure.
In conclusion, if everything sounds good and the amplifier is working correctly, congratulations! You’ve successfully modified your amplifier’s mounting location using an oscillating tool. If you encounter any problems, double-check your work and consult your amplifier’s manual or seek professional assistance. Enjoy your upgraded car audio system!
Modifying your car amplifier’s mounting location with an oscillating tool requires precision and patience. By following these steps and prioritizing safety, you can achieve a perfect, custom fit for your amplifier. Remember, always take your time, double-check your work, and don’t hesitate to seek professional help if needed. Happy listening!