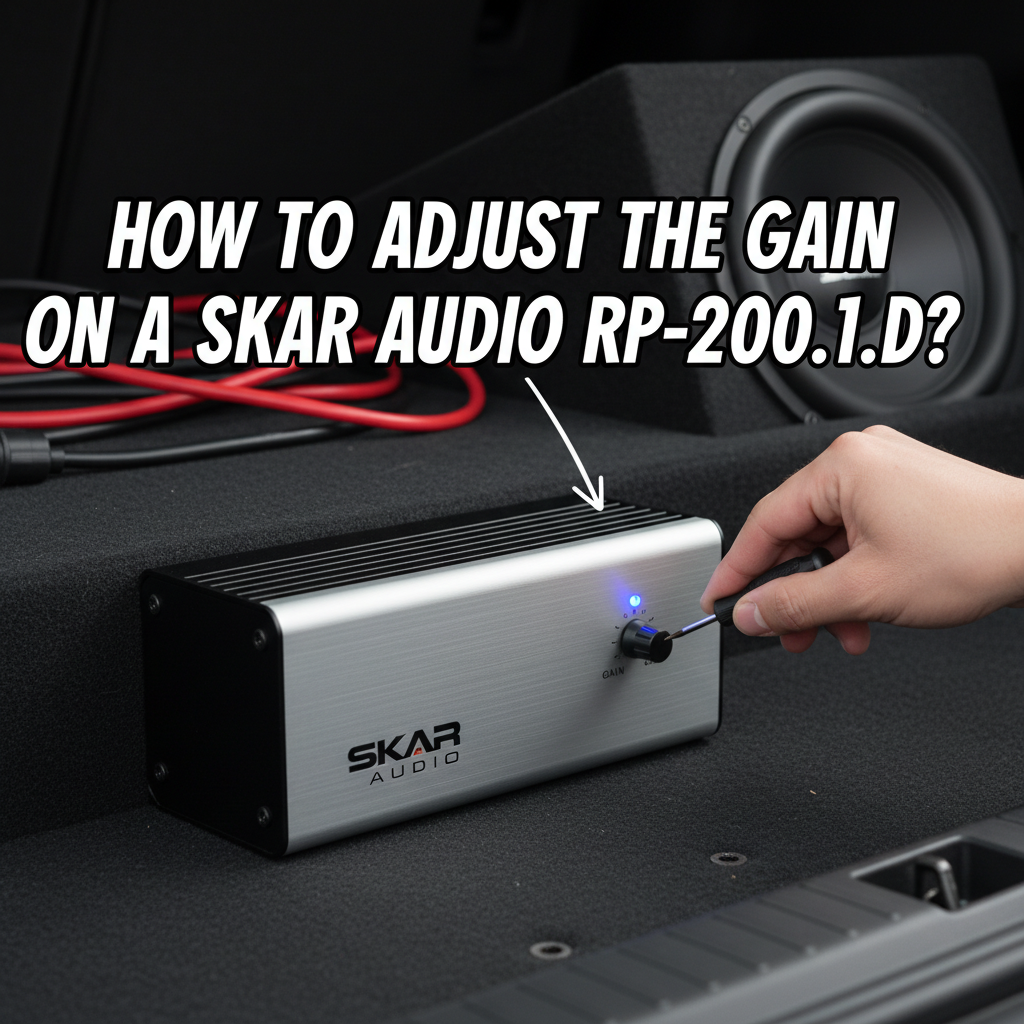
Setting the gain on your Skar Audio RP-2000.1D amplifier is crucial for achieving optimal sound quality and preventing damage to your speakers. This powerful monoblock amplifier requires precise gain adjustment to deliver clean, distortion-free bass while protecting your equipment from overdriving.
To adjust the gain on a Skar Audio RP-2000.1D, turn the gain knob counterclockwise to minimum, play test music at 75% head unit volume, then slowly increase the gain clockwise until you hear slight distortion, then back it off slightly. Use a multimeter for precise voltage matching based on your subwoofer’s impedance and power handling.
This guide will walk you through the proper gain adjustment process, explain the technical considerations, and help you avoid common mistakes that can damage your audio system.
Contents
- Understanding Gain vs Volume Control of an Amplifier
- Required Tools and Preparation to Adjust the Gain on a Skar Audio RP-2000.1D
- Step-by-Step Gain Adjustment Process on a Skar Audio RP-2000.1D
- Calculating Proper Voltage Settings
- Common Gain Setting Mistakes
- Fine-Tuning for Different Music Types
- Troubleshooting Gain-Related Issues
- Frequently Asked Questions
- Maximizing Long-Term Performance
Understanding Gain vs Volume Control of an Amplifier
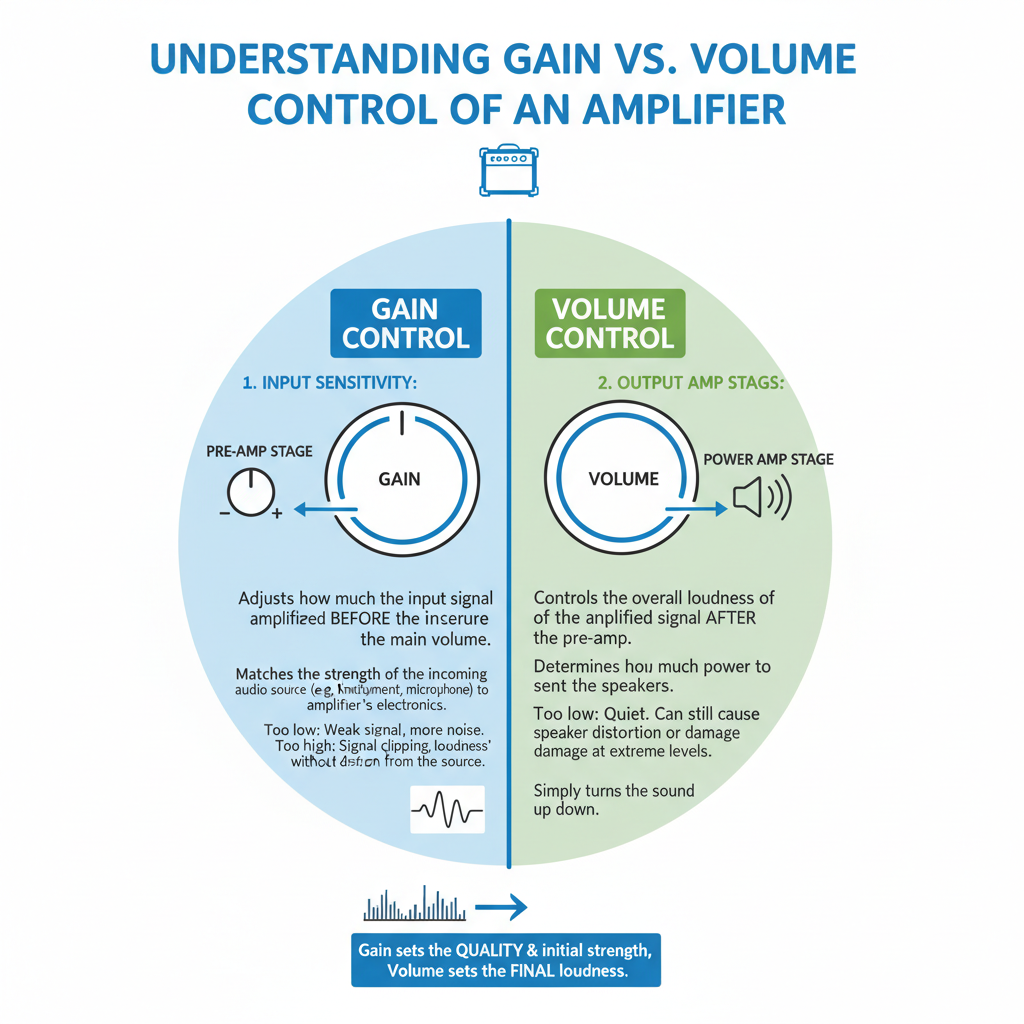
Many car audio enthusiasts confuse gain with volume, but they serve completely different purposes. Gain controls the input sensitivity of your amplifier, determining how much input signal is needed to produce full power output.
Volume controls the actual output level you hear. Think of gain as setting the “ceiling” for your amplifier’s performance, while volume determines how close you get to that ceiling during normal listening.
Setting gain incorrectly can cause clipping, distortion, or inadequate power delivery to your subwoofers. The RP-2000.1D’s gain control ranges from approximately 0.2V to 5V input sensitivity, allowing compatibility with various head unit output levels.
Required Tools and Preparation to Adjust the Gain on a Skar Audio RP-2000.1D
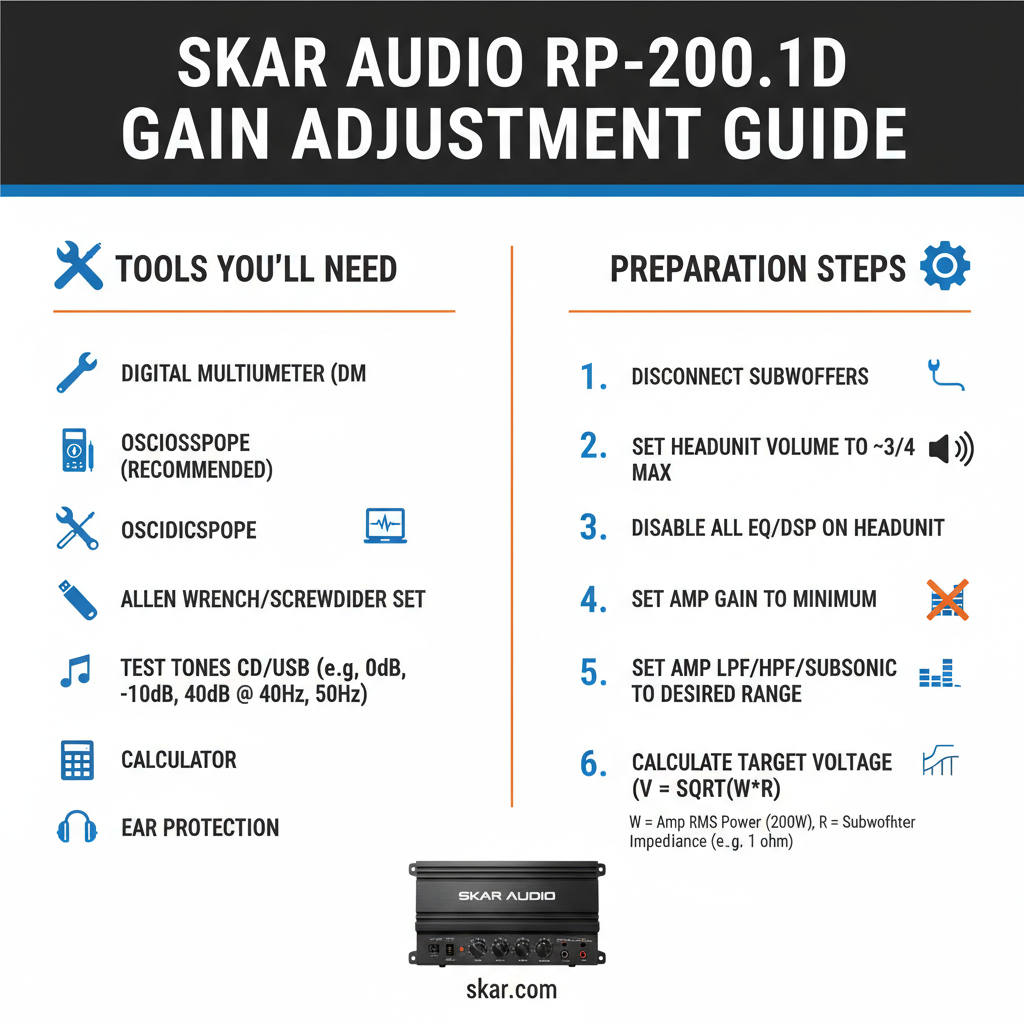
Before adjusting your RP-2000.1D’s gain, gather these essential tools:
A digital multimeter capable of measuring AC voltage is your most important tool. This allows precise measurement of the amplifier’s output voltage, ensuring you match your subwoofer’s power handling capabilities exactly.
You’ll also need test music with consistent bass content. Choose tracks without excessive dynamic range or sudden volume changes. Electronic music or bass test tones work well for this purpose.
Have your subwoofer specifications readily available, including RMS power handling and impedance. The RP-2000.1D produces different power levels depending on the load impedance, so knowing whether you’re running 1-ohm, 2-ohm, or 4-ohm loads is critical.
Step-by-Step Gain Adjustment Process on a Skar Audio RP-2000.1D
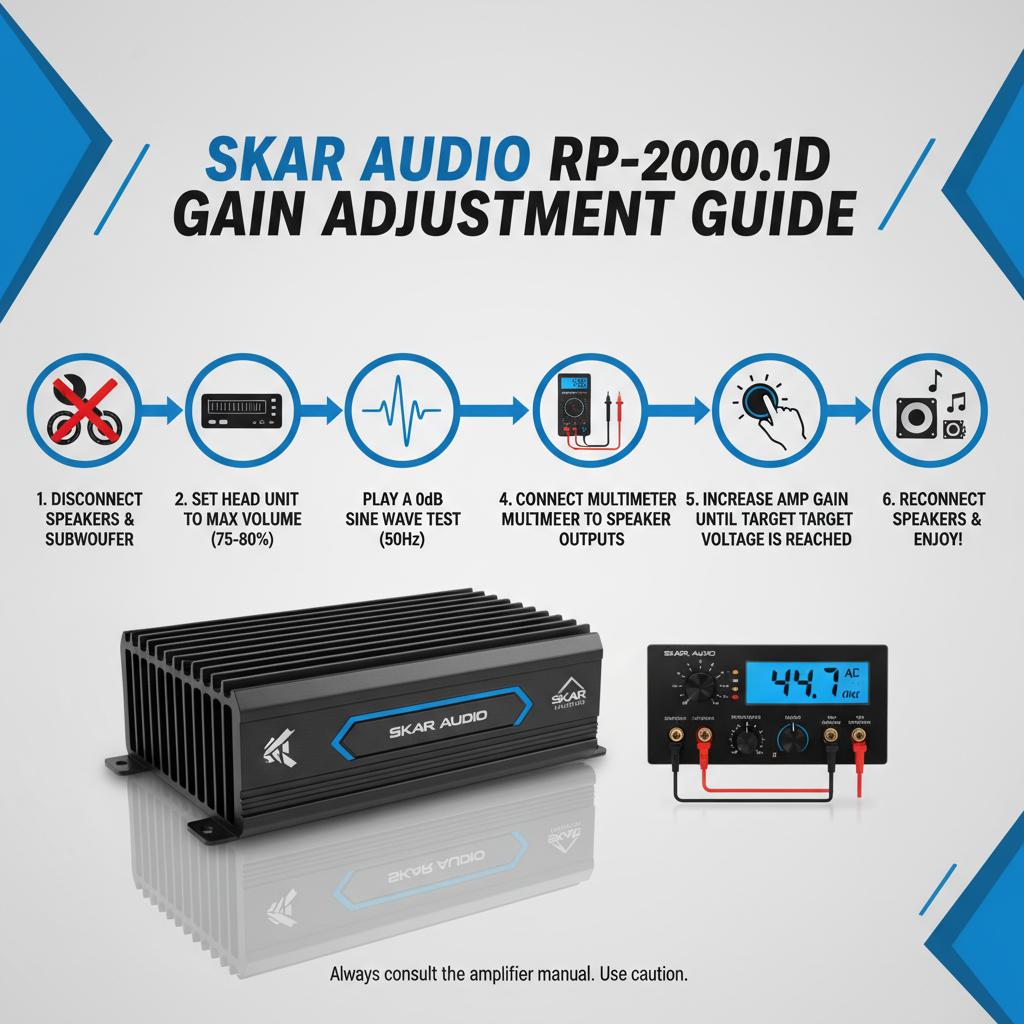
Start with all system components properly connected and the amplifier powered off. Verify all wiring connections are secure and the amplifier’s protection circuits aren’t engaged.
Turn the gain control fully counterclockwise to its minimum position. This prevents any potential damage during the initial setup process and gives you a safe starting point.
Set your head unit volume to approximately 75% of maximum. This represents the loudest listening level you’ll typically use and ensures the gain is set for real-world conditions rather than unrealistic maximum volumes.
Power on the system and begin playing your test music. The output should be very quiet or inaudible at this point, which is expected with the gain at minimum.
Slowly rotate the gain control clockwise while listening carefully for distortion. The goal is to find the point where the amplifier just begins to clip or distort, then back off slightly from that point.
Calculating Proper Voltage Settings
For precise gain adjustment, calculate the target voltage based on your subwoofer configuration. Use the formula: Voltage = √(Power × Impedance) to determine the correct AC voltage output.
If you’re running a single 4-ohm subwoofer rated for 1000W RMS, your target voltage would be √(1000 × 4) = 63.2V AC. For dual 2-ohm subwoofers wired to 1-ohm final impedance and handling 800W each, calculate √(1600 × 1) = 40V AC.
Connect your multimeter’s probes to the amplifier’s speaker terminals while playing test music. Adjust the gain until the multimeter reads your calculated target voltage. This method provides the most accurate gain setting possible.
Field experience shows that voltage-based gain setting prevents both underpowering and overpowering scenarios. Many installers rely solely on listening for distortion, but multimeter measurements eliminate guesswork and protect expensive equipment.
Common Gain Setting Mistakes
Setting gain too high is the most frequent error, leading to clipping and potential speaker damage. Many users assume higher gain equals better performance, but excessive gain actually reduces sound quality and system reliability.
Another common mistake is setting gain based on maximum head unit volume rather than typical listening levels. This approach often results in insufficient output during normal use, forcing users to push their head units into distortion territory.
Ignoring impedance changes when adding or removing subwoofers also causes problems. The RP-2000.1D’s power output varies significantly with load impedance, so gain settings must be readjusted whenever the speaker configuration changes.
Some installers set gain with the bass boost engaged, then later adjust the bass boost without rechecking gain settings. This sequence can easily push the amplifier into clipping when both controls interact.
Fine-Tuning for Different Music Types
Different musical genres may require slight gain adjustments for optimal performance. Electronic music with heavy, sustained bass might need slightly lower gain settings to prevent thermal issues during extended listening sessions.
Rock and pop music typically work well with standard gain settings since the bass content varies more dynamically. Jazz and classical music often benefit from slightly higher gain settings due to their generally lower bass levels and greater dynamic range.
In practice, most users find a single gain setting that works well across various music types. However, if you primarily listen to one genre, optimizing for that specific content can improve overall satisfaction.
Consider your typical listening environment as well. Highway driving with significant road noise might require different gain settings compared to quiet residential listening.
Troubleshooting Gain-Related Issues
If your system sounds weak despite proper gain adjustment, check for impedance mismatches or wiring problems. The RP-2000.1D performs best when presented with stable impedance loads matching its design specifications.
Thermal protection activation often indicates gain settings that are too aggressive for your cooling setup or listening habits. Reduce gain slightly and ensure adequate amplifier ventilation before assuming equipment failure.
Ground loop noise can sometimes be mistaken for gain-related distortion. If you hear noise that doesn’t change with gain adjustment, investigate grounding and signal cable routing issues instead.
Intermittent distortion that comes and goes might indicate loose connections rather than improper gain settings. Verify all power and signal connections are tight and properly secured.
Frequently Asked Questions
Should I set gain with bass boost on or off?
Always set gain with bass boost and other EQ controls at their neutral positions first. Once gain is properly adjusted, you can add modest amounts of bass boost if desired, but monitor for clipping.
Can I damage my amplifier by setting gain too low?
No, setting gain too low won’t damage your amplifier, but it will result in poor performance and insufficient output. You might compensate by turning up your head unit volume, potentially introducing distortion from that source.
How often should I readjust the gain?
Gain settings should remain stable once properly set. Only readjust if you change speakers, modify the electrical system, or notice performance changes that suggest component aging or failure.
What’s the difference between gain and level controls?
Gain adjusts input sensitivity, while level controls adjust output. Some amplifiers have both controls, allowing fine-tuning of both input matching and final output levels independently.
Why does my amp go into protection when I increase gain?
Protection mode activation during gain adjustment usually indicates you’re pushing the amplifier beyond its thermal or electrical limits. Reduce gain, check impedance loads, and verify adequate cooling.
Can I use an oscilloscope instead of a multimeter?
Yes, an oscilloscope provides even more precise gain adjustment by showing the actual waveform shape. Look for the onset of clipping (flattened waveform peaks) and adjust gain to stay just below that point.
Should gain settings change with different head units?
Yes, different head units have varying output voltages. When changing head units, always recheck and adjust gain settings to match the new unit’s output characteristics.
Maximizing Long-Term Performance
Proper gain adjustment extends beyond initial setup. Monitor your system’s performance over time and be prepared to make minor adjustments as components age or environmental conditions change.
Temperature variations affect amplifier performance, so gain settings that work perfectly in moderate weather might need slight adjustment during extreme heat or cold. The RP-2000.1D includes thermal protection, but proper gain setting reduces the likelihood of protection activation.
Regular system maintenance includes periodic gain verification, especially after any electrical system modifications or component replacements. A multimeter check every six months ensures your settings remain optimal.
Document your final gain settings and the conditions under which they were set. This information proves valuable for troubleshooting future issues or training others who might work on your system.
Setting the gain correctly on your Skar Audio RP-2000.1D amplifier ensures optimal performance, protects your equipment, and delivers the clean, powerful bass response this amplifier is designed to provide. Take time to measure and adjust properly rather than relying on guesswork – your ears and your wallet will thank you for the precision approach.