A blown speaker can be incredibly frustrating, silencing your favorite music or movie soundtrack. Fortunately, identifying a blown speaker isn’t always a complex process. This beginner’s guide will walk you through several methods to diagnose a faulty speaker, from simple listening tests to using a multimeter for a more in-depth examination. By the end, you’ll be better equipped to determine if your speaker needs repair or replacement.
Contents
- Identifying a Blown Speaker: Key Signs
- Distorted Sound: A Common Symptom
- Reduced Volume: Is Your Speaker Faint?
- Crackling or Popping Noises Heard?
- Buzzing Sounds: A Sign of Speaker Damage
- One-Sided Sound: Check for Imbalance
- Visual Inspection: Look for Physical Damage
- Testing with Different Audio Sources
- Using a Multimeter for Speaker Testing
- Professional Diagnosis: When to Seek Help
Identifying a Blown Speaker: Key Signs
Identifying a blown speaker often involves a combination of listening carefully and visually inspecting the unit. Several telltale signs can indicate a problem. These signs range from subtle changes in sound quality to more obvious physical damage. Paying attention to these clues can save you time and potential further damage to your audio equipment. Don’t hesitate to check multiple symptoms, as a single symptom might have other causes.
Furthermore, the severity of the damage will often dictate the prominence of these signs. A slightly damaged speaker might only exhibit a minor distortion, while a completely blown speaker will likely show multiple, severe issues. Keep in mind that some issues might be subtle, requiring a keen ear and careful observation. Therefore, it’s beneficial to compare the sound to another working speaker of the same model to ensure an accurate diagnosis.
Distorted Sound: A Common Symptom
One of the most common indicators of a blown speaker is distorted sound. Instead of clear, crisp audio, you’ll hear a fuzzy, muddy, or harsh sound. This distortion can manifest at any volume level, but it’s often more noticeable at higher volumes. The sound might be rasping, crackling, or simply lack clarity and definition. It’s important to differentiate this from other audio issues such as poor equalization settings or a problem with the source material.
Consequently, if you notice this type of distortion only when playing certain files or at specific frequencies, the issue might lie elsewhere in your audio chain. However, if the distortion is consistent across various audio sources and volume levels, it strongly suggests a problem with the speaker itself. Try playing a variety of audio files – music with different genres, podcasts, and even system sounds – to help isolate the problem.
Reduced Volume: Is Your Speaker Faint?
A significant drop in volume, especially when compared to other speakers in the same system, is another red flag. This isn’t just a slight decrease; it’s a noticeable reduction in the speaker’s output, even when the volume control is turned up. The sound might seem faint or weak, lacking the power and punch it once had. This reduction in volume is often coupled with other symptoms, such as distortion.
Moreover, a gradual decrease in volume over time can also be a symptom. This might indicate a progressive failure of the speaker components, where the internal parts are slowly degrading. In contrast, a sudden drop in volume often points to a more catastrophic failure. It’s crucial to compare the affected speaker’s volume to a known good speaker playing the same audio at the same settings.
Crackling or Popping Noises Heard?
Crackling or popping noises emanating from the speaker are a clear indication of internal damage. These noises are usually intermittent, occurring at random intervals during playback. They can range from subtle clicks to loud pops, depending on the severity of the damage. These sounds are often caused by loose internal connections or damaged voice coils within the speaker.
In addition, these sounds can worsen with increased volume or specific frequencies. If you hear these crackling sounds only at certain volume levels or when playing particular types of music, it points towards a specific frequency range being affected. If the crackling is persistent and doesn’t disappear regardless of the audio source or volume, it’s a strong indication that the speaker is damaged and needs attention.
Buzzing Sounds: A Sign of Speaker Damage
A persistent buzzing sound, even when no audio is playing, is a strong indicator of a problem within the speaker. This buzzing is usually a low-frequency hum that can be quite annoying. It’s often caused by a faulty voice coil or a short circuit within the speaker’s internal components. The buzzing might change in intensity depending on the proximity to other electrical devices.
Similarly, the buzzing might increase in intensity when the volume is adjusted or when the speaker is touched. This can indicate a loose connection or a problem with the speaker’s wiring. If the buzzing is accompanied by other symptoms, such as distortion or reduced volume, the likelihood of a blown speaker is even higher. Consider carefully isolating the source of the buzzing sound to rule out other potential causes like interference from nearby electrical equipment.
One-Sided Sound: Check for Imbalance
If you’re using a stereo system and notice that one speaker is significantly quieter or produces a different sound than the other, it could indicate a problem with the quieter speaker. This imbalance in sound isn’t necessarily due to a volume control issue; it’s a difference in the actual audio output. The sound might be distorted, muffled, or simply weaker on the affected side.
To further investigate, try swapping the speaker wires to see if the problem follows the speaker or the wire. If the problem moves with the speaker, the speaker itself is likely faulty. If the problem remains with the same output channel, the issue might be with the amplifier or the audio source. A careful comparison between the two channels is essential for accurate diagnosis.
Visual Inspection: Look for Physical Damage
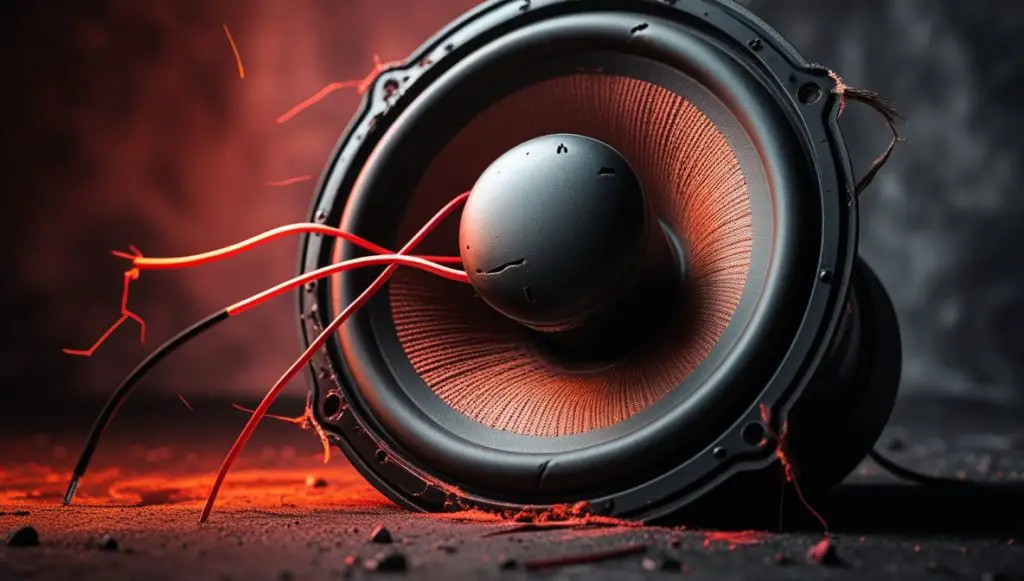
Before resorting to more technical tests, perform a visual inspection of the speaker. Look for any obvious signs of physical damage, such as tears in the speaker cone, dents in the surround, or exposed wires. Even small tears or abrasions can significantly impact the speaker’s performance. Examine the connections carefully for any loose or damaged wires.
Subsequently, pay close attention to the speaker cone itself. A damaged cone might be torn, ripped, or have a noticeable dent. Also, check the speaker’s surround (the flexible material surrounding the cone). A damaged surround can cause distortion and reduced sound quality. If you notice any physical damage, it’s highly likely the speaker is blown and needs replacement.
Testing with Different Audio Sources
To rule out problems with your audio source or amplifier, try testing the speaker with different audio devices. Connect the speaker to a different amplifier, computer, or smartphone. If the problem persists across multiple audio sources, the issue is almost certainly with the speaker itself. This helps isolate whether the problem lies with the speaker or the audio chain.
Therefore, if the speaker works perfectly fine with a different audio source, the problem lies within your original audio setup. This could be a problem with the amplifier, the audio cables, or even the audio source device itself. This elimination process is crucial for accurate diagnosis and avoids unnecessary replacement of perfectly functioning components.
Using a Multimeter for Speaker Testing
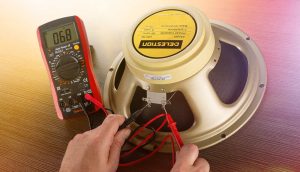
For a more technical approach, you can use a multimeter to test the speaker’s impedance and continuity. First, disconnect the speaker from the audio system. Set your multimeter to the ohms setting and measure the resistance across the speaker’s terminals. You should get a reading within the speaker’s specified impedance range (usually printed on the speaker itself). A reading of zero ohms indicates a short circuit, while an infinite reading suggests an open circuit – both signifying a blown speaker.
However, this method requires some basic understanding of electronics and the safe use of a multimeter. If you’re uncomfortable using a multimeter, it’s best to seek professional help. Remember to always disconnect the speaker from the power source before performing any tests. Incorrect usage of a multimeter can cause damage to the equipment or even personal injury.
Professional Diagnosis: When to Seek Help
If you’ve tried all the above methods and are still unsure whether your speaker is blown, or if you’re uncomfortable performing any of the tests, it’s best to seek professional help. A qualified audio technician can diagnose the problem accurately and recommend the appropriate repair or replacement. They possess the specialized tools and expertise to handle more complex issues.
In conclusion, attempting a repair yourself might lead to further damage if you lack the necessary skills. A professional can assess the extent of the damage, determine the cause, and provide an accurate cost estimate for repair or replacement. This ensures a safe and efficient solution to your speaker problem.
Identifying a blown speaker involves a combination of listening for telltale audio anomalies and visually inspecting the unit for physical damage. By systematically checking for distorted sound, reduced volume, crackling or popping noises, buzzing sounds, sound imbalance, and physical damage, you can significantly narrow down the cause of the issue. While simple tests with different audio sources can help isolate the problem, using a multimeter provides a more in-depth technical assessment. Remember, if you’re unsure about any step, consulting a professional is always the safest option to ensure the longevity of your audio equipment.
