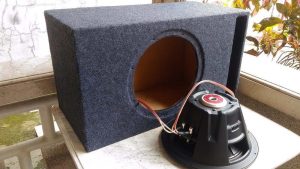
A powerful car audio system delivers an immersive experience, with deep, resonant bass that brings music to life. Achieving this level of sound quality requires a well-sealed subwoofer enclosure. Subwoofer sealant plays a critical role in ensuring airtight performance, maximizing bass output, and protecting your audio equipment. In this comprehensive guide, we explore the importance of subwoofer sealant, the best materials for the job, step-by-step application tips, and common mistakes to avoid. By the end, you’ll have the knowledge to enhance your car stereo system with a perfectly sealed subwoofer enclosure.
Contents
- Why Subwoofer Sealant Matters for Your Car Audio System
- Types of Subwoofer Sealants for Car Stereo Systems
- How to Choose the Right Subwoofer Sealant
- Step-by-Step Guide to Sealing Your Subwoofer Enclosure
- Common Mistakes to Avoid When Sealing a Subwoofer
- Benefits of a Properly Sealed Subwoofer Enclosure
- Advanced Tips for Audiophiles
- Maintaining Your Sealed Subwoofer Enclosure
- Conclusion
Why Subwoofer Sealant Matters for Your Car Audio System
A subwoofer enclosure needs to be airtight to perform at its best. Without proper sealing, air leaks can compromise sound quality, reduce bass impact, and even damage your subwoofer over time. Sealant creates a barrier that prevents air from escaping, allowing the subwoofer to move air efficiently and produce deep, accurate bass notes. This airtight environment ensures the subwoofer operates as intended, delivering the powerful low-frequency sounds that make your music thump.
Sealing also protects the subwoofer from environmental factors like dust, moisture, and vibrations caused by driving. A well-sealed enclosure minimizes rattling, reduces distortion, and extends the lifespan of your audio equipment. For car audio enthusiasts chasing premium sound, choosing the right sealant and applying it correctly can transform the listening experience.
Types of Subwoofer Sealants for Car Stereo Systems
Several sealant options exist for subwoofer enclosures, each with unique properties suited to different needs. Let’s dive into the most popular choices and their benefits.
Silicone Sealant
Silicone sealant ranks as a top choice for sealing subwoofer enclosures due to its flexibility, durability, and strong adhesive properties. It forms an airtight seal that withstands vibrations and temperature changes in a car’s interior. Silicone comes in neutral-cure and acetoxy-cure varieties. Neutral-cure silicone, which emits fewer fumes, proves safer for subwoofer components, as acetoxy-cure silicone releases acetic acid that may harm rubber surrounds or cones over time.
Apply silicone along enclosure seams or around the subwoofer mounting area for a secure seal. Allow it to cure for at least 24 hours to avoid off-gassing, which could damage the subwoofer’s rubber components.
Weatherstripping Foam
Weatherstripping foam offers a mess-free alternative to liquid sealants. This self-adhesive, closed-cell foam creates a tight seal between the subwoofer and the enclosure. It’s easy to apply, removable without residue, and ideal for those who may need to reposition or replace their subwoofer. Available at hardware stores, weatherstripping foam costs just a few dollars and works well for sealed enclosures.
Cut the foam to fit the subwoofer’s mounting surface, press it firmly in place, and secure the subwoofer with screws. This method suits DIY enthusiasts seeking simplicity and effectiveness.
Liquid Nails
Liquid Nails, a construction adhesive, provides a robust sealing solution for subwoofer enclosures. It bonds strongly to wood, MDF, and other enclosure materials, creating a durable, airtight seal. However, Liquid Nails emits strong fumes during curing, which can damage the subwoofer’s rubber surround if not fully cured before installation. Wait at least 24 hours after application to ensure safety.
Use Liquid Nails sparingly along enclosure seams or joints, as its strength makes it difficult to remove for future adjustments. This option suits permanent installations where sound quality takes priority.
Caulk Sealant
Caulk, particularly indoor/outdoor varieties with silicone, serves as a versatile sealant for subwoofer enclosures. It’s affordable, easy to apply, and creates a strong seal along enclosure seams or terminal cups. Window caulk, available at most hardware stores, works well for sealing speaker terminals and preventing air leaks.
Apply caulk with a caulking gun, smooth it with a finger or tool, and let it cure for a day. Pair caulk with a protective coating, like truck bed liner, for added durability and leak prevention.
Specialty Audio Sealants
Some audio retailers offer specialized sealants, like 3M StripCaulk or speaker sealing caulk, designed for car audio applications. These products, often adhesive-backed or moldable, create a reliable seal without the mess of liquid sealants. 3M StripCaulk, available at auto parts stores, resembles black, tar-like strips that adhere to enclosure surfaces.
Specialty sealants suit audiophiles seeking professional-grade solutions. They’re pricier but deliver consistent results for high-performance audio systems.
How to Choose the Right Subwoofer Sealant
Selecting the best sealant depends on your enclosure type, installation goals, and budget. Consider these factors to make an informed choice:
- Enclosure Material: Most subwoofer boxes use MDF or plywood. Ensure the sealant bonds well with your enclosure material. Silicone and Liquid Nails work well with MDF, while weatherstripping foam suits various surfaces.
- Curing Time: Sealants like silicone and Liquid Nails require 24 hours or more to cure fully. If you need a quick install, weatherstripping foam offers instant sealing without curing.
- Fume Safety: Avoid sealants with strong fumes, like acetoxy-cure silicone or Liquid Nails, unless you can let them cure completely before installing the subwoofer. Neutral-cure silicone or foam minimizes risks to subwoofer components.
- Ease of Removal: If you plan to upgrade or reposition your subwoofer, choose removable sealants like weatherstripping foam over permanent options like Liquid Nails.
- Budget: Weatherstripping foam and basic caulk cost $2–$10, while specialty sealants or high-quality silicone may run $15–$30. Balance cost with performance for your setup.
For sealed enclosures, prioritize airtight sealants like silicone or caulk. For ported enclosures, where air movement is intentional, focus on sealing joints and terminals to prevent unintended leaks.
Step-by-Step Guide to Sealing Your Subwoofer Enclosure
Proper application ensures your sealant performs effectively. Follow these steps to seal your subwoofer enclosure like a pro.
Step 1: Gather Your Materials
You’ll need:
- Chosen sealant (silicone, weatherstripping foam, caulk, etc.)
- Caulking gun (for silicone or caulk)
- Utility knife or scissors (for foam)
- Clean cloth and rubbing alcohol
- Screwdriver or drill
- Gloves (for handling liquid sealants)
Step 2: Prepare the Enclosure
Clean the enclosure’s interior and mounting surfaces with a cloth and rubbing alcohol to remove dust, grease, or debris. A clean surface ensures a strong bond for liquid sealants or adhesive foam. Inspect the enclosure for gaps, loose joints, or rough edges. Sand rough areas for a smooth application.
Step 3: Apply the Sealant
- For Silicone or Caulk: Load the sealant into a caulking gun. Apply a thin, even bead along enclosure seams, joints, or the subwoofer mounting area. Smooth the bead with a gloved finger or a tool for a uniform seal. For speaker terminals, apply sealant around the terminal cup to prevent leaks.
- For Weatherstripping Foam: Measure and cut the foam to fit the subwoofer’s mounting surface. Peel off the adhesive backing and press the foam firmly onto the enclosure. Ensure no gaps remain.
- For Liquid Nails: Apply a small amount along seams or joints using a caulking gun or trowel. Avoid overapplying, as excess can be difficult to clean.
- For Specialty Sealants: Follow the product’s instructions. For 3M StripCaulk, mold the strips into place along seams or mounting surfaces.
Step 4: Let the Sealant Cure
Allow liquid sealants to cure for at least 24 hours in a well-ventilated area. This prevents fumes from damaging the subwoofer’s rubber surround or cone. Weatherstripping foam and some specialty sealants require no curing time, letting you proceed immediately.
Step 5: Mount the Subwoofer
Place the subwoofer into the enclosure, ensuring it aligns with the sealant or foam. Secure it with screws, tightening evenly to avoid warping the enclosure. Check for air leaks by gently pressing the subwoofer cone; a slow return indicates a proper seal.
Step 6: Test the System
Connect the subwoofer to your car audio system and play a bass-heavy track. Listen for clean, powerful bass without rattles or distortion. If you hear air leaks or weak bass, inspect the sealant and reapply as needed.
Common Mistakes to Avoid When Sealing a Subwoofer
Even experienced DIYers can make errors when sealing a subwoofer enclosure. Steer clear of these pitfalls to ensure optimal performance:
- Using the Wrong Sealant: Acetoxy-cure silicone or uncured Liquid Nails can release fumes that degrade the subwoofer’s rubber components. Opt for neutral-cure silicone or fully cured adhesives.
- Skipping the Curing Process: Installing the subwoofer before the sealant cures risks damage from fumes and weak seals. Always wait 24–48 hours for liquid sealants to set.
- Overapplying Sealant: Excess silicone or caulk can create a messy seal, interfere with subwoofer mounting, or ooze into the enclosure. Apply thin, even beads for best results.
- Ignoring Enclosure Joints: Air leaks often occur at seams or terminal cups. Seal all joints and connections, not just the subwoofer mounting area.
- Neglecting Surface Prep: Dust or grease on the enclosure prevents sealants from adhering properly. Clean surfaces thoroughly before applying sealant.
Benefits of a Properly Sealed Subwoofer Enclosure
Investing time in sealing your subwoofer enclosure yields significant rewards for your car audio system. A well-sealed enclosure:
- Enhances Bass Quality: An airtight seal ensures accurate, powerful bass with minimal distortion, making your music sound richer and more immersive.
- Protects Equipment: Sealing prevents dust, moisture, and vibrations from damaging the subwoofer, extending its lifespan.
- Reduces Rattles: A secure seal minimizes enclosure vibrations, eliminating annoying rattles during high-volume playback.
- Improves Efficiency: An airtight enclosure allows the subwoofer to convert power into sound more effectively, maximizing output without straining your amplifier.
- Customizes Sound: Proper sealing optimizes the enclosure for your subwoofer’s specifications, delivering the tight or boomy bass you prefer, depending on the enclosure type (sealed or ported).
Advanced Tips for Audiophiles
For car audio enthusiasts seeking the ultimate sound experience, consider these pro-level tips:
- Test for Leaks with Low Frequencies: Play a 5Hz test tone at high volume to detect air leaks. Listen for whistling or shuffling sounds near seams or mounting points. Tighten screws or add sealant where needed.
- Combine Sealants for Extra Protection: Use silicone for seams and weatherstripping foam for the subwoofer mount. This dual approach ensures a robust, airtight seal.
- Upgrade Enclosure Materials: Pair your sealant with high-quality MDF or add internal bracing to reduce vibrations and improve sound clarity.
- Tune Your System: After sealing, adjust your amplifier’s crossover and gain settings to match the subwoofer’s performance. A well-tuned system maximizes the benefits of a sealed enclosure.
- Consider Specialty Products: Explore audio-specific sealants like Meniscus gasket tape or Parts Express speaker sealing caulk for professional-grade results.
Maintaining Your Sealed Subwoofer Enclosure
Regular maintenance keeps your subwoofer enclosure performing at its peak. Check the sealant every few months for cracks, wear, or loosening due to vibrations. Reapply sealant as needed to maintain an airtight seal. Inspect the subwoofer’s rubber surround for damage, as tears can mimic air leaks and degrade sound quality. Clean the enclosure’s interior periodically to remove dust or debris that could affect performance.
If you upgrade your subwoofer or amplifier, verify that the enclosure and sealant still suit the new setup. Larger subwoofers or more powerful amps may require a different enclosure volume or stronger sealing to handle increased air pressure.
Conclusion
Sealing your subwoofer enclosure transforms your car audio system, delivering powerful, distortion-free bass that elevates every drive. By choosing the right sealant—whether silicone, weatherstripping foam, Liquid Nails, caulk, or specialty products—and applying it correctly, you ensure an airtight environment that maximizes sound quality and protects your equipment. Follow the step-by-step guide, avoid common mistakes, and incorporate advanced tips to achieve professional results. With a properly sealed subwoofer enclosure, your car stereo will deliver the heart-pounding bass you crave, making every journey a musical adventure.
Explore premium car audio solutions at Auto Stereo Guide for more tips, reviews, and gear to enhance your in-car sound experience.

