As an Amazon Influencer, we earn from qualifying purchases you might make if you click any of the links or buttons on this page at no expense to you.
Installing a backup camera system in your vehicle has become increasingly important for safety and convenience. If you’ve purchased an Insight backup camera, you’re taking a smart step toward improving your driving experience and reducing the risk of accidents while reversing. This comprehensive guide will walk you through how to connect insight backup camera systems, covering everything from preparation to troubleshooting common issues.
Contents
Understanding Your Insight Backup Camera System
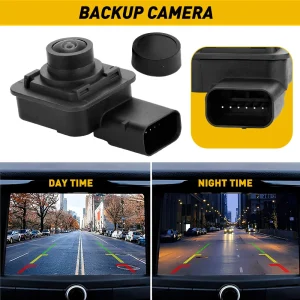
Before diving into the installation process, it’s essential to understand what components make up your Insight reverse camera system. Most Insight backup camera kits include the camera unit itself, a display monitor, connecting cables, and mounting hardware. Some models feature wireless connectivity, while others require hardwired connections.
The camera typically mounts on the rear of your vehicle, often above the license plate or integrated into the tailgate. The display monitor can be installed on your dashboard, integrated into your existing infotainment system, or replace your rearview mirror. Understanding these components will help you plan your installation approach and gather the necessary tools.
When learning how to connect insight backup camera systems, it’s crucial to identify whether you have a wired model or wireless model. Wireless systems offer easier installation but may experience interference issues, while wired systems provide more reliable connections but require more extensive installation work.
Essential Tools and Preparation
Successful backup camera installation requires proper preparation and the right tools. Before beginning your Insight camera setup, gather these essential items: a drill with various bit sizes, wire strippers, electrical tape, zip ties, a multimeter for testing connections, and basic hand tools like screwdrivers and pliers.
Safety should be your top priority during installation. Disconnect your vehicle’s battery before working with any electrical connections to prevent short circuits or damage to your car’s electrical system. Additionally, ensure you have adequate lighting in your workspace and consider having a helper assist with routing cables through tight spaces.
Review your vehicle’s manual to identify the best locations for camera mounting and wire routing. Some vehicles have pre-existing holes or channels that make installation easier, while others may require drilling new holes. Planning your wire routes in advance will save time and ensure a cleaner installation.
Step-by-Step Installation Process
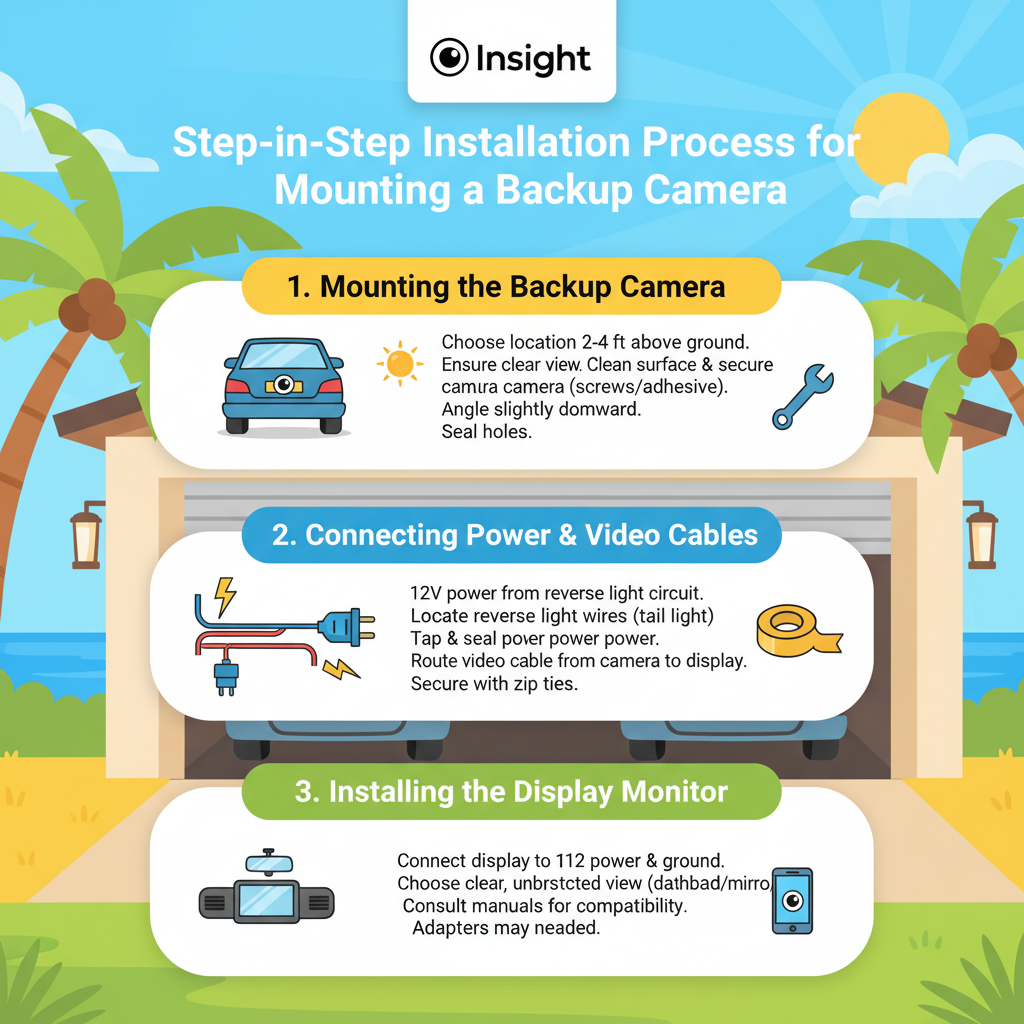
Mounting the Backup Camera
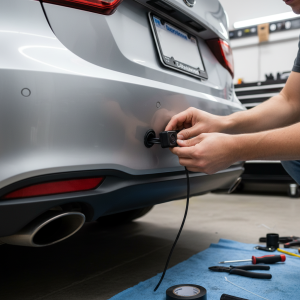
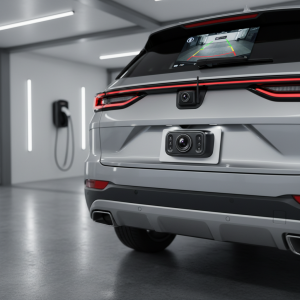
The first step in connecting your Insight backup camera involves choosing the optimal mounting location. The camera should provide a clear view of the area behind your vehicle without obstructions from the spare tire, trailer hitch, or other accessories. Most installations work best when the camera is mounted 2-4 feet above ground level.
Clean the mounting surface thoroughly and mark the drilling points if your camera requires screws. Some Insight models come with adhesive mounting options, which work well on smooth, clean surfaces. Ensure the camera is level and properly angled – typically pointing slightly downward to capture the ground immediately behind your vehicle.
When mounting on a license plate area, you may need to relocate your license plate light or integrate the camera with existing lighting. Take care to seal any new holes with appropriate weatherproofing materials to prevent water damage and corrosion.
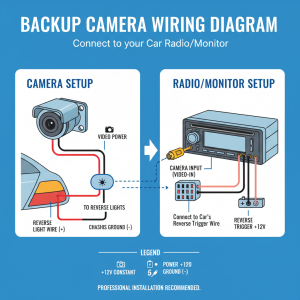
Connecting Power and Video Cables
Understanding how to connect insight backup camera wiring is crucial for proper functionality. Most backup cameras require a 12-volt power connection that activates when you shift into reverse. This connection typically taps into your reverse light circuit, ensuring the camera only operates when needed.
Locate your vehicle’s reverse light wires, usually found near the tail light assembly. Use a multimeter to identify which wire carries 12 volts when the transmission is in reverse. Strip a small section of this wire and connect your camera’s power wire using a proper splice connector or solder joint, then seal the connection with electrical tape.
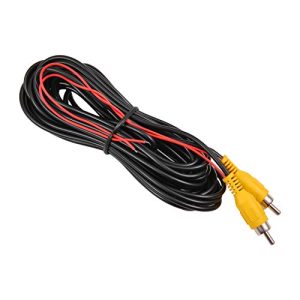
Route the video cable from the camera to your display location, following existing wire harnesses when possible. Avoid areas where the cable might be pinched or damaged by moving parts. Use zip ties to secure the cable every 12-18 inches, ensuring it won’t interfere with vehicle operation.
Installing the Display Monitor
The display installation varies depending on your Insight backup camera model. Dashboard-mounted monitors typically require a 12-volt power connection and ground, which you can often tap from existing accessory circuits. Choose a location that provides clear visibility without obstructing your view of the road or interfering with vehicle controls.
For rearview mirror replacement displays, you’ll need to remove your existing mirror and connect the new unit to your vehicle’s power system. These installations often provide the cleanest appearance but may require more complex wiring.
If integrating with an existing infotainment system, you may need additional adapters or interfaces. Consult your vehicle’s manual and the Insight camera documentation to ensure compatibility and proper connection procedures.
Wireless vs. Wired Connection Options
When considering how to connect insight backup camera systems, you’ll encounter both wireless and wired options, each with distinct advantages and considerations. Wireless systems simplify installation by eliminating the need to route video cables through your vehicle, making them ideal for DIY installations or temporary setups.
Wireless Insight backup cameras transmit video signals using radio frequencies, typically in the 2.4GHz range. These systems require power connections at both the camera and display locations but eliminate the video cable routing challenge. However, wireless systems may experience interference from other electronic devices or physical obstructions.
Wired systems provide more reliable video transmission and aren’t susceptible to wireless interference. The direct cable connection ensures consistent signal quality and eliminates potential lag issues. However, wired installations require more time and effort to route cables properly through your vehicle’s interior and exterior panels.
Troubleshooting Common Connection Issues
Even with careful installation, you may encounter issues when learning how to connect insight backup camera systems. Poor video quality often results from loose connections, inadequate power supply, or interference from other electronic devices. Check all connections for tightness and proper contact, ensuring power and ground connections are secure.
If your camera isn’t activating when shifting into reverse, verify your reverse light connection. Use a multimeter to confirm 12 volts reaches the camera when the transmission is in reverse. Sometimes, LED reverse lights don’t provide sufficient power for camera operation, requiring a separate power source with relay activation.
Display issues like flickering, distortion, or complete signal loss typically indicate video cable problems. Inspect the video cable for damage, particularly at connection points and areas where it passes through metal panels. Ensure the cable hasn’t been pinched or stretched during installation.
For wireless systems experiencing connectivity problems, check for interference sources like WiFi routers, cell phones, or other wireless devices. Relocating the camera or display units slightly may improve signal reception. Also, verify that both units are properly paired according to the manufacturer’s instructions.
Optimizing Your Backup Camera Performance
Once you’ve successfully connected your Insight backup camera, several adjustments can optimize its performance. Camera angle adjustment is crucial for maximum effectiveness – the camera should capture the ground immediately behind your vehicle while providing adequate coverage of the surrounding area.
Many Insight backup cameras feature adjustable settings for brightness, contrast, and color saturation. Adjust these settings based on your typical driving conditions and personal preferences. Some models include night vision capabilities that may require separate adjustment for optimal low-light performance.
Consider adding guidelines or grid lines to your display if your system supports this feature. These visual aids help judge distances and improve parking accuracy. Some systems allow you to customize guideline positions based on your vehicle’s dimensions and typical backing scenarios.
Regular maintenance ensures continued reliable operation. Clean the camera lens periodically to remove dirt, water spots, and debris that can affect image quality. Check connections annually for corrosion or looseness, particularly in areas exposed to weather or road salt.
Conclusion
Learning how to connect insight backup camera systems successfully requires careful planning, proper tools, and attention to detail. Whether you choose a wireless or wired system, following the step-by-step installation process and understanding the key connection points will help ensure reliable operation and improved driving safety.
Remember that backup camera installation involves working with your vehicle’s electrical system, so take appropriate safety precautions and don’t hesitate to consult professional installers if you’re uncomfortable with any aspect of the process. A properly installed Insight backup camera will provide years of reliable service, enhancing your vehicle’s safety features and giving you confidence when reversing in tight spaces or challenging conditions.
With your new backup camera system properly connected and optimized, you’ll enjoy improved visibility, reduced accident risk, and greater confidence in your daily driving activities. The investment in time and effort to properly install your Insight backup camera will pay dividends in safety and convenience for years to come.