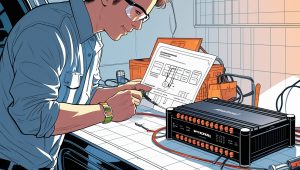
Are you tired of taking your hands off the steering wheel to adjust your car’s stereo system? A steering wheel control interface lets you maintain control of your audio system without compromising driving safety. This guide walks you through the entire installation process, helping you upgrade your driving experience with minimal hassle.
Contents
- What Is a Steering Wheel Control Interface?
- Why Install a Steering Wheel Control Interface?
- Tools and Materials You’ll Need
- Choosing the Right Steering Wheel Control Interface
- Step-by-Step Installation Guide
- Advanced Features and Customization
- Compatibility Considerations
- Cost Considerations
- Professional vs. DIY Installation
- Conclusion
What Is a Steering Wheel Control Interface?
A steering wheel control interface (SWC interface) connects your vehicle’s factory steering wheel controls to an aftermarket car stereo. This small device translates signals from your steering wheel buttons into commands your new head unit can understand. With a proper installation, you’ll retain the convenience of adjusting volume, changing tracks, or answering calls right from your steering wheel.
Why Install a Steering Wheel Control Interface?
Before diving into the installation process, let’s explore the benefits:
- Enhanced Safety: Keep your hands on the wheel and eyes on the road
- Convenience: Easily control your audio system without reaching for the dashboard
- Value Preservation: Maintain your vehicle’s factory features when upgrading the stereo
- Clean Installation: No unsightly buttons or add-ons cluttering your dashboard
- Customizable Functions: Many interfaces allow you to program buttons for different commands
Tools and Materials You’ll Need
Gather these items before starting your installation:
- Steering wheel control interface module (brand specific to your needs)
- Vehicle-specific wiring harness
- Wire strippers and crimpers
- Electrical tape or heat shrink tubing
- Small screwdrivers (Phillips and flathead)
- Multimeter (for testing connections)
- Wire connectors or butt connectors
- Zip ties for cable management
- Owner’s manuals for both your vehicle and aftermarket stereo
Choosing the Right Steering Wheel Control Interface
Not all SWC interfaces work with every vehicle and stereo combination. The three main brands dominating the market are:
- Axxess: Compatible with a wide range of vehicles and aftermarket stereos
- PAC: Known for reliability and excellent customer support
- iDatalink Maestro: Features advanced integration with digital displays and vehicle diagnostics
Research which interface works with your specific vehicle make, model, year, and aftermarket stereo brand. Many manufacturers offer online compatibility tools to help you find the perfect match.
Step-by-Step Installation Guide
Step 1: Preparation and Safety First
Start by disconnecting your vehicle’s battery. This safety measure prevents electrical shorts during installation. Simply:
- Open the hood
- Locate the battery
- Disconnect the negative (black) terminal
- Wait about 10 minutes for any residual power to dissipate
Step 2: Remove the Factory Stereo
Access your factory stereo by:
- Removing trim panels surrounding the stereo (use plastic trim tools to avoid scratches)
- Removing any screws securing the radio
- Carefully pulling the stereo out from the dashboard
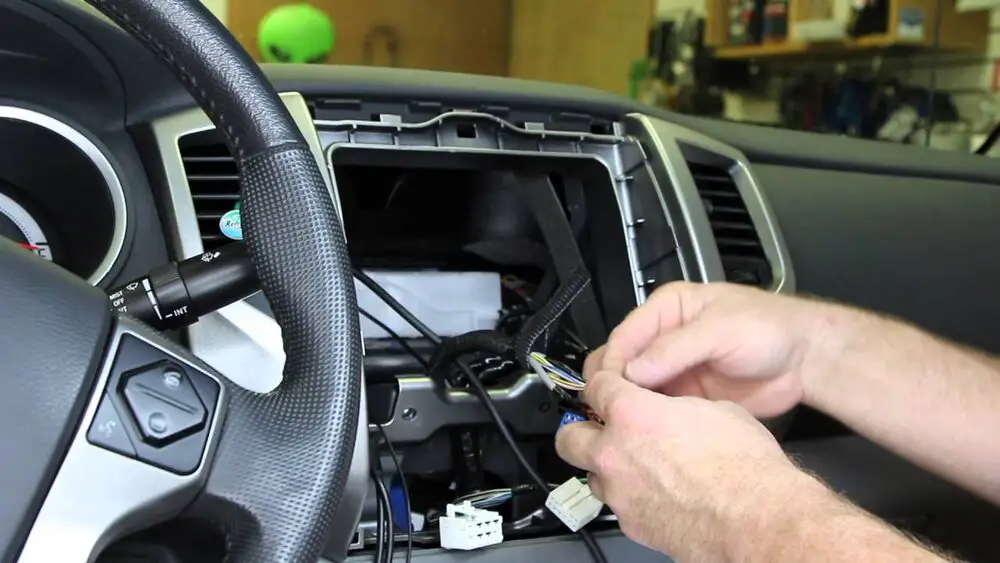
- Disconnecting all wiring harnesses and antennas
Keep all screws and parts organized for reinstallation later.
Step 3: Identify the Wiring
Now you’ll need to identify several key wires:
- Factory radio harness: The main connector that powered your original stereo
- Steering wheel control wires: Usually found within the factory harness (often a 3.5mm jack or dedicated wires)
- Aftermarket stereo harness: The connector that came with your new stereo
Consult your vehicle’s wiring diagram to locate the correct steering wheel control wires. They’re typically labeled as “SWC” or “Remote.” Colors vary by manufacturer but are often white/brown, brown/white, or green.
Step 4: Connect the Interface Module
Follow these steps to connect your SWC interface:
- Connect the vehicle-specific harness to your factory wiring
- Connect the aftermarket radio harness to your new stereo
- Connect the SWC interface between these harnesses according to the manufacturer’s instructions
- Connect the dedicated SWC wire(s) to the appropriate input on the interface module
Most modern interfaces use a simple “plug-and-play” design, but some may require wire splicing. If splicing is necessary:
- Strip about 1/2 inch of insulation from each wire
- Twist the exposed wires together
- Secure with a wire connector
- Insulate with electrical tape or heat shrink tubing
Step 5: Program the Interface
Different brands have different programming methods:
Axxess ASWC-1:
- Connect everything according to instructions
- Turn on the ignition (don’t start the engine)
- The LED will flash as it auto-detects your vehicle
- When the LED turns solid, programming is complete
PAC SWI-RC:
- Connect the module
- Press and hold the programming button
- Turn the ignition on
- Release the button when the LED lights up
- Follow the manual’s instructions to program each button
iDatalink Maestro:
- Download the Maestro software to your computer
- Connect the module via USB
- Configure settings for your specific vehicle and stereo
- Flash the updated firmware to the module
- Complete installation according to the on-screen instructions
Step 6: Test and Troubleshoot
Before finalizing the installation:
- Reconnect the vehicle’s battery
- Turn on the ignition
- Test each steering wheel button to verify proper operation
- Make any necessary adjustments to the programming
Common issues and solutions:
- No response from buttons: Check wire connections and make sure the interface is properly grounded
- Incorrect button functions: Reprogram the interface following manufacturer instructions
- Intermittent operation: Look for loose connections or interference from other electronics
Step 7: Finalize the Installation
Once everything works correctly:
- Secure all wires with zip ties to prevent rattling
- Wrap any exposed connections with electrical tape
- Mount the interface module securely behind the dashboard
- Reinstall the stereo, securing with factory screws
- Replace all trim panels and ensure everything fits properly
Advanced Features and Customization
Many steering wheel control interfaces offer advanced customization options:
Button Mapping: Reassign functions to different buttons based on your preferences. For example, you might want the “Source” button to activate voice commands instead.
Dual-Function Buttons: Program buttons to perform different actions based on short or long presses. A short press might change tracks while a long press changes input sources.
Vehicle Information Display: Some high-end interfaces like the iDatalink Maestro can display vehicle information like performance data, climate control status, or door status on compatible stereos.
Retention of Factory Features: Advanced interfaces can retain features like OnStar, factory amplifiers, or parking sensor displays that might otherwise be lost when installing an aftermarket stereo.
Compatibility Considerations
Before purchasing, verify compatibility between:
Vehicle Make and Model: Different vehicles use different communication protocols for steering wheel controls.
Aftermarket Stereo Brand: Each manufacturer uses different connections for SWC inputs. Common brands include:
- Pioneer (typically uses a 3.5mm jack)
- Kenwood (usually a blue/yellow wire)
- Sony (often uses a 3.5mm jack)
- Alpine (commonly uses a brown/white wire)
- JVC (typically uses a 3.5mm jack)
Factory Options: Vehicles with advanced factory systems like Bose audio, navigation, or rear-seat entertainment may require special interfaces.
Cost Considerations
The total cost of installing a steering wheel control interface varies based on several factors:
- Basic interfaces start around $40-60
- Advanced interfaces like iDatalink Maestro range from $100-200
- Vehicle-specific harnesses typically cost $15-30
- Professional installation adds $50-100 if you’re not comfortable doing it yourself
When budgeting, consider the interface as an investment in safety and convenience that enhances your driving experience daily.
Professional vs. DIY Installation
DIY Installation Pros:
- Save money on labor costs
- Learn about your vehicle’s electrical system
- Customize exactly to your preferences
DIY Installation Cons:
- Risk of electrical problems if done incorrectly
- Time-consuming, especially for beginners
- May void warranties if mistakes damage components
Professional Installation Pros:
- Guaranteed functionality
- Often includes warranty on labor
- Saves time and frustration
Professional Installation Cons:
- Additional cost
- Possible wait times for appointment scheduling
- Less control over customization details
Conclusion
Installing a steering wheel control interface bridges the gap between your vehicle’s factory convenience features and your upgraded audio system. While the process requires attention to detail, the result is worth the effort – seamless control of your entertainment system without taking your hands off the wheel.
By following this guide, you can successfully install a steering wheel control interface and enjoy the best of both worlds: upgraded audio performance with factory convenience. Remember to research thoroughly, purchase compatible components, and take your time during installation to ensure everything works perfectly.
Whether you’re streaming music, navigating with GPS, or taking hands-free calls, your steering wheel controls will keep these functions right at your fingertips – exactly where they belong for safe and enjoyable driving.
