Want to crank up the bass and experience earth-shattering sound from your car audio system? Bridging your 4-channel amplifier is the key! This beginner’s guide will walk you through the process step-by-step, ensuring you achieve powerful mono sound without blowing your speakers or damaging your amp. Don’t worry if you’re new to car audio – we’ll cover everything you need to know. Let’s get started!
Contents
- Understanding Your 4-Channel Amp
- Identifying Speaker Wire Connections
- The Basics of Bridging Amplifiers
- Wiring for Bridged Mono Output
- Positive & Negative Terminal Pairing
- Adjusting Gain & Impedance Matching
- Power Handling and Safety Precautions
- Testing Your Bridged Amplifier
- Troubleshooting Common Bridging Issues
- Enjoying Your Powerful Mono Sound
Understanding Your 4-Channel Amp
First things first: let’s get familiar with your amplifier. A 4-channel amp, as the name suggests, typically has four channels, each capable of powering a single speaker. However, many 4-channel amps offer a bridging option, allowing you to combine two channels into a single, more powerful channel. This creates a higher-wattage mono output, perfect for powering a subwoofer or other high-power speaker. Check your amplifier’s manual; it should clearly state whether bridging is supported and provide specific instructions. Look for labels indicating “bridge mode,” “bridged mono,” or similar terms.
Furthermore, understanding the power specifications of your amp is crucial. Note the power output per channel and the total power output when bridged. This information will help you choose the correct speakers and ensure you don’t exceed the amp’s capabilities. Pay close attention to the impedance ratings (measured in ohms) as this directly impacts power output and stability. Mismatching impedance can lead to overheating and damage.
Identifying Speaker Wire Connections
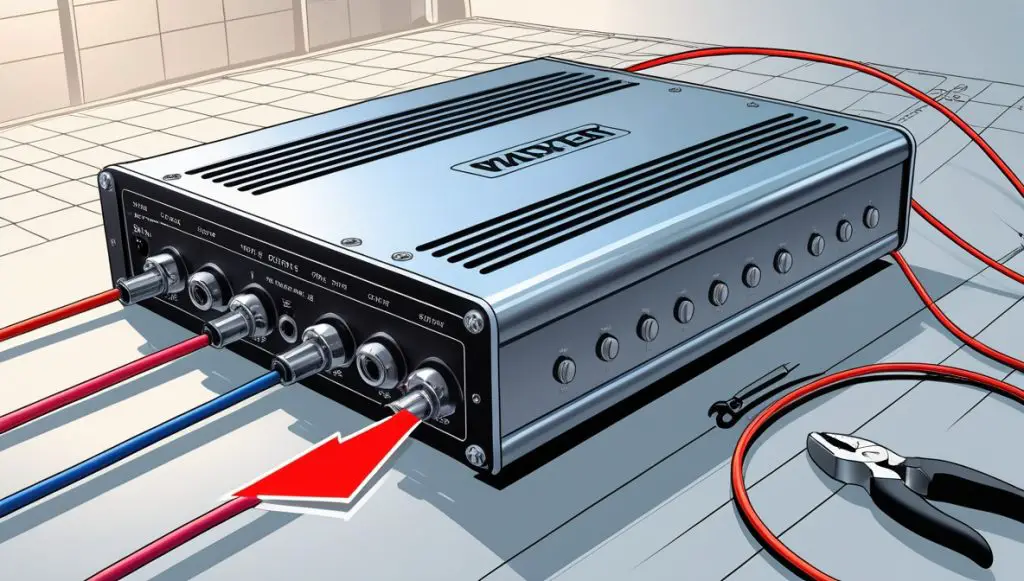
Before you start bridging, carefully examine your amplifier’s terminal connections. You’ll typically find sets of positive (+) and negative (-) terminals for each channel. These terminals are usually labeled clearly, often with numbers (like Channel 1, Channel 2, etc.). Some amps might use color-coded terminals, while others use a combination of labels and colors. Take your time to identify each terminal correctly; incorrect wiring can lead to serious damage. It’s a good idea to take a picture of your connections before you begin, just in case you need a reference later.
Moreover, locate the speaker wire outputs. These are where you’ll connect your speaker wires to send the amplified audio signal to your speakers. Make sure you have the correct gauge speaker wire for your system’s power handling capabilities. Using too thin a wire can lead to excessive resistance and heat buildup, while too thick a wire might be difficult to manage. Always use high-quality speaker wire to ensure optimal signal transmission and longevity.
The Basics of Bridging Amplifiers
Bridging an amplifier essentially combines two channels to create a single, more powerful channel. Instead of sending separate signals to two speakers, you’re sending a doubled signal to one speaker. This results in significantly increased power output, ideal for subwoofers that require high wattage. However, bridging changes the impedance requirements. What was once a 4-ohm load per channel might become an 8-ohm or even a 4-ohm load in bridged mode, depending on your amp’s specifications. Always consult your amplifier’s manual for the correct impedance settings when bridging.
Consequently, bridging isn’t simply connecting two channels together. It involves specific wiring configurations that ensure the signals are combined correctly and the amplifier operates within its safe operating parameters. Improper bridging can damage your amplifier and speakers. Therefore, carefully following the instructions in your amplifier’s manual or a reliable guide like this one is essential.
Wiring for Bridged Mono Output
Now comes the actual wiring. To bridge your 4-channel amp, you’ll typically use two channels. Let’s say you’re using channels 1 and 2. You’ll connect the positive (+) terminal of your subwoofer to the positive (+) output of channel 1. Simultaneously, you’ll connect the negative (-) terminal of your subwoofer to the negative (-) output of channel 2. This creates a “bridge” between the two channels. Your amp’s manual will provide the exact bridging instructions, including which channels to use and how to connect the wires.
In addition, ensure all connections are secure and well-insulated. Loose connections can lead to signal loss, poor sound quality, and even short circuits. Use appropriate crimp connectors or solder your connections for a robust and reliable connection. Never leave bare wires exposed, as this poses a significant risk of short circuits and potential damage. Always double-check your wiring before turning on the system.
Positive & Negative Terminal Pairing
Accurate pairing of positive and negative terminals is absolutely critical when bridging. Incorrect pairing will result in a short circuit, potentially damaging your amplifier and other components. Always double-check your connections before powering on the system. Remember, the positive (+) terminal of your subwoofer connects to the positive (+) output of one channel, and the negative (-) terminal of your subwoofer connects to the negative (-) output of the other channel. This creates the necessary polarity for the bridged mono output.
Furthermore, pay attention to the color-coding of your wires. Most speaker wires use a consistent color code (typically red for positive and black for negative), but double-checking is always a good idea. If your amplifier uses color-coded terminals, make sure the colors match the corresponding terminals on your subwoofer. Taking your time and carefully verifying each connection will prevent potential problems down the road.
Adjusting Gain & Impedance Matching
Once you’ve wired your amplifier, you need to adjust the gain and ensure impedance matching. The gain control adjusts the input sensitivity of the amplifier. Start with the gain controls turned all the way down. Then, slowly increase the gain while playing music at a moderate volume. Listen for any distortion or clipping. If you hear distortion, reduce the gain slightly. The goal is to find the optimal gain setting that provides clear, undistorted sound at your desired volume level.
In the same vein, impedance matching is crucial for preventing damage to your amplifier and speakers. Your amplifier’s manual will specify the impedance requirements for bridged mode. Make sure the impedance of your subwoofer matches the amplifier’s specifications. Using a subwoofer with an impedance that’s too low can overload the amplifier, leading to overheating and potential damage. Using an impedance that’s too high will reduce the power output.
Power Handling and Safety Precautions
Before you power up your system, it’s essential to understand power handling capabilities. Ensure your subwoofer’s power handling capacity is compatible with your amplifier’s bridged output. Overpowering a subwoofer can easily damage the voice coil and other components. Always check the specifications of both your amplifier and subwoofer to ensure they are a good match. Never exceed the amplifier’s maximum power output, even in bridged mode.
Similarly, safety should always be your top priority. Work in a well-ventilated area to prevent overheating. Never touch bare wires or components while the system is powered on. If you’re unsure about any aspect of the process, seek help from a qualified car audio professional. Improper wiring or mismatched components can lead to serious damage or even injury.
Testing Your Bridged Amplifier
After completing the wiring and making the necessary adjustments, it’s time to test your bridged amplifier. Start by playing music at a low volume. Gradually increase the volume and listen carefully for any distortion or unusual noises. If you hear any distortion or clipping, reduce the gain. If you hear crackling or popping sounds, double-check your wiring for loose connections or short circuits.
Subsequently, monitor the temperature of your amplifier. If the amplifier gets excessively hot, it could indicate a problem with the wiring, impedance mismatch, or an overloaded amplifier. If you notice excessive heat, turn off the system immediately and troubleshoot the issue before continuing. It’s always a good idea to have a multimeter handy to check voltages and current draw if you suspect a problem.
Troubleshooting Common Bridging Issues
Even with careful wiring, you might encounter some issues. One common problem is distortion. This often indicates a gain setting that’s too high or an impedance mismatch. Try reducing the gain or double-checking your subwoofer’s impedance. Another common issue is a lack of sound. This could be due to a blown fuse, a faulty connection, or a problem with the amplifier itself. Check your fuses and wiring carefully.
In addition, overheating is a serious concern. If your amplifier is overheating, it’s likely due to an impedance mismatch, an overloaded amplifier, or poor ventilation. Ensure your subwoofer’s impedance matches your amplifier’s specifications, and make sure the amplifier has adequate ventilation. If the problem persists, consult a car audio professional.
Enjoying Your Powerful Mono Sound
Congratulations! You’ve successfully bridged your 4-channel amplifier. Now you can enjoy the powerful, deep bass of your subwoofer. Remember to listen at a safe volume to protect your hearing and your equipment. Enjoy the improved sound quality and the increased power output. With proper care and maintenance, your bridged amplifier will provide years of enjoyable listening. Experiment with different settings to find the perfect sound for your preferences.
Finally, remember that this is a complex process. If at any point you feel uncomfortable or unsure, it’s always best to consult a professional. Improper wiring can cause serious damage to your equipment and even pose a safety risk. Safety first! Enjoy the rumble!
Bridging your 4-channel amplifier can significantly enhance your car audio experience, delivering powerful and impactful bass. By carefully following these steps and prioritizing safety, you can enjoy the rewards of